
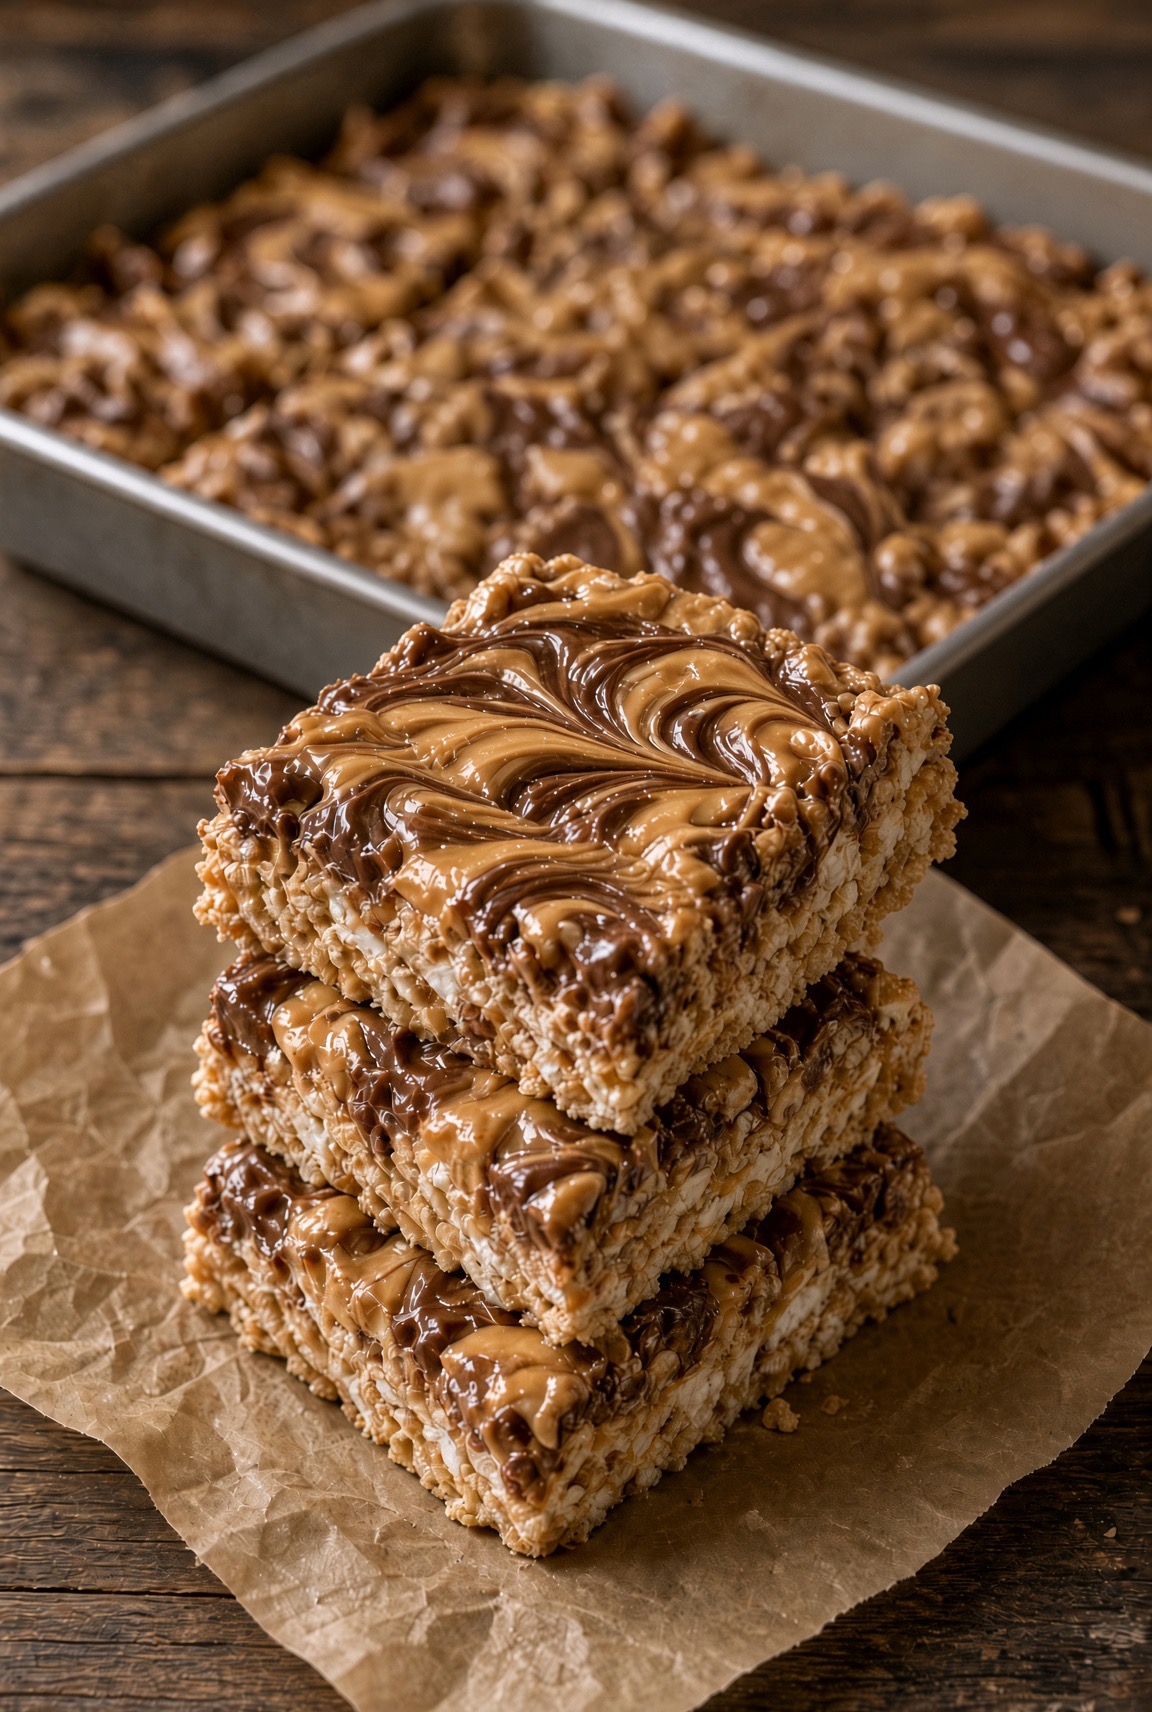
Why This Recipe Is an Absolute Keeper
Before we dive into the method, here’s why these Twisted Scotcheroos will become a staple in your kitchen:
-
No-bake. No oven required—just a stovetop and a microwave.
-
Quick and easy. Ready in about 15 minutes, plus chilling time.
-
Just 8 ingredients. Simple, affordable pantry staples.
-
Gooey and chewy. The marshmallows make them extra soft and irresistible.
-
Beautiful marbled topping. Looks impressive with minimal effort.
-
Crowd-pleasing. Kids and adults alike devour these.
-
Perfect for any occasion. Bake sales, potlucks, holidays, or Tuesday nights.
-
Make-ahead friendly. Store in the fridge or freezer for later.
-
Customizable. Swap the cereal, change the chips, add mix-ins.
-
Nostalgic and comforting. Tastes like childhood in every bite.
The Ingredients
This recipe uses simple, wholesome ingredients that come together beautifully.
-
¼ cup butter – Salted or unsalted both work. Salted adds a nice contrast to the sweet.
-
10 ounces mini marshmallows (about 5 cups) – Fresh marshmallows melt smoothest. Stale ones can be sticky and difficult to work with.
-
½ cup peanut butter – Creamy peanut butter is classic, but crunchy adds nice texture. Avoid natural peanut butter that separates—it can make the bars oily.
-
6 cups rice cereal (such as Rice Krispies) – The classic crispy rice cereal. Don’t substitute puffed rice—it won’t hold up.
-
1 cup semisweet chocolate chips – Semi-sweet balances the sweetness. Dark chocolate works too for a less sweet version.
-
½ cup butterscotch chips – The signature Scotcheroo flavor. Don’t skip these!
-
2 teaspoons coconut oil, divided – Helps the chocolate and butterscotch melt smoothly and set beautifully. Vegetable oil or shortening work too.
Step-by-Step Instructions
Step 1: Prep Your Pan
Lightly grease a 9×13-inch baking dish with butter or nonstick cooking spray. Set aside. This ensures the bars release cleanly and make slicing easy.
Step 2: Melt the Butter
In a large saucepan over low heat, melt the butter. Keep the heat low—you don’t want the butter to brown or burn. Just melt it gently until it’s liquid and golden.
Step 3: Add the Marshmallows and Peanut Butter
When the butter is melted, add the mini marshmallows and peanut butter together, stirring until smooth and fully combined. The marshmallows will melt into the butter and peanut butter, creating a gooey, glossy mixture. This takes about 3-5 minutes over low heat. Stir constantly so nothing sticks or scorches.
Pro Tip: Keep the heat low! High heat will make the marshmallows tough and stringy instead of smooth and creamy.
Step 4: Add the Rice Cereal
Remove the saucepan from the heat and stir in the Rice Krispies until everything is evenly coated. Work quickly—the mixture starts to set as it cools. Make sure every piece of cereal gets coated in that gooey peanut butter-marshmallow mixture.
Step 5: Press into the Pan
Press the mixture into the greased baking dish. Use a spatula or your hands to press it into an even layer. For the best results, lightly spray your hands or spatula with nonstick spray so the mixture doesn’t stick. Press firmly but gently—you want a compact, even layer without crushing the cereal.
Pro Tip: Don’t press too hard! Over-compressing makes the bars dense and tough. A gentle, even press is all you need.
Step 6: Melt the Chocolate
In a microwave-safe bowl, combine the semisweet chocolate chips with 1 teaspoon coconut oil. Microwave in short bursts of 20-30 seconds, stirring between each, until smooth and glossy. This usually takes about 1-2 minutes total. Be careful not to overheat—chocolate can seize and become grainy if it gets too hot.
Step 7: Pour the Chocolate
Pour the melted chocolate over the bars and smooth it into an even layer using a spatula or the back of a spoon. Make sure it covers the entire surface, reaching the edges.
Step 8: Melt the Butterscotch
In a second microwave-safe bowl, melt the butterscotch chips with the remaining 1 teaspoon coconut oil the same way—short bursts, stirring between each, until smooth.
Step 9: Swirl the Topping
Drizzle the melted butterscotch over the chocolate in thin zigzags or swirls. Use a toothpick or chopstick to swirl the two together into a marbled pattern. Don’t overdo it—just enough to swirl, not mix! You want distinct ribbons of chocolate and butterscotch, not a muddy blend.
Pro Tip: Work quickly here. The chocolate and butterscotch start to set fast. A few quick swirls are all you need for a beautiful marble effect.
Step 10: Chill and Slice
Let the topping cool in the fridge for an hour or so until set completely before slicing into squares. Use a sharp knife to cut clean, even squares. For the cleanest cuts, dip your knife in hot water and wipe it dry between each slice.
Step 11: Enjoy!
Serve and enjoy! These bars are delicious cold, at room temperature, or even slightly chilled. Store leftovers in an airtight container in the fridge.
How to Serve It Like a Pro
These bars are delicious on their own, but a few simple touches make them even better:
-
At room temperature – The chocolate softens slightly, making them extra gooey.
-
Chilled – The topping stays crisp and the bars are perfectly chewy.
-
With a glass of cold milk – Classic pairing.
-
With coffee – The bitterness balances the sweetness.
-
With a sprinkle of flaky sea salt – Adds a sophisticated sweet-salty contrast.
-
On a dessert platter – Arrange with other no-bake treats for a beautiful spread.
-
In lunchboxes – Wrap individually for easy grab-and-go treats.
-
At bake sales – These always sell out first.
-
For holidays – Add festive sprinkles on top before the chocolate sets.
-
As a gift – Stack in a pretty tin with parchment between layers.
Variations & Swaps (Because Life Happens)
One of the best things about this recipe is how flexible it is. Here are some easy ways to make it your own:
Make It with Different Cereal
-
Cornflakes – For a crunchier texture.
-
Cheerios – For a heartier, oat-y flavor.
-
Puffed wheat – For a lighter, airier bar.
-
Cocoa Krispies – For double chocolate flavor.
-
Special K – For a slightly healthier twist.
Make It with Different Nut Butters
-
Almond butter – For a sophisticated twist.
-
Cashew butter – Creamy and mild.
-
Sunflower seed butter – For a nut-free version.
-
Crunchy peanut butter – For added texture.
Make It with Different Toppings
-
Dark chocolate – Less sweet, more intense.
-
Milk chocolate – Sweeter and creamier.
-
White chocolate – For a beautiful contrast.
-
Peanut butter chips – Instead of butterscotch.
-
Caramel chips – For a gooey caramel twist.
Make It with Add-Ins
-
Mini chocolate chips – Folded into the cereal mixture.
-
Chopped nuts – Peanuts, pecans, or walnuts for crunch.
-
Dried fruit – Raisins or cranberries for chewiness.
-
Pretzels – Crushed for a sweet-salty crunch.
-
Toffee bits – For buttery, crunchy sweetness.
-
Sprinkles – For a festive touch.
Make It with Different Shapes
-
Bars – The classic.
-
Bites – Roll into balls for bite-sized treats.
-
Nests – Press into muffin tins for individual servings.
-
Pops – Insert sticks for Scotcheroo pops.
Pro Tips for the Best Twisted Scotcheroos
-
Use fresh marshmallows. Stale marshmallows don’t melt smoothly.
-
Keep the heat low. High heat makes marshmallows tough and stringy.
-
Work quickly. The mixture sets fast once the cereal is added.
-
Grease your hands. Nonstick spray makes pressing the mixture easy.
-
Don’t overpress. A gentle press keeps the bars light and chewy.
-
Melt chocolate gently. Short bursts in the microwave prevent seizing.
-
Add coconut oil. It helps the chocolate melt smoothly and set beautifully.
-
Swirl, don’t mix. A few quick swirls create a beautiful marble effect.
-
Chill completely. This ensures clean, even slices.
-
Use a hot knife. Dip your knife in hot water and wipe dry between cuts for clean slices.
Frequently Asked Questions
Can I use large marshmallows instead of mini?
Yes. Use about 40 large marshmallows in place of the mini ones. They’ll take slightly longer to melt.
Can I use a different cereal?
Yes. Cornflakes, Cheerios, or puffed wheat all work beautifully.
Can I use natural peanut butter?
Natural peanut butter that separates can make the bars oily. Stir it well before using, or use conventional peanut butter for best results.
Can I make these without peanut butter?
Yes. Use almond butter, cashew butter, or sunflower seed butter for a nut-free version.
Can I make these dairy-free?
Yes. Use dairy-free butter and dairy-free chocolate and butterscotch chips.
Can I make these gluten-free?
Yes. Use gluten-free rice cereal and gluten-free chocolate and butterscotch chips.
How long do these bars last?
Store in an airtight container in the refrigerator for up to 5 days, or at room temperature for up to 3 days.
Can I freeze these bars?
Yes! Wrap individual bars tightly in plastic wrap, then store in a freezer bag for up to 3 months. Thaw at room temperature before serving.
Why are my bars too sticky?
You may have used too much butter or not enough cereal. Add a little more cereal if the mixture seems too wet.
Why is my chocolate topping grainy?
The chocolate seized, likely from overheating or getting water in it. Use short microwave bursts and dry utensils.
Can I double the recipe?
Yes. Use a larger saucepan and a 9×13-inch pan for a thicker bar, or two 9×13 pans for thinner bars.
Can I add salt on top?
Absolutely! A sprinkle of flaky sea salt on the melted chocolate before it sets adds a delicious sweet-salty contrast.
Storage & Reheating
Refrigerator
-
Store in an airtight container for up to 5 days. The bars are delicious cold or at room temperature.
Freezer
-
Wrap individual bars tightly in plastic wrap, then store in a freezer bag for up to 3 months. Thaw at room temperature before serving.
Make-Ahead Tips
-
These bars are perfect for making ahead. Prepare them up to 3 days in advance and store in the fridge.
-
For longer storage, freeze and thaw as needed.
The Beauty of Simple, Nostalgic Treats
There’s something deeply satisfying about a recipe that delivers big flavor with minimal effort. These Twisted Scotcheroos are the kind of treat that makes people happy—the kind that brings back childhood memories and creates new ones.
They’re not fancy. They’re not complicated. But they are reliable, crowd-pleasing, and absolutely delicious. And isn’t that what great desserts are all about?
So keep butter, marshmallows, peanut butter, and rice cereal in your kitchen. And when you need a simple, impressive treat that delivers big flavor with minimal fuss, you’ll know exactly what to make.
Final Verdict
Rating: 5 out of 5
Difficulty: Easy
Prep Time: 15 minutes
Cook Time: 1 minute
Total Time: 16 minutes (plus 1 hour chilling)
Yield: 24 bars
Cleanup: Minimal (one saucepan + two microwave bowls + one baking dish)
Leftover potential: Excellent — store in fridge or freezer
Best for: Bake sales, potlucks, holidays, lunchbox treats, and anytime you need a no-bake crowd-pleaser