
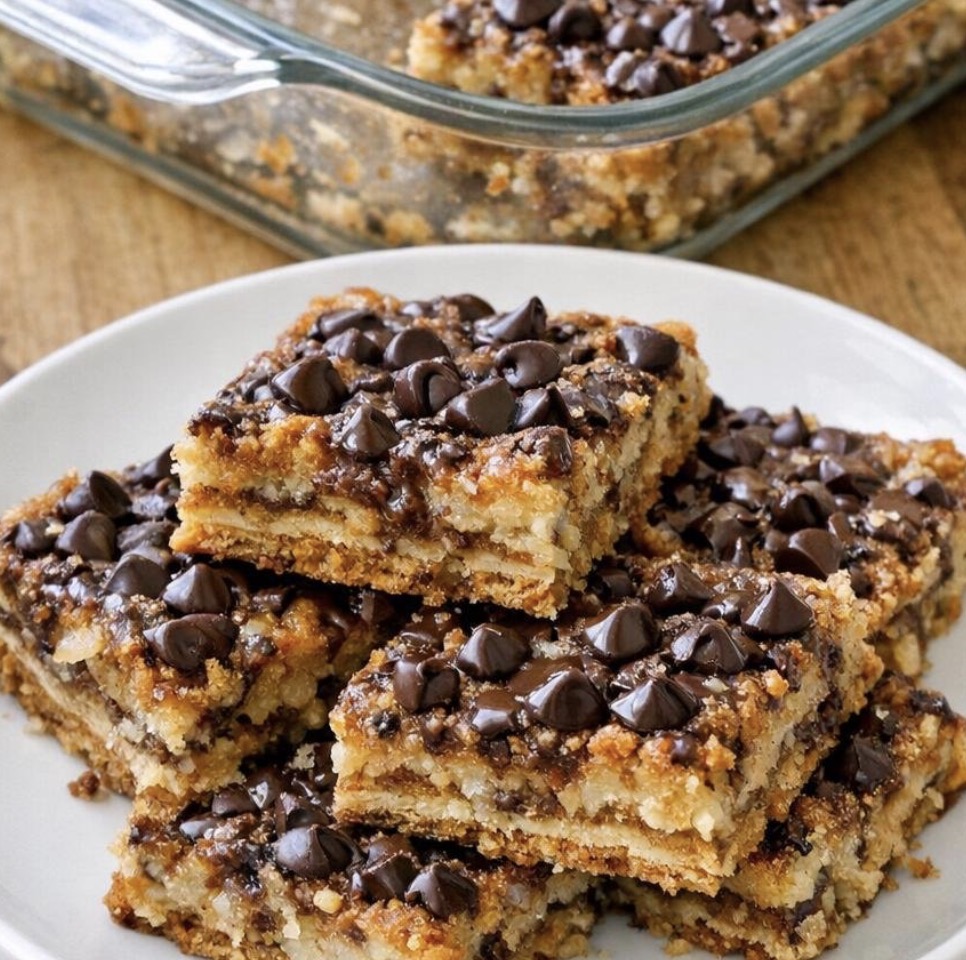
Why This Recipe Is an Absolute Keeper
Before we dive into the method, here’s why these graham cracker bars will become a staple in your kitchen:
-
Just 4 ingredients. Graham crackers, sweetened condensed milk, chocolate chips, and butter. That’s it!
-
Quick and easy. Ready in about 30 minutes of active time, plus cooling.
-
No eggs, no flour, no leavening. Perfect for when you’re out of the basics.
-
Caramelized, gooey, and rich. The condensed milk transforms into a golden, sticky topping.
-
Crowd-pleasing. Kids and adults alike devour these.
-
Perfect for any occasion. Potlucks, bake sales, holiday trays, or just because.
-
Budget-friendly. Simple, affordable ingredients.
-
Minimal cleanup. One dish, four ingredients.
-
Make-ahead friendly. Store in the fridge or freezer for later.
-
Versatile. Add nuts, swap the chocolate, or drizzle with caramel.
The Ingredients
This recipe uses simple, affordable ingredients that come together beautifully.
-
12 whole graham cracker sheets – For the buttery, tender base and top layer.
-
1 can (14 ounces) sweetened condensed milk – The magic ingredient. It caramelizes into a golden, sticky topping.
-
1 cup semisweet chocolate chips – For gooey, rich chocolate pockets.
-
½ cup unsalted butter, melted – For richness and to help the graham crackers soften.
Step-by-Step Instructions
Step 1: Preheat and Prep
Preheat the oven to 350°F. Lightly grease a clear glass 9×13-inch baking dish or line it with parchment for easier lifting and slicing.
Pro Tip: A glass dish is recommended—it heats evenly and lets you see the beautiful layers forming.
Step 2: Arrange the First Layer
Arrange 6 whole graham cracker sheets in a single layer across the bottom of the baking dish, breaking only a small piece if needed to fill a gap at the edge.
Pro Tip: Don’t crush the graham crackers—keep them whole for the best texture.
Step 3: Add Butter and Chocolate
Drizzle the melted butter as evenly as possible over the graham crackers, then sprinkle the chocolate chips across the surface.
Pro Tip: Spread the chocolate chips evenly so every bite has chocolate.
Step 4: Add the Second Layer
Place the remaining 6 whole graham cracker sheets on top to make a second layer. Slowly pour the sweetened condensed milk over the top, aiming to cover the surface as evenly as you can.
Pro Tip: Pour slowly and evenly. The condensed milk will seep down into the layers as it bakes.
Step 5: Bake to Golden Perfection
Bake for 25 to 30 minutes, until the top is lightly golden and the condensed milk has bubbled around the edges. Let the pan cool completely so the bars can set before slicing.
Pro Tip: Watch the edges—they’ll bubble first. That’s your signal that the bars are ready.
Step 6: Cool, Chill, and Slice
Cut into bars and serve. For the cleanest slices, chill the pan for 20 to 30 minutes after cooling, then use a sharp knife to portion the bars.
Pro Tip: For the cleanest cuts, dip your knife in hot water and wipe it dry between each slice.
How to Serve It Like a Pro
These graham cracker bars are delicious on their own, but a few simple touches make them even better:
-
With a sprinkle of flaky sea salt – For a sweet-salty contrast.
-
With a drizzle of caramel – For extra gooeyness.
-
With a drizzle of chocolate sauce – For chocolate lovers.
-
With a scoop of vanilla ice cream – For a decadent dessert.
-
With a cup of coffee – The bitterness balances the sweetness.
-
With a glass of cold milk – Classic pairing.
-
On a dessert platter – Arrange with other treats for a beautiful spread.
-
At room temperature – The chocolate softens slightly, making them extra gooey.
-
Chilled – The bars stay firm and slice cleanly.
-
As a gift – Stack in a pretty tin with parchment between layers.
Variations & Swaps (Because Life Happens)
One of the best things about this recipe is how flexible it is. Here are some easy ways to make it your own:
Make It with Different Chocolate
-
Milk chocolate – Sweeter and creamier.
-
Dark chocolate – Less sweet, more intense.
-
White chocolate – For a beautiful contrast.
-
Peanut butter chips – For a nutty twist.
-
Butterscotch chips – For a rich, caramel flavor.
Make It with Add-Ins
-
Chopped nuts – Pecans or walnuts sprinkled on top.
-
Flaky sea salt – Sprinkled on top before baking.
-
Crushed pretzels – Sprinkled on top for extra crunch.
-
Mini marshmallows – Sprinkled on top for gooeyness.
-
Toffee bits – For buttery, crunchy sweetness.
-
Coconut – Toasted and sprinkled on top.
Make It with Different Crackers
-
Cinnamon graham crackers – For a warm, spicy twist.
-
Chocolate graham crackers – For double chocolate flavor.
-
Shortbread cookies – For a buttery, tender base.
-
Oreo cookies – For a chocolatey base.
Make It with Different Toppings
-
Caramel sauce – Drizzled over the top.
-
Chocolate ganache – For a rich, glossy finish.
-
Powdered sugar – For a simple, elegant dusting.
-
Fresh berries – For a pop of color and freshness.
Make It Gluten-Free
-
Use gluten-free graham crackers.
Pro Tips for the Best Graham Cracker Bars
-
Use whole graham crackers. They create the best texture.
-
Drizzle the butter evenly. Every cracker should get some.
-
Spread the chocolate chips evenly. Every bite should have chocolate.
-
Pour the condensed milk slowly. It seeps into the layers as it bakes.
-
Watch the edges. They’ll bubble first. That’s your signal.
-
Cool completely. This allows the bars to set.
-
Chill before slicing. For the cleanest cuts.
-
Use a sharp knife. Dip it in hot water and wipe dry between cuts.
-
Store in the fridge. They keep for up to a week.
-
Make extra. They disappear fast!
Frequently Asked Questions
Can I use a different type of cracker?
Yes. Cinnamon graham crackers, chocolate graham crackers, shortbread cookies, or Oreo cookies all work beautifully.
Can I use milk chocolate instead of semi-sweet?
Yes. Milk chocolate is sweeter and creamier.
Can I add nuts?
Absolutely! Chopped pecans or walnuts add a delicious crunch.
Can I make these ahead of time?
Yes. These bars taste even better the next day. Store in the refrigerator for up to a week.
How long do leftovers last?
Store in an airtight container in the refrigerator for up to 1 week.
Can I freeze these bars?
Yes. Wrap individual bars tightly in plastic wrap and freeze for up to 3 months. Thaw in the fridge overnight.
Why are my bars falling apart?
The bars may not have cooled completely, or they weren’t chilled long enough. Cool completely and chill for 20-30 minutes before slicing.
Why is my condensed milk not caramelized?
The oven may not be hot enough, or the bars didn’t bake long enough. Bake until the top is golden and bubbly.
Can I use a different size pan?
Yes. Use a 9×13 pan for the classic version, or an 8×8 pan for a thicker dessert.
Is this recipe gluten-free?
Use gluten-free graham crackers for a gluten-free version.
Can I make this dairy-free?
Yes. Use dairy-free butter, dairy-free chocolate chips, and dairy-free sweetened condensed milk.
Can I double the recipe?
Yes. Use a larger pan and double all ingredients.
Storage & Reheating
Refrigerator
-
Store in an airtight container for up to 1 week.
-
Serve chilled or at room temperature.
Freezer
-
Wrap individual bars tightly in plastic wrap, then store in a freezer bag for up to 3 months.
-
Thaw in the refrigerator overnight before serving.
Make-Ahead Tips
-
Prep Ahead: Arrange the graham crackers in the pan up to 24 hours in advance.
-
Bake Ahead: Bake the bars up to 5 days in advance and store in the refrigerator.
-
Freeze Ahead: Freeze baked bars for up to 3 months. Thaw and serve.
The Beauty of Simple, Four-Ingredient Desserts
There’s something deeply satisfying about a recipe that delivers big flavor with minimal effort. These Oven-Baked Graham Cracker Dessert Bars are the kind of treat that makes people happy—the kind that brings everyone to the table with a smile.
They’re not fancy. They’re not complicated. But they are reliable, crowd-pleasing, and absolutely delicious. And isn’t that what great desserts are all about?
So keep graham crackers, sweetened condensed milk, chocolate chips, and butter in your kitchen. And when you need a simple, impressive dessert that delivers big flavor with minimal fuss, you’ll know exactly what to make.
Final Verdict
Rating: 5 out of 5
Difficulty: Easy
Prep Time: 10 minutes
Cook Time: 25-30 minutes
Cooling Time: 30 minutes
Total Time: Approximately 1 hour 10 minutes
Yield: 16 bars
Cleanup: Minimal (one baking dish)
Leftover potential: Excellent — store in the fridge or freezer
Best for: Potlucks, bake sales, holiday trays, and anytime you need a crowd-pleasing sweet treat