
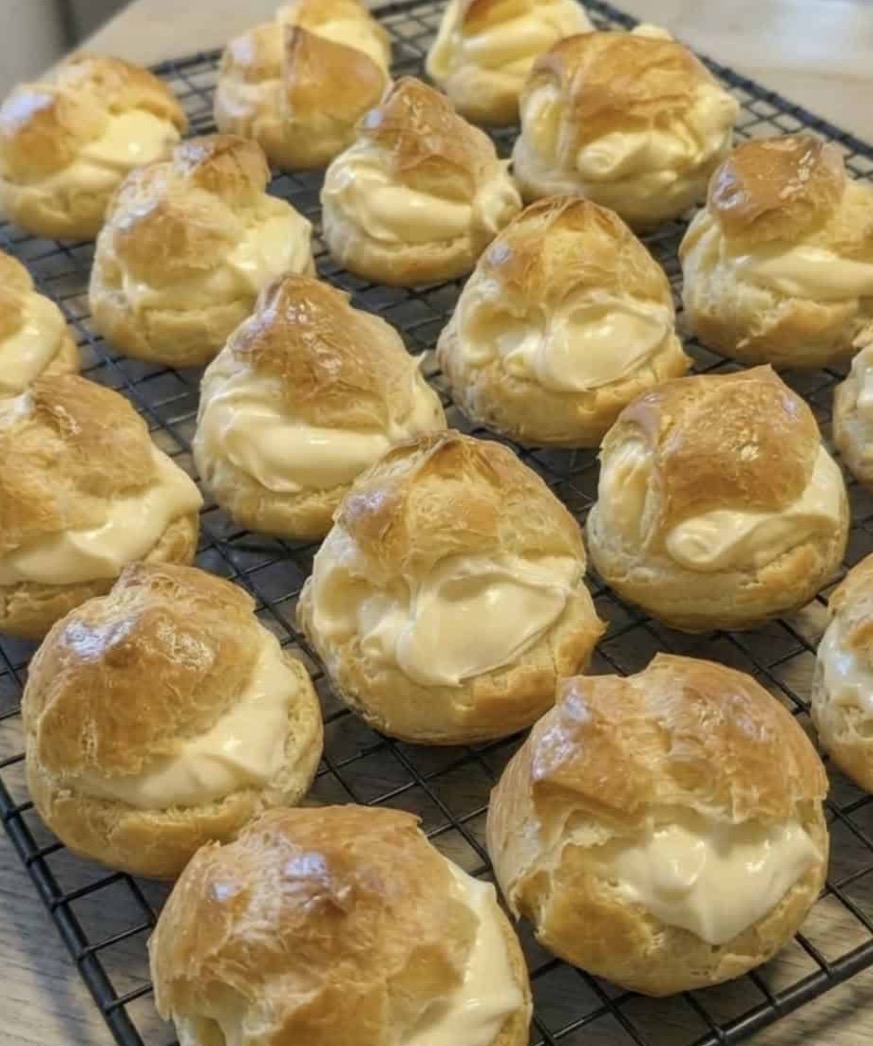
Why This Recipe Is an Absolute Keeper
Before we dive into the method, here’s why these cream puffs will become a staple in your kitchen:
-
Foolproof dough. The choux pastry comes together in one pan in about 5 minutes.
-
Simple filling. Just three ingredients and a mixer.
-
Impressive presentation. They look like they came from a fancy bakery.
-
Crowd-pleasing. Everyone loves cream puffs.
-
Perfect for any occasion. Birthdays, holidays, showers, potlucks, or just because.
-
Make-ahead friendly. Shells can be baked and frozen in advance.
-
Budget-friendly. Simple, affordable ingredients.
-
Versatile. Fill with cream, custard, ice cream, or anything you love.
-
Great for beginners. No complicated techniques or equipment required.
-
Nostalgic and comforting. Tastes like childhood in every bite.
The Ingredients
This recipe uses simple, wholesome ingredients that come together beautifully.
For the Cream Puff Shells:
-
1 stick butter (8 tablespoons) – Unsalted butter works best.
-
1 cup water – The liquid base for the dough.
-
1 teaspoon vanilla – For flavor and aroma.
-
4 eggs – The key to a puffy, airy shell. Bring to room temperature for best results.
-
1 cup all-purpose flour – The structure of the dough.
For Mom’s Famous Filling:
-
1 pint heavy cream – The creamy, fluffy base.
-
1 package (3.4 ounces) instant vanilla pudding – The secret to a stable, flavorful filling.
-
⅓ cup milk – Thins the pudding just enough to keep it creamy.
Step-by-Step Instructions
Step 1: Preheat and Prep
Preheat your oven to 400°F (200°C). Line a baking sheet with parchment paper or a silicone baking mat. Set aside.
Pro Tip: Parchment paper or a silicone mat is essential. Greasing the pan can cause the shells to spread too much.
Step 2: Make the Choux Dough
In a medium saucepan over medium heat, combine the butter, water, and vanilla. Bring to a boil, stirring occasionally, until the butter is completely melted.
Add the flour all at once and stir vigorously with a wooden spoon. Continue stirring until the mixture forms a smooth ball and pulls away from the sides of the pan, about 1-2 minutes.
Pro Tip: Keep stirring! The dough needs to dry out slightly. You’ll know it’s ready when it forms a smooth ball and leaves a thin film on the bottom of the pan.
Step 3: Add the Eggs
Remove the pan from the heat and let the dough cool for about 5 minutes. Add the eggs one at a time, stirring vigorously after each addition until fully incorporated. The dough should be smooth, glossy, and thick enough to hold its shape.
Pro Tip: Add the eggs one at a time! Adding them all at once can make the dough too runny. The dough is ready when it falls from the spoon in a thick “V” shape.
Step 4: Pipe the Shells
Transfer the dough to a piping bag fitted with a large round tip (or a zip-top bag with the corner cut off). Pipe 16 even mounds, about 1½ inches in diameter, onto the prepared baking sheet, leaving about 2 inches between each one.
Pro Tip: Use a wet finger to gently smooth the tops of any peaks. This prevents them from burning.
Step 5: Bake to Golden Perfection
Bake for 20-25 minutes, or until the shells are puffed, golden brown, and dry to the touch. Do not open the oven during baking—this can cause them to deflate.
Pro Tip: If the shells are browning too quickly, reduce the oven temperature to 375°F after the first 15 minutes.
Step 6: Cool and Fill
Remove from the oven and transfer to a wire rack to cool completely. Once cool, use a sharp knife to cut a small slit in the side of each shell (or pierce the bottom with a skewer). This allows steam to escape and keeps the shells crisp.
Pro Tip: Let the shells cool completely before filling. Filling warm shells will make them soggy.
Step 7: Make Mom’s Famous Filling
In a large bowl, combine the heavy cream, instant vanilla pudding mix, and milk. Beat with an electric mixer on medium-high speed until stiff peaks form, about 2-3 minutes. The filling should be thick, creamy, and hold its shape.
Pro Tip: Chill the bowl and beaters in the freezer for 10 minutes before whipping. This helps the cream whip faster and fluffier.
Step 8: Fill the Cream Puffs
Transfer the filling to a piping bag fitted with a small round tip (or a zip-top bag with the corner cut off). Insert the tip into the slit in each shell and fill until the shell feels heavy and the filling starts to come back out. Alternatively, cut the shells in half horizontally and spoon the filling into the bottom half, then replace the top.
Pro Tip: Fill the cream puffs just before serving for the best texture. If making ahead, store shells and filling separately.
Step 9: Serve and Enjoy
Dust with powdered sugar, drizzle with chocolate, or serve as-is. Enjoy immediately!
Pro Tip: For a beautiful presentation, arrange the cream puffs on a platter and dust with powdered sugar just before serving.
How to Serve It Like a Pro
These cream puffs are delicious on their own, but a few simple touches make them even better:
-
Dusted with powdered sugar – Classic and elegant.
-
Drizzled with chocolate sauce – For chocolate lovers.
-
Drizzled with caramel sauce – For a sweet, gooey finish.
-
Topped with fresh berries – For a pop of color and freshness.
-
Filled with ice cream – For a frozen twist.
-
Served with coffee – Perfect for an afternoon treat.
-
Arranged on a tiered stand – For a beautiful presentation.
-
With a sprinkle of cinnamon – For warmth.
-
With a splash of liqueur in the filling – For an adult twist.
-
With a glass of champagne – For a celebration.
Variations & Swaps (Because Life Happens)
One of the best things about this recipe is how flexible it is. Here are some easy ways to make it your own:
Make It with Different Fillings
-
Chocolate pudding – For chocolate cream puffs.
-
Lemon pudding – For a bright, citrusy twist.
-
Butterscotch pudding – For a rich, caramel flavor.
-
Cheesecake pudding – For a tangy, creamy filling.
-
Fresh whipped cream – For a lighter, less sweet option.
-
Pastry cream – For a classic French filling.
-
Ice cream – For a frozen treat.
Make It with Different Toppings
-
Chocolate ganache – For a rich, glossy finish.
-
Caramel sauce – For a sweet, gooey drizzle.
-
Powdered sugar – For a simple, elegant dusting.
-
Crushed nuts – For crunch.
-
Sprinkles – For a fun, festive touch.
-
Fresh fruit – For brightness and color.
Make It Gluten-Free
-
Use gluten-free all-purpose flour blend in place of the regular flour.
Make It with a Savory Twist
-
Omit the vanilla and fill with chicken salad, tuna salad, or egg salad for a savory appetizer.
Pro Tips for the Best Cream Puffs
-
Use room temperature eggs. They incorporate more easily into the dough.
-
Stir vigorously. The dough needs to be smooth and glossy.
-
Add eggs one at a time. This ensures the dough doesn’t become too runny.
-
Pipe evenly. Uniform size ensures even baking.
-
Don’t open the oven. This can cause the shells to deflate.
-
Cool completely before filling. Warm shells will become soggy.
-
Pierce the shells. This allows steam to escape and keeps them crisp.
-
Fill just before serving. This keeps the shells crispy.
-
Chill the bowl and beaters. This helps the cream whip faster.
-
Make extra. They disappear fast!
Frequently Asked Questions
Can I make the shells ahead of time?
Yes. Bake the shells, cool completely, and store in an airtight container at room temperature for up to 2 days, or freeze for up to 3 months.
Can I freeze the filled cream puffs?
Freezing is not recommended, as the filling can become watery upon thawing.
Can I use a different pudding flavor?
Yes. Chocolate, lemon, butterscotch, or cheesecake pudding all work beautifully.
Can I use homemade whipped cream instead of pudding?
Yes. Use 2 cups of heavy cream whipped with ¼ cup powdered sugar and 1 teaspoon vanilla.
Why did my cream puffs deflate?
You may have opened the oven during baking, or they weren’t baked long enough. Bake until golden and dry to the touch.
Why is my dough too runny?
You may have added too many eggs. Add eggs one at a time and stop when the dough holds its shape.
Why is my dough too thick?
You may not have added enough eggs. Add a little beaten egg at a time until the dough reaches the right consistency.
Can I make these gluten-free?
Yes. Use gluten-free all-purpose flour blend.
Can I make these dairy-free?
Yes. Use dairy-free butter and dairy-free whipped topping.
How long do leftovers last?
Store filled cream puffs in the refrigerator for up to 2 days. The shells will soften over time.
Can I double the recipe?
Yes. Use two baking sheets and rotate them halfway through baking.
Can I pipe the dough into different shapes?
Yes. Pipe into éclairs, rings, or small bites.
Storage & Reheating
Room Temperature
-
Store unfilled shells in an airtight container for up to 2 days.
Refrigerator
-
Store filled cream puffs in an airtight container for up to 2 days. The shells will soften over time.
Freezer
-
Unfilled shells: Freeze in a freezer bag for up to 3 months. Thaw at room temperature before filling.
-
Filled cream puffs: Freezing is not recommended.
Reheating Tips
-
Oven: To re-crisp unfilled shells, bake at 350°F for 5 minutes.
-
Air Fryer: To re-crisp unfilled shells, air fry at 350°F for 2-3 minutes.
Make-Ahead Tips
-
Prep Ahead: Bake the shells up to 2 days in advance and store in an airtight container.
-
Freeze Ahead: Freeze unfilled shells for up to 3 months.
-
Fill Ahead: Fill the cream puffs up to 2 hours before serving for the best texture.
The Beauty of Simple, Elegant Desserts
There’s something deeply satisfying about a recipe that delivers big flavor with minimal effort. These Mom’s Famous Cream Puffs are the kind of dessert that makes people happy—the kind that brings everyone to the table with a smile.
They’re not fancy. They’re not complicated. But they are reliable, crowd-pleasing, and absolutely delicious. And isn’t that what great desserts are all about?
So keep butter, flour, eggs, cream, and pudding mix in your kitchen. And when you need a simple, impressive dessert that delivers big flavor with minimal fuss, you’ll know exactly what to make.
Final Verdict
Rating: 5 out of 5
Difficulty: Easy to Moderate
Prep Time: 20 minutes
Cook Time: 25 minutes
Total Time: Approximately 45-50 minutes
Yield: 16 cream puffs
Cleanup: Moderate (saucepan + mixing bowl + baking sheet)
Leftover potential: Good — best enjoyed fresh
Best for: Birthdays, holidays, showers, potlucks, and anytime you need a crowd-pleasing dessert