
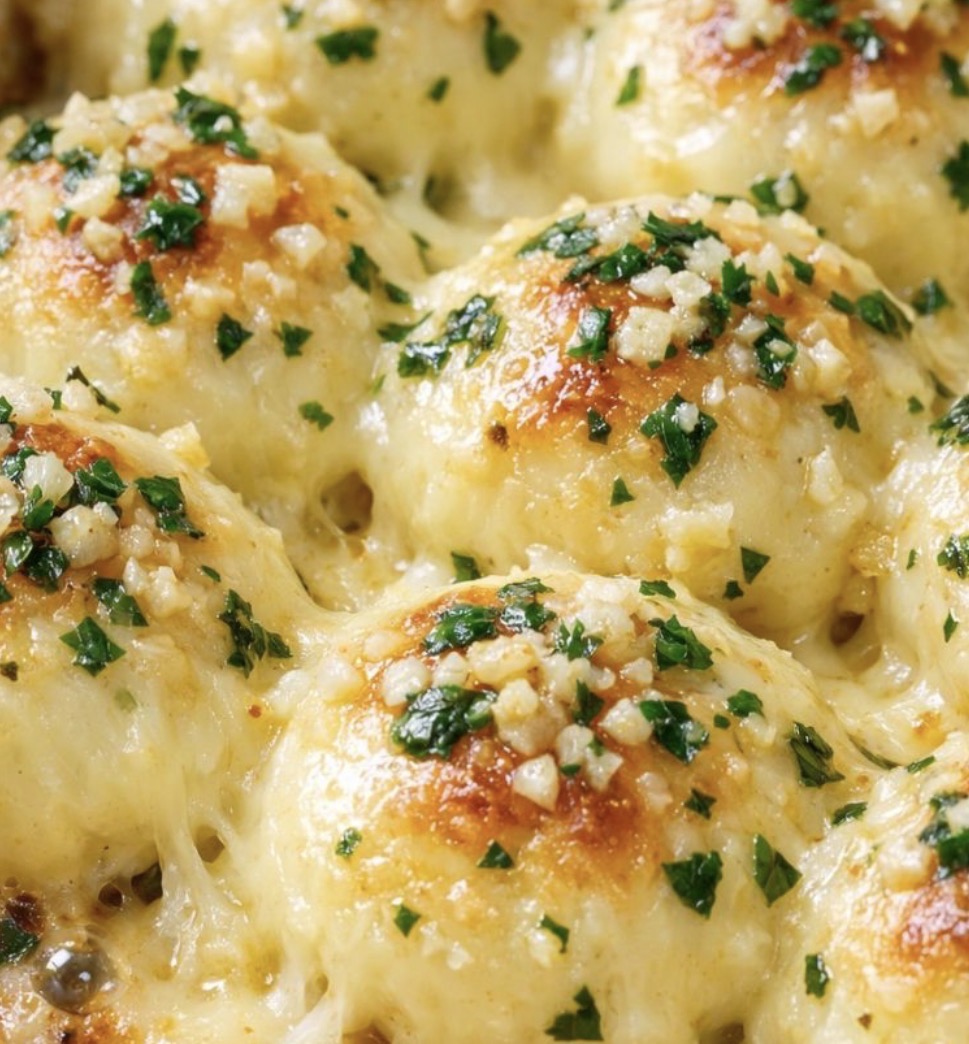
Why This Recipe Is an Absolute Keeper
Before we dive into the method, here’s why these garlic cheese bombs will become a staple in your kitchen:
-
Just 3 ingredients. Shredded low-moisture mozzarella, full-fat ricotta, and garlic-herb seasoning blend. That’s it!
-
Low carb and keto-friendly. Perfect for low-carb lifestyles.
-
Quick and easy. Ready in about 25 minutes from start to finish.
-
Crispy, golden, and gooey. Every bite is perfect.
-
Melty, stretchy mozzarella. It creates that irresistible cheese pull.
-
Creamy, rich ricotta. It adds structure and creaminess.
-
Savory, aromatic garlic-herb seasoning. It adds depth and flavor.
-
Crowd-pleasing. Kids and adults alike devour these.
-
Perfect for any occasion. Game days, holiday parties, or potlucks.
-
Minimal cleanup. One bowl, one casserole dish.
The Ingredients
This recipe uses simple, affordable ingredients that come together beautifully.
-
2 cups shredded low-moisture mozzarella cheese – For a gooey, stretchy center.
-
1 cup full-fat ricotta cheese – For creaminess and structure.
-
2 tablespoons garlic-herb seasoning blend(with dried minced garlic and green herbs), plus more to taste – For savory, aromatic depth.
Step-by-Step Instructions
Step 1: Preheat and Prep
Preheat your oven to 400°F (200°C). Lightly grease a small ceramic casserole dish so the cheese bombs release easily and the edges can get nice and crisp.
Pro Tip: A small casserole dish keeps the cheese bombs thick and gooey.
Step 2: Mix the Cheeses
In a medium mixing bowl, combine the shredded mozzarella, ricotta, and garlic-herb seasoning blend. Use a sturdy spoon to stir until everything is well mixed and the seasoning looks evenly speckled throughout the cheese.
Pro Tip: Make sure the cheeses are well combined for even flavor in every bite.
Step 3: Let It Rest
Let the mixture sit for 5 minutes at room temperature. This helps the ricotta firm up a bit and makes the mixture easier to scoop and shape.
Pro Tip: Don’t skip this step—it makes the mixture much easier to work with.
Step 4: Scoop and Arrange
Using a small cookie scoop or a tablespoon, scoop heaping spoonfuls of the cheese mixture and drop them into the prepared casserole dish. Leave a little space between each mound so they have room to puff and spread as they bake.
Pro Tip: Leave space between the mounds—they’ll spread as they bake.
Step 5: Add Extra Seasoning
Sprinkle a light extra pinch of the garlic-herb seasoning blend over the tops for a more pronounced garlicky, herby crust. Gently pat any loose bits so they stick to the cheese.
Pro Tip: The extra seasoning creates a delicious, flavorful crust.
Step 6: Bake to Golden Perfection
Place the casserole dish on the middle rack of the oven and bake for 14–18 minutes, or until the cheese bombs are puffed, bubbling vigorously around the edges, and deep golden brown on top. The edges should look slightly greasy and crisp, with some browned spots.
Pro Tip: Watch the edges—they’ll brown first. That’s where the crispiness is.
Step 7: Optional Broil
If you like a deeper brown top, switch the oven to broil for 1–2 minutes at the end of baking, watching closely so they don’t burn.
Pro Tip: Stay by the oven! Broiling can go from perfect to burnt in seconds.
Step 8: Rest and Serve
Remove the dish from the oven and let the garlic cheese bombs sit for 3–5 minutes. They’ll be very hot and molten inside at first; a short rest lets them set just enough to scoop without falling apart. Serve warm, scooping the cheese bombs straight from the casserole dish with a spoon or small spatula. Enjoy while the centers are still gooey and stretchy.
Pro Tip: Serve with marinara sauce for dipping.
How to Serve It Like a Pro
These garlic cheese bombs are delicious on their own, but a few simple accompaniments make them even better:
-
With marinara sauce – For dipping.
-
With ranch dressing – Creamy and tangy.
-
With pesto – For a fresh, herby twist.
-
With garlic aioli – For extra garlicky goodness.
-
With a simple green salad – Balances the richness.
-
On a party platter – Arrange with other appetizers.
-
With a glass of red wine – Chianti or Merlot.
-
With a glass of white wine – Chardonnay or Sauvignon Blanc.
-
With a cold beverage – Beer, sweet tea, or lemonade.
-
As a main course – Serve with a side of roasted vegetables.
Variations & Swaps (Because Life Happens)
One of the best things about this recipe is how flexible it is. Here are some easy ways to make it your own:
Make It with Different Cheeses
-
Fontina – Buttery and smooth.
-
Gouda – Smoky and rich.
-
Gruyère – Nutty and sophisticated.
-
Cheddar – For a sharper, bolder flavor.
-
Parmesan – For a sharper, nuttier finish.
Make It with Different Seasonings
-
Italian seasoning – For a classic flavor.
-
Ranch seasoning – For a tangy, herby twist.
-
Everything bagel seasoning – For a trendy twist.
-
Red pepper flakes – For heat.
-
Fresh herbs – Parsley, basil, or oregano.
Make It with Add-Ins
-
Bacon – Crumbled for smoky crunch.
-
Spinach – Chopped and wilted for a veggie boost.
-
Sun-dried tomatoes – Chopped for tang.
-
Jalapeños – Minced for heat.
-
Garlic – Minced for extra garlicky flavor.
-
Parmesan – Sprinkled on top for extra flavor.
Make It Spicier
-
Add cayenne – A pinch for heat.
-
Add red pepper flakes – A pinch for warmth.
-
Add jalapeños – Minced for fresh heat.
-
Use pepper jack cheese – For extra kick.
Make It in the Air Fryer
-
Air fry at 375°F for 8-10 minutes, until the cheese is melted and golden.
Pro Tips for the Best Garlic Cheese Bombs
-
Use low-moisture mozzarella. It melts beautifully without becoming watery.
-
Use full-fat ricotta. It adds richness and structure.
-
Mix well. Ensures even flavor in every bite.
-
Let the mixture rest. It firms up and becomes easier to scoop.
-
Leave space between mounds. They’ll spread as they bake.
-
Add extra seasoning. For a flavorful, herby crust.
-
Watch the edges. They’ll brown first. That’s where the crispiness is.
-
Broil for extra color. Optional but gives a beautiful golden top.
-
Let them rest. The 3-5 minute rest allows the cheese to set.
-
Serve warm. These are best fresh from the oven.
Frequently Asked Questions
Can I use a different type of cheese?
Yes. Fontina, Gouda, Gruyère, cheddar, or Parmesan all work beautifully.
Can I use a different type of seasoning?
Yes. Italian seasoning, ranch seasoning, or everything bagel seasoning all work beautifully.
Can I make these without ricotta?
No. The ricotta is essential for structure and creaminess.
Can I make these ahead of time?
Yes. Assemble the cheese bombs, cover, and refrigerate for up to 24 hours. Bake as directed, adding a few minutes if needed.
How long do leftovers last?
Store in an airtight container in the refrigerator for up to 3 days. Reheat in the oven or air fryer to restore crispiness.
Can I freeze these cheese bombs?
Yes. Freeze assembled, unbaked cheese bombs on a baking sheet until solid, then transfer to a freezer bag. Bake from frozen at 400°F for 18-20 minutes.
Why did my cheese bombs spread too much?
The mixture may have been too warm, or the ricotta was too soft. Let the mixture rest for 5 minutes and keep it cool.
Why is my cheese not golden?
The oven may not be hot enough, or you baked them too long. Bake at 400°F and broil for 1-2 minutes at the end for extra color.
Can I add bacon?
Absolutely! Crumbled bacon adds a delicious smoky crunch.
Can I make these in the air fryer?
Yes. Air fry at 375°F for 8-10 minutes, until the cheese is melted and golden.
Can I double the recipe?
Yes. Use a larger casserole dish and increase the baking time slightly.
Is this recipe gluten-free?
Yes, as written, this recipe is naturally gluten-free (check your seasoning blend label).
Storage & Reheating
Refrigerator
-
Store cooled cheese bombs in an airtight container for up to 3 days.
-
Reheat in the oven at 350°F for 5-7 minutes, or in the air fryer at 350°F for 3-5 minutes.
Freezer
-
Freeze assembled, unbaked cheese bombs on a baking sheet until solid, then transfer to a freezer bag. Bake from frozen at 400°F for 18-20 minutes.
-
Freeze baked cheese bombs in a freezer bag for up to 3 months. Reheat in the oven or air fryer.
Reheating Tips
-
Oven: Best method. 350°F for 5-7 minutes to restore crispiness.
-
Air Fryer: 350°F for 3-5 minutes.
-
Microwave: Works in a pinch but will soften the cheese.
Make-Ahead Tips
-
Prep Ahead: Mix the cheese mixture up to 24 hours in advance and store in the refrigerator.
-
Assemble Ahead: Scoop the mixture into the casserole dish, cover, and refrigerate for up to 24 hours. Bake as directed.
-
Freeze Ahead: Freeze assembled, unbaked cheese bombs for up to 3 months. Bake from frozen.
The Beauty of Simple, Gooey, Garlicky Low-Carb Cheese Bombs
There’s something deeply satisfying about a recipe that delivers big flavor with minimal effort. These Low Carb Garlic Cheese Bombs are the kind of treat that makes people happy—the kind that brings everyone to the table with a smile.
They’re not fancy. They’re not complicated. But they are reliable, crowd-pleasing, and absolutely delicious. And isn’t that what great appetizers are all about?
So keep shredded low-moisture mozzarella, full-fat ricotta, and garlic-herb seasoning blend in your kitchen. And when you need a simple, impressive appetizer that delivers big flavor with minimal fuss, you’ll know exactly what to make.
Final Verdict
Rating: 5 out of 5
Difficulty: Easy
Prep Time: 10 minutes
Cook Time: 14-18 minutes
Total Time: Approximately 25-30 minutes
Yield: 8 servings
Cleanup: Minimal (one bowl + one casserole dish)
Leftover potential: Good — reheat in oven or air fryer
Best for: Game days, holiday parties, potlucks, and anytime you need a crowd-pleasing low-carb appetizer