
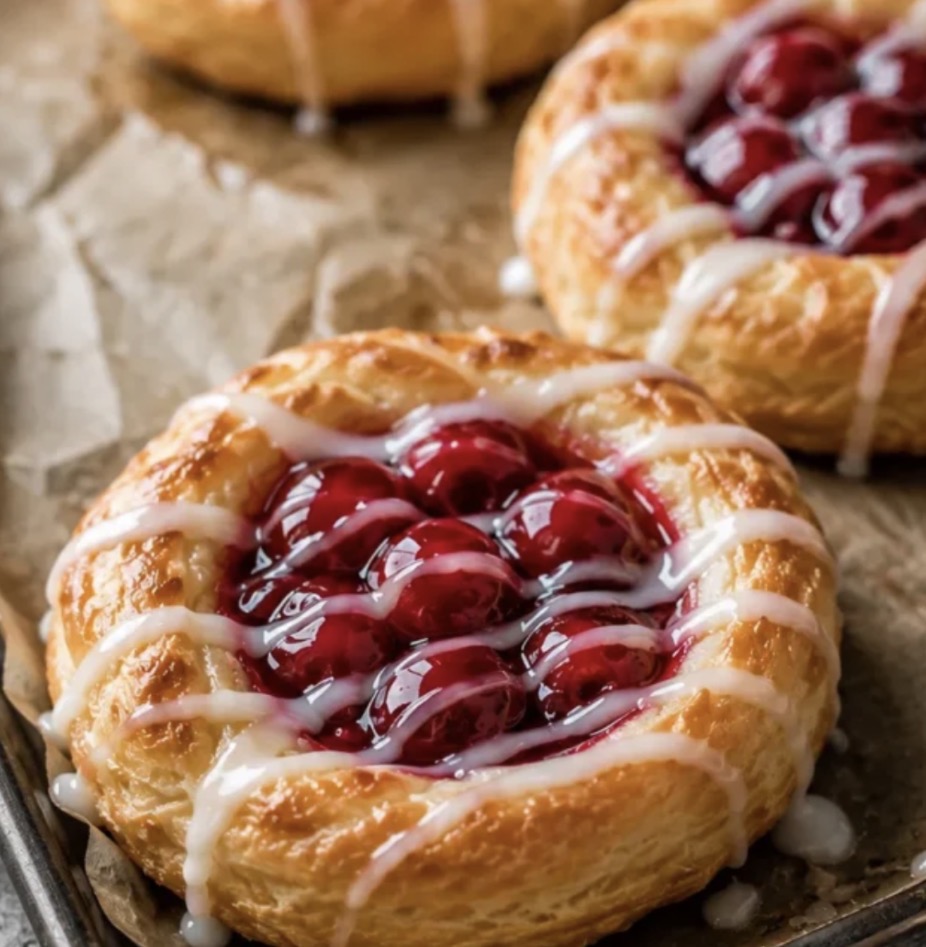
Why This Recipe Is an Absolute Keeper
Before we dive into the method, here’s why these cherry danishes will become a staple in your kitchen:
-
Simple ingredients. Crescent roll dough, cream cheese, powdered sugar, vanilla, cherry pie filling, and milk. That’s it!
-
Quick and easy. Ready in about 25 minutes from start to finish.
-
Flaky, creamy, and sweet. Every bite is perfect.
-
Buttery, flaky crescent dough. It bakes into golden perfection.
-
Smooth, creamy cream cheese filling. It’s lightly sweet and vanilla-kissed.
-
Sweet, tart cherry pie filling. It adds brightness and color.
-
Glossy powdered sugar glaze. It adds a beautiful finish.
-
Crowd-pleasing. Kids and adults alike devour these.
-
Budget-friendly. Simple, affordable ingredients.
-
Beautiful presentation. Looks like they came from a fancy bakery.
The Ingredients
This recipe uses simple, affordable ingredients that come together beautifully.
-
1 (8-ounce) can Pillsbury Crescent Rolls – For a flaky, buttery base.
-
6 ounces cream cheese, softened – For the creamy filling.
-
4 tablespoons powdered sugar – For sweetness in the filling.
-
1 tablespoon vanilla – For warmth and depth.
-
1 can cherry pie filling – For the sweet, tart topping.
-
½ cup powdered sugar – For the glaze.
-
2 to 3 teaspoons milk – For the glaze.
Step-by-Step Instructions
Step 1: Preheat and Prep
Preheat the oven to 350°F. Line a baking sheet with parchment paper and set it aside.
Pro Tip: Parchment paper makes cleanup a breeze and prevents sticking.
Step 2: Prepare the Dough
Remove the crescent dough from the package and slice it into 10 even pieces.
Pro Tip: Use a sharp knife or kitchen shears to cut the dough evenly.
Step 3: Arrange and Press
Arrange the dough pieces on the prepared baking sheet, leaving space between each one. Use the bottom of a small measuring cup or glass to gently press down the center of each dough piece, creating a raised outer edge to hold the filling.
Pro Tip: Press gently to create a nest for the filling without tearing the dough.
Step 4: Make the Filling
In a medium bowl, combine the softened cream cheese, powdered sugar, and vanilla. Beat the mixture with a handheld mixer until smooth, light, and fluffy.
Pro Tip: Make sure the cream cheese is fully softened for a smooth filling.
Step 5: Fill the Danishes
Spoon a small amount of the cream cheese filling into the center of each dough piece, then gently spread it inside the indented area. Add 1 tablespoon of cherry pie filling on top of the cream cheese layer.
Pro Tip: Don’t overfill—the filling will spread as it bakes.
Step 6: Bake to Golden Perfection
Bake for 15 to 17 minutes, or until the danishes are puffed and lightly golden around the edges.
Pro Tip: Watch them closely toward the end—crescent dough can go from golden to burnt quickly.
Step 7: Cool and Glaze
Remove the baking sheet from the oven and let the danishes cool for about 8 minutes. In a small bowl, whisk together the powdered sugar and milk until smooth. Drizzle the glaze lightly over the warm danishes.
Pro Tip: Drizzle the glaze while the danishes are still warm so it sets beautifully.
Step 8: Serve and Enjoy
Serve and enjoy.
Pro Tip: Serve warm or at room temperature. They’re delicious either way!
How to Serve It Like a Pro
These cherry danishes are delicious on their own, but a few simple accompaniments make them even better:
-
With a cup of coffee – Perfect for breakfast.
-
With a cup of hot tea – For a cozy treat.
-
With a glass of cold milk – Classic pairing.
-
With a glass of orange juice – Breakfast of champions.
-
With fresh fruit – For a balanced breakfast.
-
With a dollop of whipped cream – For a decadent twist.
-
On a brunch platter – Arrange with other breakfast treats.
-
With a sprinkle of sliced almonds – For crunch.
-
With a drizzle of chocolate – For chocolate lovers.
-
With a dusting of powdered sugar – For a beautiful finish.
Variations & Swaps (Because Life Happens)
One of the best things about this recipe is how flexible it is. Here are some easy ways to make it your own:
Make It with Different Pie Fillings
-
Blueberry – For a fruity twist.
-
Apple – For a fall twist.
-
Peach – For a summery twist.
-
Raspberry – For a tart twist.
-
Strawberry – For a sweet twist.
Make It with Different Cheeses
-
Mascarpone – For an even richer filling.
-
Ricotta – For a lighter, fluffier filling.
-
Goat cheese – For a tangy twist.
-
Greek yogurt – For a healthier option.
Make It with Add-Ins
-
Sliced almonds – For crunch.
-
Chopped nuts – Pecans or walnuts for crunch.
-
Chocolate chips – For chocolate lovers.
-
Shredded coconut – For a tropical twist.
-
Fresh berries – For a pop of color and freshness.
Make It Spicier
-
Add cinnamon – A pinch for warmth.
-
Add nutmeg – A pinch for depth.
-
Add cardamom – A pinch for warmth.
Make It with Different Doughs
-
Puff pastry – For a flakier, more elegant danish.
-
Pizza dough – For a heartier, chewier danish.
-
Biscuit dough – For a softer, more rustic danish.
-
Gluten-free crescent dough – For dietary needs.
Pro Tips for the Best Cherry Danishes
-
Use a sharp knife or kitchen shears. For cutting the dough evenly.
-
Press gently. Create a nest for the filling without tearing the dough.
-
Soften the cream cheese. Room temperature cream cheese mixes smoothly.
-
Don’t overfill. The filling will spread as it bakes.
-
Watch them closely. Crescent dough can go from golden to burnt quickly.
-
Drizzle the glaze while warm. It sets beautifully.
-
Serve warm. These are best fresh from the oven.
-
Make extra. They disappear fast!
-
Experiment with fillings. Make them your own.
-
Store properly. Keep in an airtight container in the fridge.
Frequently Asked Questions
Can I use a different type of pie filling?
Yes. Blueberry, apple, peach, raspberry, or strawberry pie filling all work beautifully.
Can I use a different type of cheese?
Yes. Mascarpone, ricotta, goat cheese, or Greek yogurt all work beautifully.
Can I use a different type of dough?
Yes. Puff pastry, pizza dough, biscuit dough, or gluten-free crescent dough all work beautifully.
Can I make these ahead of time?
Yes. Assemble the danishes, cover, and refrigerate for up to 24 hours. Bake as directed, adding a few minutes if needed.
How long do leftovers last?
Store in an airtight container in the refrigerator for up to 3 days. Reheat in the oven or air fryer to restore crispiness.
Can I freeze these danishes?
Yes. Freeze baked danishes in a freezer bag for up to 3 months. Reheat in the oven or air fryer.
Why did my danishes leak?
You may have overfilled them, or the dough wasn’t pressed firmly enough. Use less filling and press firmly.
Why are my danishes not puffy?
The oven may not have been hot enough, or the dough was too warm. Bake at 350°F and keep the dough cold until ready to bake.
Can I add chocolate?
Absolutely! A drizzle of melted chocolate adds a delicious twist.
Can I make these in the air fryer?
Yes. Air fry at 350°F for 8-10 minutes, until golden brown.
Can I double the recipe?
Yes. Use two baking sheets and rotate them halfway through baking.
Is this recipe gluten-free?
Use gluten-free crescent dough for a gluten-free version.
Storage & Reheating
Refrigerator
-
Store cooled danishes in an airtight container for up to 3 days.
-
Reheat in the oven at 350°F for 5-7 minutes, or in the air fryer at 350°F for 3-5 minutes.
Freezer
-
Freeze baked danishes in a freezer bag for up to 3 months.
-
Reheat in the oven or air fryer until hot.
Reheating Tips
-
Oven: Best method. 350°F for 5-7 minutes to restore crispiness.
-
Air Fryer: 350°F for 3-5 minutes.
-
Microwave: Works in a pinch but will soften the dough.
Make-Ahead Tips
-
Prep Ahead: Make the cream cheese filling up to 2 days in advance and store in the refrigerator.
-
Assemble Ahead: Assemble the danishes, cover, and refrigerate for up to 24 hours. Bake as directed.
-
Freeze Ahead: Freeze baked danishes for up to 3 months. Reheat in the oven or air fryer.
The Beauty of Simple, Flaky, Creamy Cherry Danishes
There’s something deeply satisfying about a recipe that delivers big flavor with minimal effort. These Easy Cherry Danishes are the kind of treat that makes people happy—the kind that brings everyone to the table with a smile.
They’re not fancy. They’re not complicated. But they are reliable, crowd-pleasing, and absolutely delicious. And isn’t that what great breakfast treats are all about?
So keep crescent roll dough, cream cheese, powdered sugar, vanilla, cherry pie filling, and milk in your kitchen. And when you need a simple, impressive treat that delivers big flavor with minimal fuss, you’ll know exactly what to make.
Final Verdict
Rating: 5 out of 5
Difficulty: Easy
Prep Time: 10 minutes
Cook Time: 15-17 minutes
Total Time: Approximately 25-30 minutes
Yield: 10 danishes
Cleanup: Minimal (one bowl + one baking sheet)
Leftover potential: Good — reheat in oven or air fryer
Best for: Holiday breakfasts, lazy weekend brunches, or a sweet dessert