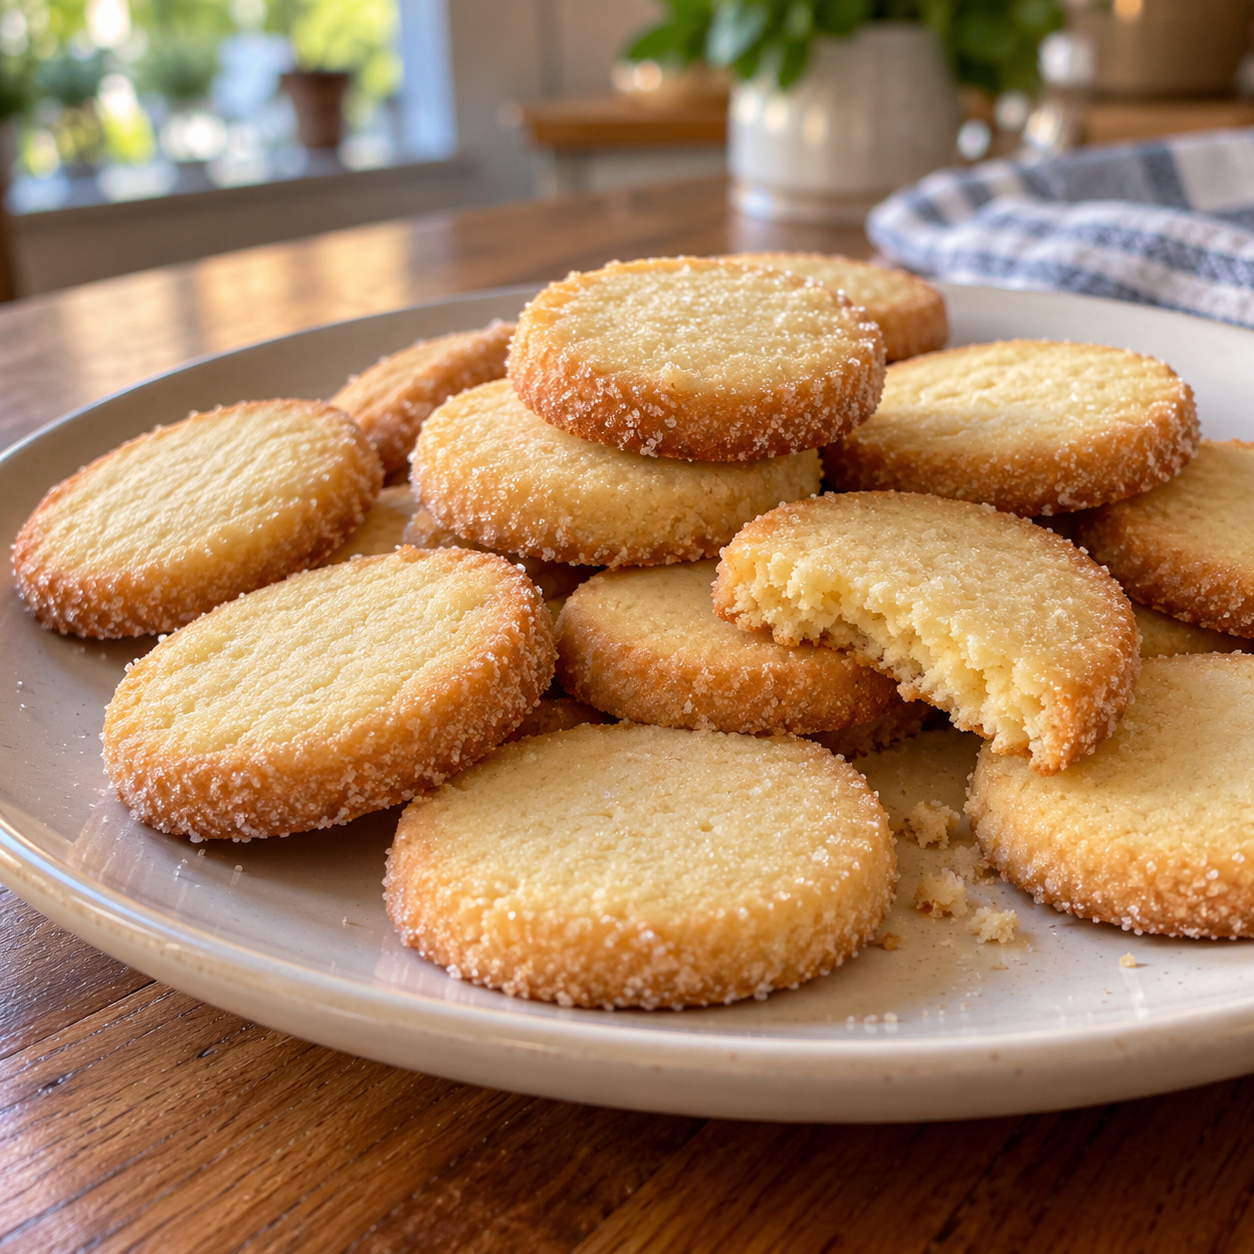
Bottom line up front: This is a complete, ready-to-publish blog article for an Easy 4-Ingredient Butter Cookies recipe. It includes the recipe card, why the recipe works, pro tips, variations, storage advice, FAQs, and serving suggestions — everything you need for a full blog post that ranks and converts.
Introduction
Sometimes the best recipes are the ones with the shortest ingredient lists. These
Easy 4-Ingredient Butter Cookies are proof. Butter, sugar, an egg yolk, and flour — that’s it. No baking powder, no vanilla extract, no secret ingredients. Just four simple pantry staples that come together into rich, tender, buttery cookies with delicate golden edges.
They’re the kind of cookie that feels fancy enough for a holiday cookie platter but simple enough for a Tuesday afternoon. The dough comes together in one bowl, chills for 30 minutes, and bakes in about 10 minutes.
Prep takes 15 minutes, and the recipe yields about 18 cookies.
If you’ve been looking for a back-to-basics butter cookie that delivers maximum flavor with minimum effort, this is it.
Recipe Card
🍪 Easy 4-Ingredient Butter Cookies
Rich, buttery cookies with delicate golden edges—perfect with coffee, tea, or milk!
⏱ Prep: 15 minutes
❄️ Chill: 30 minutes
🔥 Bake: About 10 minutes
🍪 Yield: Approximately 18 cookies
🛒 Ingredients
- ½ cup butter, softened—not melted
- ½ cup sugar
- 1 egg yolk, at room temperature
- 1 cup plus 2 tablespoons all-purpose flour
- Optional: 2 tablespoons granulated sugar for coating
👩🍳 Instructions
- Mix butter, sugar, and egg yolk until well combined.
- Add flour and mix just until a soft dough forms.
- Divide into two logs. Wrap and refrigerate for 30 minutes.
- Preheat oven to 350°F (175°C). Line a baking sheet with parchment.
- Unwrap logs and roll in optional coating sugar. Cut into ⅜-inch-thick slices.
- Arrange on the baking sheet with space between cookies. Bake about 10 minutes, until lightly golden.
- Cool on the baking sheet for 5 minutes, then transfer to a wire rack.
💡 Tips
- Chilling helps the cookies hold their shape.
- Avoid overmixing.
- Store cooled cookies airtight at room temperature for up to one week.
Why This Recipe Works
Four ingredients means nowhere to hide — and that’s the point. Without baking powder, vanilla, or other flavorings, the butter is the star of the show. Use good-quality butter, and these cookies taste rich, clean, and unmistakably buttery.
The egg yolk is the secret to tenderness. Using only the yolk — not the whole egg — keeps the dough rich and tender rather than cakey. The yolk also adds a subtle golden color and helps bind the dough without making it tough.
The flour-to-butter ratio is carefully balanced. One cup plus two tablespoons of flour gives you a dough that’s soft enough to slice but firm enough to hold its shape after chilling. Too little flour and the cookies spread; too much and they turn dry and crumbly.
Chilling the dough is non-negotiable. Thirty minutes in the refrigerator firms up the butter, which prevents the cookies from spreading in the oven. It also makes the dough easier to slice cleanly. Skip this step, and you’ll end up with flat, irregular cookies.
Rolling in sugar before slicing adds sparkle and crunch. That optional coating of granulated sugar creates a delicate, crackly exterior that contrasts beautifully with the tender interior. It’s a small touch that makes these cookies look and taste bakery-worthy.
They bake in about 10 minutes. These are thin, slice-and-bake cookies, so they bake fast. That means you can have fresh cookies on the table in under an hour from start to finish.
Pro Tips for Perfect Results Every Time
Use softened butter, not melted. Softened butter creams properly with the sugar, creating air pockets that give the cookies their light texture. Melted butter will make the dough greasy and the cookies flat.
Room-temperature egg yolk matters. A cold egg yolk can cause the butter to seize up and the dough to curdle. Let the egg sit on the counter for 20–30 minutes before you start.
Mix just until the dough comes together. Overmixing develops the gluten in the flour, which makes the cookies tough instead of tender. Stop as soon as the dough forms a cohesive ball.
Chill for the full 30 minutes — longer is fine. If your kitchen is warm, chill for 45 minutes to an hour. You can even chill the logs overnight, wrapped tightly in plastic wrap. Just let them sit at room temperature for 5 minutes before slicing if they’re very firm.
Slice evenly at ⅜ inch. Uneven slices mean uneven baking. Use a sharp knife and a gentle sawing motion. If the dough crumbles slightly at the edges, press it back together with your fingers.
Roll the logs in sugar before slicing for a bakery-style finish. This creates that sparkling, slightly crunchy exterior. You can also use turbinado sugar or a cinnamon-sugar mixture for variation.
Rotate the baking sheet halfway through. If your oven has hot spots, rotating the pan at the 5-minute mark ensures even browning.
Cool on the baking sheet for 5 minutes first. The cookies are fragile when they first come out of the oven. Letting them set on the warm pan for a few minutes makes them easier to transfer without breaking.
Watch the first batch closely. Ovens vary, and these cookies go from golden to overdone quickly. Ten minutes is a guideline — check at 8 minutes and adjust from there.
Variations and Substitutions
Add vanilla or almond extract. A teaspoon of vanilla extract or ½ teaspoon of almond extract adds a lovely flavor dimension without changing the texture.
Make them citrusy. Add 1 teaspoon of lemon or orange zest to the dough for a bright, fresh twist.
Try a cinnamon-sugar coating. Mix 2 tablespoons of granulated sugar with 1 teaspoon of cinnamon and roll the logs in it before slicing.
Add chopped nuts. Fold ¼ cup of finely chopped pecans, walnuts, or pistachios into the dough for a bit of crunch.
Dip them in chocolate. Once cooled, dip half of each cookie in melted dark, milk, or white chocolate. Let them set on parchment paper.
Make sandwich cookies. Spread a little jam, Nutella, or buttercream between two cooled cookies for an elegant sandwich cookie.
Use brown sugar instead of white. Substitute half or all of the granulated sugar with light brown sugar for a deeper, caramel-like flavor.
Make them gluten-free. Use a 1-to-1 gluten-free all-purpose flour blend in place of the regular flour. The texture will be slightly different but still delicious.
Add sprinkles. Roll the logs in sprinkles instead of sugar for a festive, colorful finish — perfect for birthdays and holidays.
Storage and Reheating
Room temperature: Store cooled cookies in an airtight container at room temperature for up to one week. Add a slice of bread to the container to keep them soft, if desired.
Refrigerator: For longer storage, keep cookies in an airtight container in the refrigerator for up to 2 weeks. Bring to room temperature before serving for the best flavor and texture.
Freezer: These cookies freeze beautifully. Store baked cookies in a freezer-safe bag or container for up to 3 months. You can also freeze the unbaked dough logs, tightly wrapped, for up to 2 months. Slice and bake straight from the freezer, adding 1–2 minutes to the bake time.
Make ahead: Prepare the dough logs up to 3 days in advance and refrigerate, or up to 2 months in advance and freeze. Slice and bake whenever a cookie craving strikes.
No reheating needed: These cookies are best at room temperature. If they soften too much, a quick 3–4 minutes in a 300°F (150°C) oven will crisp them back up.
What to Serve With Them
These buttery cookies are the perfect companion to just about any warm beverage or dessert spread:
- A cup of hot coffee or espresso
- A pot of English breakfast or Earl Grey tea
- A cold glass of milk
- Hot cocoa on a chilly evening
- Vanilla or strawberry ice cream for an easy ice cream sandwich
- Fresh berries for a light, elegant dessert plate
Frequently Asked Questions
Can I use salted butter instead of unsalted?
Yes. If you use salted butter, omit any added salt (this recipe doesn’t call for any) and expect a slightly saltier cookie. It works fine, but unsalted butter gives you more control over the flavor.
Why did my cookies spread too much?
The dough was likely too warm, or the butter was too soft or melted. Chill the dough for the full 30 minutes (or longer), and make sure your butter is softened but still cool to the touch — not greasy.
Why are my cookies dry or crumbly?
Overmixing or adding too much flour will make the cookies dry. Measure your flour carefully by spooning it into the measuring cup and leveling it off with a knife. Also, stop mixing as soon as the dough comes together.
Can I make these cookies without chilling the dough?
You can, but they’ll spread more in the oven and won’t hold their shape as well. Chilling is what gives these slice-and-bake cookies their clean edges and tender texture.
How thin should I slice the cookies?
Aim for about ⅜ inch — roughly the thickness of a pencil. Thinner cookies will be crispier; thicker cookies will be softer and chewier.
Can I double this recipe?
Yes, it doubles easily. Just make sure to mix the dough in a large enough bowl and chill the logs for the full 30 minutes.
Can I freeze the dough?
Absolutely. Wrap the logs tightly in plastic wrap and then foil, and freeze for up to 2 months. Slice and bake from frozen, adding 1–2 minutes to the bake time.
Why do my cookies have pale centers?
They’re underbaked. Every oven is different, so check at 8 minutes and look for lightly golden edges. The centers should look set, not doughy.
Can I use a cookie scoop instead of slicing?
Yes. Instead of forming logs, scoop the dough into 1-inch balls, place them on the baking sheet, and flatten slightly with the bottom of a glass. Bake as directed.
Final Thoughts
These
Easy 4-Ingredient Butter Cookies are the kind of recipe every home baker should have in their back pocket. They’re simple, they’re forgiving, and they deliver big buttery flavor with just four ingredients you probably already have in your kitchen.
They’re perfect for holiday cookie platters, afternoon tea, lunchbox treats, or just because. And because the dough can be made ahead and frozen, you’re never more than 10 minutes away from warm, fresh cookies straight from the oven.
If you make these cookies, I’d love to hear how they turned out. Did you add vanilla? Roll them in cinnamon sugar? Dip them in chocolate? Drop a comment below and let me know — and if you’re planning to make them, pin this recipe so you can find it again the next time a cookie craving strikes.