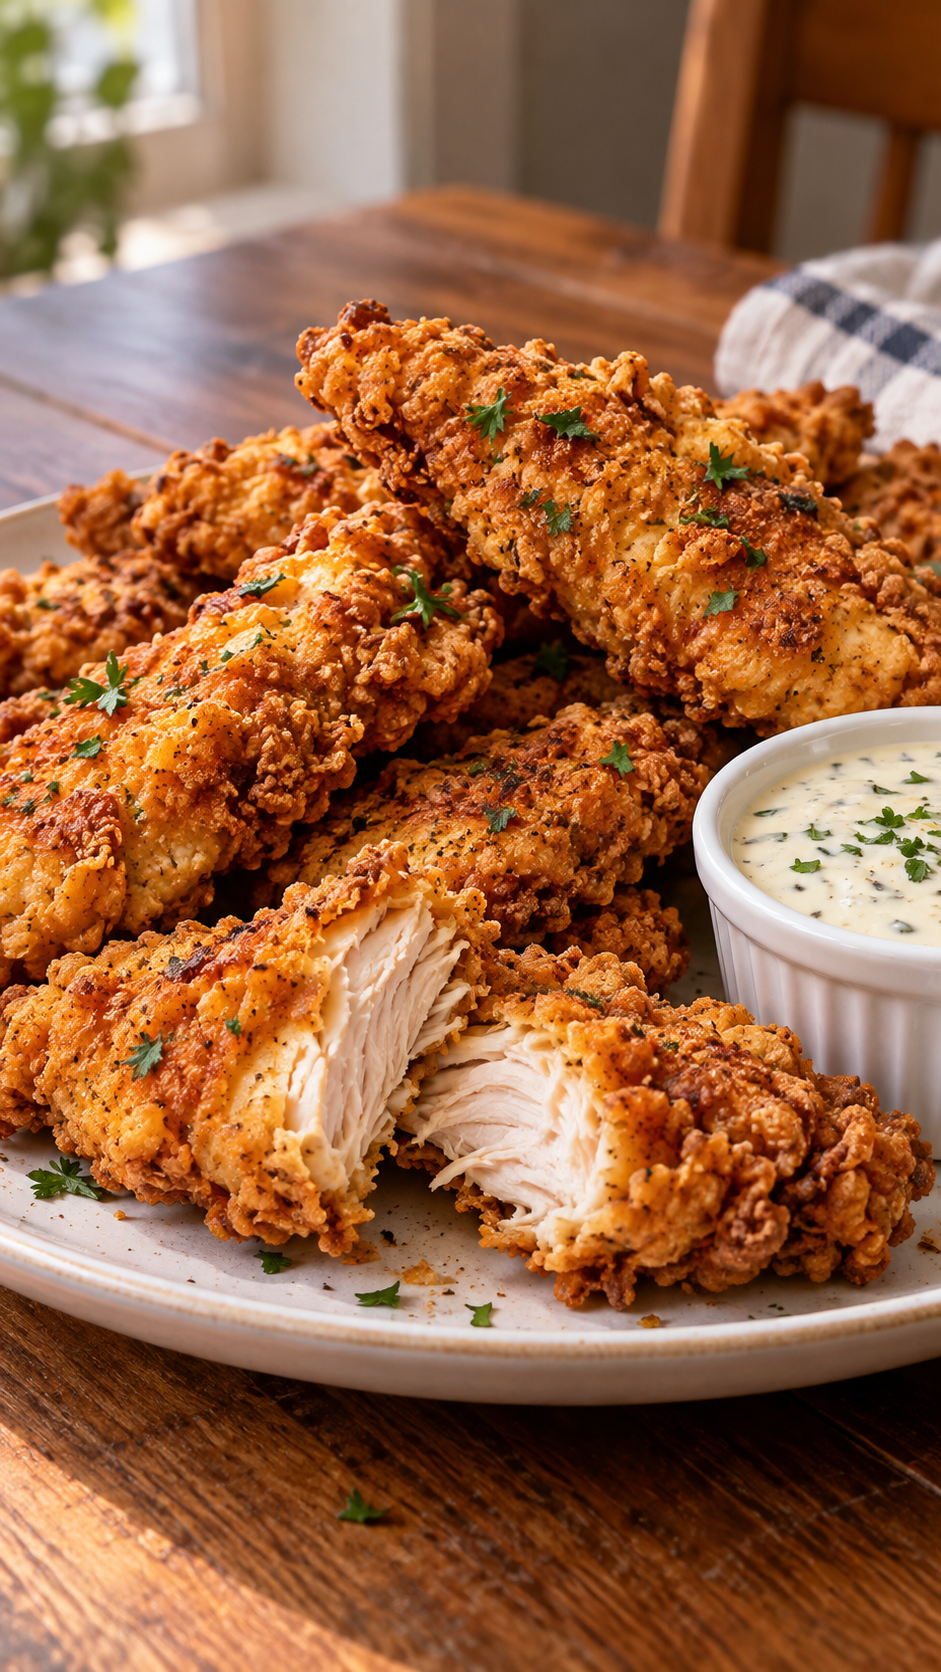
There’s a reason fried chicken tenders never go out of style. That golden, craggy coating that shatters when you bite into it, the juicy chicken underneath, and the endless possibilities for dipping — it’s comfort food at its finest.
These
Crispy Crunchy Fried Chicken Tenders are everything homemade fried chicken should be. The chicken gets seasoned twice — once with a savory spice blend and again in a buttermilk marinade — then dredged in a seasoned flour and cornstarch coating that fries up extra crispy and craggy. The cornstarch and baking powder are the secret to that shatteringly crunchy exterior, while the buttermilk keeps the chicken tender and juicy inside.
Prep takes 20 minutes, the chicken marinates for 30 minutes to 4 hours, and the tenders fry in 15 to 25 minutes in batches. It serves 4 — and they’re perfect for dipping in ranch, honey mustard, BBQ sauce, or anything else you love.
Recipe Card
Crispy Crunchy Fried Chicken Tenders
Golden, craggy coating on the outside and juicy chicken inside! Buttermilk and a seasoned flour coating make these homemade tenders perfect for dipping.
Prep: 20 minutes |
Marinate: 30 minutes–4 hours |
Cook: 15–25 minutes, in batches
Servings: 4
Chicken seasoning
- 500 g (about 1.1 lb) boneless chicken breast, cut into even strips
- 1 teaspoon salt
- 1 teaspoon garlic powder
- 1 teaspoon onion powder
- 1 teaspoon paprika
- ½ teaspoon black pepper
- ½ teaspoon curry powder
- ½ teaspoon dried thyme
Marinade
- 1 cup buttermilk
- 1 large egg
- 1 teaspoon salt
- ½ teaspoon black pepper
Crispy coating
- 2 cups all-purpose flour
- ½ cup cornstarch
- 1 teaspoon baking powder
- 1 teaspoon paprika
- 1 teaspoon garlic powder
- 1 teaspoon onion powder
- 1 teaspoon salt
- ½ teaspoon black pepper
- ½ teaspoon dried thyme
- Vegetable oil, for frying
- Chopped parsley, optional
Instructions
- Season: Pat the chicken dry with paper towels. Toss with all the chicken seasonings.
- Marinate: Whisk the buttermilk, egg, salt, and pepper. Add the chicken, cover, and refrigerate for 30 minutes to 4 hours.
- Prepare the coating: Combine the flour, cornstarch, baking powder, and coating seasonings in a wide bowl.
- Dredge: Lift each strip from the marinade, letting excess drip off. Press firmly into the flour mixture. For a thicker crust, dip briefly back into the marinade and dredge again. Place on a tray and rest for 10 minutes.
- Heat the oil: Add 2–3 inches of oil to a heavy, deep pot, keeping it less than half full. Heat to 340–350°F (170–175°C) using a frying thermometer.
- Fry: Carefully lower in a few strips at a time. Cook for approximately 5–8 minutes, turning occasionally, until golden and the thickest part reaches 165°F (74°C) on an instant-read thermometer.
- Drain: Transfer to a wire rack over a baking sheet. Let the oil return to temperature before adding another batch.
- Serve: Sprinkle with parsley if desired and serve with your favorite dipping sauce.
Why This Recipe Works
The double seasoning builds deep flavor. The chicken gets seasoned twice — once directly with the spice blend and again through the buttermilk marinade. This ensures the meat itself is flavorful, not just the coating.
Buttermilk tenderizes the chicken. The acidity in buttermilk breaks down the proteins in the chicken, making it more tender and juicy. It also helps the flour coating adhere to the surface, so the crust stays on during frying.
Cornstarch is the secret to extra-crispy coating. Combining cornstarch with flour creates a lighter, crispier crust that stays crunchy longer than flour alone. The cornstarch also helps the coating fry up with that craggy, shatteringly crisp texture.
Baking powder adds lift and crunch. A small amount of baking powder in the coating creates tiny bubbles when it hits the hot oil, giving the crust a light, airy, extra-crispy texture.
The 10-minute rest before frying helps the coating set. Letting the dredged tenders rest allows the flour mixture to hydrate and adhere properly, which means less coating falls off in the oil and more stays on the chicken.
Frying at 340–350°F (170–175°C) is the sweet spot. This temperature range cooks the chicken through without burning the coating. If the oil is too cool, the coating absorbs oil and becomes greasy. If it’s too hot, the outside burns before the inside cooks.
Draining on a wire rack keeps the coating crispy. Paper towels trap steam and make the coating soggy. A wire rack allows air to circulate around the tenders, keeping them crispy on all sides.
The curry powder adds a subtle, savory depth. It’s not enough to make the tenders taste like curry — it just adds a warm, slightly earthy note that makes the seasoning blend more complex and interesting.
Pro Tips for Perfect Results Every Time
Pat the chicken completely dry before seasoning. Moisture prevents the seasoning from sticking and can make the coating fall off. Use paper towels and take the extra minute.
Cut the chicken into even strips. Even strips cook at the same rate, so every tender is juicy and cooked through. Uneven pieces mean some will dry out while others are undercooked.
Marinate for at least 30 minutes. Even a short marinade helps tenderize the chicken and infuse it with flavor. For the best results, marinate for 2 to 4 hours.
Don’t marinate longer than 4 hours. The acidity in the buttermilk can start to break down the chicken too much, making it mushy.
Use a wide bowl for dredging. A wide, shallow bowl makes it easy to press the chicken into the flour mixture and coat it evenly.
Press the flour mixture firmly onto the chicken. Don’t just dip — press the coating into the chicken with your fingers. This helps it adhere and creates those craggy, crunchy edges.
For an extra-thick crust, double-dredge. Dip the coated chicken briefly back into the marinade, then press it into the flour mixture again. This creates an even thicker, crunchier coating.
Rest the dredged tenders for 10 minutes before frying. This allows the coating to hydrate and set, which helps it stay on during frying.
Use a frying thermometer. The only reliable way to maintain the right oil temperature is to measure it. Keep the oil between 340–350°F (170–175°C).
Fry in small batches. Adding too many tenders at once drops the oil temperature and steams the chicken instead of frying it. Work in batches of 3–4 tenders.
Let the oil return to temperature between batches. This takes a few minutes, but it’s essential for crispy, evenly cooked chicken.
Use an instant-read thermometer to check doneness. The chicken should reach 165°F (74°C) in the thickest part. This is the most reliable way to know it’s fully cooked.
Drain on a wire rack, not paper towels. A wire rack allows air to circulate around the tenders, keeping them crispy. Paper towels trap steam and make the coating soggy.
Season the tenders with a little extra salt right after frying. A light sprinkle of flaky salt while the tenders are hot adds a final punch of flavor.
Keep finished tenders warm in a low oven. Place them on a wire rack on a baking sheet in a 200°F (95°C) oven while you fry the rest.
Variations and Substitutions
Use chicken thighs instead of breasts. Boneless, skinless chicken thighs are juicier and more flavorful. Adjust the frying time slightly — thighs may need an extra minute or two.
Make it spicier. Add cayenne pepper, chili powder, or a pinch of ghost pepper to the coating. A drizzle of hot honey over the finished tenders is also delicious.
Make it gluten-free. Substitute the all-purpose flour with a 1-to-1 gluten-free flour blend. Verify that your cornstarch, baking powder, and seasonings are gluten-free.
Make it dairy-free. Substitute the buttermilk with a dairy-free alternative, such as almond milk mixed with a tablespoon of lemon juice or vinegar. Use a dairy-free egg substitute if needed.
Bake instead of fry. For a lighter version, spray the coated tenders with cooking spray and bake at 425°F (220°C) for 15–20 minutes, flipping halfway through, until golden and cooked through.
Air fry instead of fry. Air fry at 400°F (200°C) for 10–12 minutes, flipping halfway through, until golden and crispy.
Use panko breadcrumbs for extra crunch. Mix ½ cup of panko breadcrumbs into the flour coating for an even crunchier texture.
Add Parmesan to the coating. Mix ¼ cup of grated Parmesan into the flour mixture for a savory, cheesy crust.
Make it a Nashville hot chicken version. Brush the finished tenders with a spicy cayenne and brown sugar oil for a Nashville hot chicken twist.
Try a different dipping sauce. Ranch, honey mustard, BBQ sauce, chipotle mayo, or a spicy sriracha mayo all pair beautifully.
Storage and Reheating
Refrigerator: Store cooled tenders in an airtight container for up to 4 days. Keep them in a single layer or separate layers with parchment paper to prevent sticking.
Reheating: The best way to reheat is in a 375°F (190°C) oven for 10–15 minutes, or in an air fryer at 375°F (190°C) for 5–7 minutes, until hot and crispy. Microwaving works in a pinch but will make the coating soft rather than crispy.
Freezer: These tenders freeze beautifully. Fry them completely, cool them, then freeze them in a single layer on a baking sheet until solid. Transfer to a freezer-safe bag and freeze for up to 3 months. Reheat from frozen in a 400°F (200°C) oven for 15–20 minutes, or in an air fryer at 375°F (190°C) for 8–10 minutes.
Make ahead: You can season and marinate the chicken up to 4 hours in advance. You can also prepare the coating mixture and store it in an airtight container at room temperature for up to a week. Dredge and fry just before serving.
Freezing uncooked tenders: You can also freeze dredged, uncooked tenders. Freeze them in a single layer, then transfer to a freezer bag. Fry from frozen, adding 1–2 minutes to the cooking time.
What to Serve With Them
These tenders are a complete meal on their own, but a few sides round them out beautifully:
- Ranch, honey mustard, or BBQ sauce for dipping
- French fries or sweet potato fries
- Coleslaw for a cool, crunchy contrast
- Corn on the cob or creamed corn
- Buttermilk biscuits or cornbread
- A simple green salad with a tangy vinaigrette
- Pickles or pickled jalapeños for a tangy kick
Frequently Asked Questions
Can I use chicken thighs instead of breasts?
Yes. Boneless, skinless chicken thighs are juicier and more flavorful. Adjust the frying time slightly — thighs may need an extra minute or two.
Why did my coating fall off during frying?
The chicken wasn’t patted dry, the coating wasn’t pressed on firmly, or the tenders weren’t rested before frying. Pat the chicken dry, press the coating on firmly, and let the dredged tenders rest for 10 minutes.
Why did my tenders turn out greasy?
The oil temperature was too low, or you crowded the pot. Keep the oil between 340–350°F (170–175°C) and fry in small batches.
Can I bake these instead of frying?
Yes. Spray the coated tenders with cooking spray and bake at 425°F (220°C) for 15–20 minutes, flipping halfway through. They won’t be quite as crispy, but they’re still delicious.
Can I air fry these tenders?
Yes. Air fry at 400°F (200°C) for 10–12 minutes, flipping halfway through, until golden and crispy.
Can I make these gluten-free?
Yes. Use a 1-to-1 gluten-free flour blend in place of the all-purpose flour. Verify that your cornstarch, baking powder, and seasonings are gluten-free.
How do I know when the chicken is done?
Use an instant-read thermometer. The chicken should reach 165°F (74°C) in the thickest part.
Can I make these ahead of time?
You can season and marinate the chicken up to 4 hours in advance, or prepare the coating mixture up to a week ahead. Fry just before serving for the crispiest results.
Can I freeze these tenders?
Yes, for up to 3 months. Fry them completely, cool, freeze in a single layer, then transfer to a freezer bag. Reheat in the oven or air fryer until crispy.
How do I keep the tenders crispy after frying?
Drain them on a wire rack instead of paper towels, and keep finished tenders warm in a 200°F (95°C) oven while you fry the rest.
Can I use this recipe for chicken nuggets?
Yes. Cut the chicken into bite-sized pieces instead of strips and reduce the frying time to 3–5 minutes.
What’s the best oil for frying?
Use a neutral oil with a high smoke point, such as vegetable oil, canola oil, peanut oil, or sunflower oil.
Final Thoughts
These
Crispy Crunchy Fried Chicken Tenders are everything homemade fried chicken should be: golden, craggy, shatteringly crispy on the outside, and juicy and flavorful on the inside. The double seasoning, buttermilk marinade, and cornstarch-flour coating come together to create tenders that rival any restaurant version.
They’re perfect for a fun family dinner, a game-day spread, or anytime you’re craving fried chicken but want to make it at home. Serve them with your favorite dipping sauces, and watch them disappear.
If you make these tenders, I’d love to hear how they turned out. Did you make them spicy? Try a different dipping sauce? Bake them instead of frying? Drop a comment below and let me know — and if you’re planning to make them, save this recipe for your next fried chicken craving.