
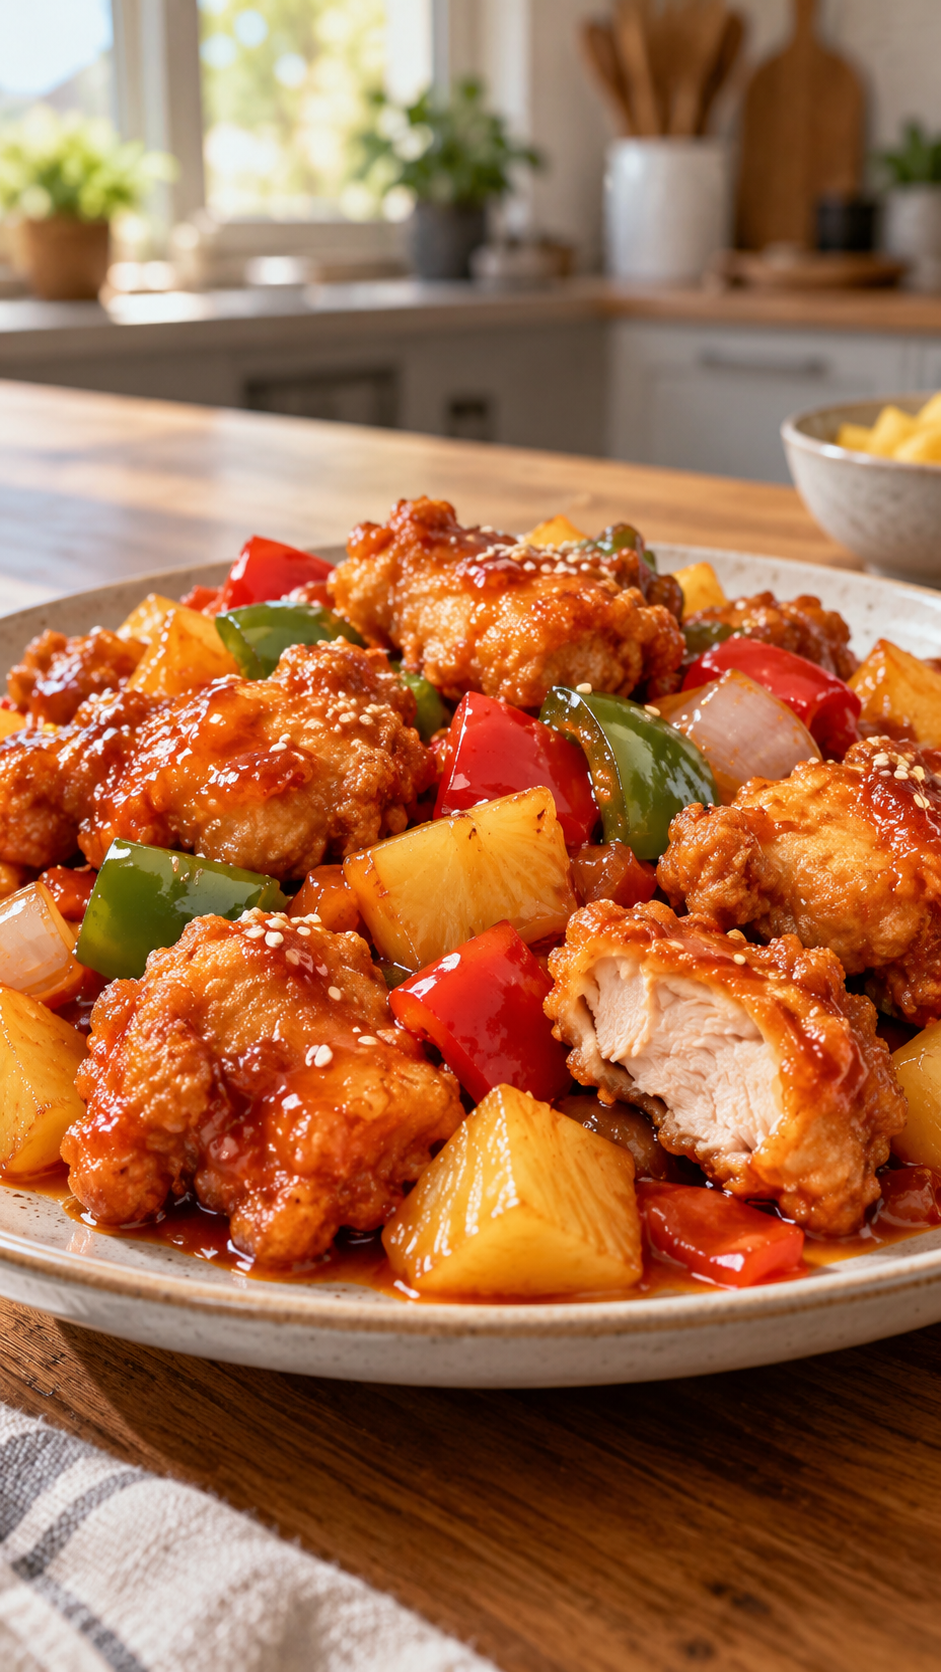
If you’ve ever eaten at Chowking, you know the appeal of their sweet and sour chicken. Crispy golden chicken, bright chunks of pineapple, colorful peppers, and a glossy, tangy sauce that ties it all together. It’s the kind of dish that makes you go back for seconds before you’ve even finished your first plate.
This Chowking-Inspired Sweet & Sour Chicken brings that same restaurant-quality flavor into your own kitchen. The chicken gets a light, crispy coating, the vegetables stay crisp and vibrant, and the sauce strikes that perfect balance between sweet, tangy, and savory. Serve it over steamed rice, and you have a homemade dinner that rivals your favorite takeout.
Prep takes 20 minutes, the chicken marinates for 30, and the whole dish cooks in about 25 minutes. It serves 4 to 6, making it perfect for a family dinner or a weekend treat.
Recipe Card
Chowking-Inspired Sweet & Sour Chicken
Golden fried chicken tossed with pineapple, colorful peppers, and a tangy sauce—an easy homemade dinner to serve with steamed rice!
Prep: 20 minutes | Marinate: 30 minutes | Cook: 25 minutes Servings: 4–6
For the chicken
- 4 boneless, skinless chicken breasts, cut into 1-inch pieces
- ½ teaspoon salt
- ½ teaspoon chicken bouillon powder
- ½ teaspoon ground black pepper
- ¾ cup cornstarch
- 1 egg
- ¼ cup water
- Neutral oil, for frying
For the vegetables
- 1 large onion, cut into chunks
- 1 medium green bell pepper, diced
- 1 medium red bell pepper, diced
- 1 can (227 g / 8 oz) pineapple chunks, drained, juice reserved
- 1 tablespoon neutral oil
For the sauce
- Reserved juice from the pineapple can
- ⅓ cup ketchup
- ¼ cup vinegar
- 2–3 tablespoons brown sugar
- 1 tablespoon soy sauce
- 1 tablespoon oyster sauce
- 2 tablespoons cornstarch
- ½ cup water, plus more as needed
- Sesame seeds, optional garnish
Instructions
- Coat the chicken: Mix chicken with salt, chicken powder, pepper, cornstarch, egg, and ¼ cup water until evenly coated. Cover and refrigerate for 30 minutes.
- Prepare the sauce: Whisk pineapple juice, ketchup, vinegar, 2 tablespoons brown sugar, soy sauce, and oyster sauce together. In a separate bowl, stir the 2 tablespoons cornstarch into ½ cup cold water.
- Fry: Heat about 2 inches of oil in a deep, heavy pot to 350°F (175°C). Fry chicken in small batches for approximately 4–6 minutes, turning as needed, until golden and the centers reach 165°F (74°C). Drain on a wire rack.
- Cook the vegetables: Heat 1 tablespoon oil in a large skillet over medium-high heat. Add onion and peppers; stir-fry for 2–3 minutes, keeping them slightly crisp. Add pineapple and cook for another minute. Transfer to a plate.
- Thicken the sauce: Pour the sauce mixture into the skillet and bring to a gentle simmer. Stir the cornstarch slurry again, then gradually add it while stirring, using enough to reach your preferred thickness. Simmer for 1–2 minutes. Add water if too thick and the remaining sugar if desired.
- Toss and serve: Return the vegetables and pineapple to the pan. Add the fried chicken and gently toss until coated. Sprinkle with sesame seeds if desired and serve immediately.
Why This Recipe Works
The cornstarch coating is the secret to crispy chicken. Cornstarch creates a light, crispy crust that stays crunchy even after the chicken is tossed in the sauce. Unlike a heavy batter, this coating doesn’t absorb too much oil, so the chicken stays tender and juicy inside.
The marinade seasons the chicken from the inside out. Salt, chicken bouillon powder, and black pepper infuse the chicken with savory flavor before it’s even fried. The egg and water help the cornstarch adhere, creating a smooth, even coating.
The sauce strikes the perfect sweet-tangy balance. Ketchup brings sweetness and body, vinegar adds tang, soy sauce and oyster sauce add umami depth, and brown sugar rounds it all out. It’s the classic sweet and sour profile that keeps you coming back for more.
Frying in small batches keeps the oil temperature steady. Crowding the pot drops the oil temperature, which makes the chicken greasy instead of crispy. Small batches ensure each piece fries to golden perfection.
The vegetables stay crisp because they’re stir-fried quickly. A brief stir-fry over high heat keeps the peppers and onions slightly crisp, providing a satisfying contrast to the tender chicken and soft pineapple.
The cornstarch slurry thickens the sauce to a glossy finish. Adding the slurry gradually lets you control the consistency. The result is a sauce that clings to every piece of chicken and vegetable without being too thick or too thin.
It’s faster than takeout and tastes just as good. From start to finish, this dish comes together in about 75 minutes — and most of that is hands-off marinating time. It’s a restaurant-quality meal made at home.
Pro Tips for Perfect Results Every Time
Cut the chicken into even 1-inch pieces. Even pieces cook at the same rate, so every bite is juicy and tender. Uneven pieces mean some will overcook while others are still raw in the center.
Marinate for the full 30 minutes. This gives the seasonings time to penetrate the chicken and the coating time to adhere properly. If you’re short on time, 15 minutes will work, but 30 is better.
Use cornstarch, not flour, for the coating. Cornstarch creates a lighter, crispier crust that stays crunchy longer. Flour produces a heavier, softer coating that absorbs more oil.
Heat the oil to 350°F (175°C). Use a deep-fry thermometer to monitor the temperature. If the oil is too cool, the chicken absorbs oil and becomes greasy. If it’s too hot, the outside burns before the inside cooks through.
Fry in small batches. Adding too much chicken at once drops the oil temperature and steams the chicken instead of frying it. Work in batches of 4–6 pieces.
Drain on a wire rack, not paper towels. A wire rack allows air to circulate around the chicken, keeping it crispy. Paper towels trap steam and make the coating soggy.
Keep the vegetables slightly crisp. Stir-fry them over high heat for just 2–3 minutes. They should be tender-crisp, not soft. They’ll continue to cook slightly when tossed with the hot sauce.
Stir the cornstarch slurry before adding it. Cornstarch settles to the bottom of the bowl quickly. Give it a stir right before pouring it into the sauce.
Add the slurry gradually. You may not need all of it. Add a little at a time, stirring constantly, until the sauce reaches your desired thickness.
Toss the chicken with the sauce at the last minute. Add the fried chicken to the sauce just before serving so it stays as crispy as possible. The longer it sits in the sauce, the softer the coating becomes.
Serve immediately. This dish is at its best fresh out of the pan, when the chicken is crispy, the vegetables are bright, and the sauce is glossy and hot.
Variations and Substitutions
Use chicken thighs instead of breasts. Boneless, skinless chicken thighs are juicier and more flavorful than breasts. They work beautifully in this recipe.
Make it with pork or shrimp. Cubed pork tenderloin or large shrimp can be substituted for the chicken. Adjust the frying time — shrimp cooks in just 2–3 minutes.
Add more vegetables. Carrots, snow peas, broccoli, or water chestnuts all work well. Stir-fry them with the peppers and onions.
Make it spicier. Add red pepper flakes, a drizzle of sriracha, or diced jalapeños to the sauce.
Make it gluten-free. Use gluten-free soy sauce (tamari) and gluten-free oyster sauce. Verify that your ketchup and vinegar are gluten-free.
Bake the chicken instead of frying. For a lighter version, coat the chicken in the cornstarch mixture and bake at 400°F (200°C) on a greased baking sheet for 15–20 minutes, flipping halfway through.
Air fry the chicken. Air fry at 400°F (200°C) for 10–12 minutes, shaking the basket halfway through, until golden and crispy.
Make it a stir-fry. Skip the coating and frying, and stir-fry the chicken directly in the skillet with the vegetables. It’s a lighter, faster version.
Add a pineapple-forward twist. Use fresh pineapple instead of canned, and add a splash of pineapple juice to the sauce for extra brightness.
Storage and Reheating
Refrigerator: Store leftovers in an airtight container for up to 3 days. Keep the chicken and sauce separate if possible — this helps the chicken stay crispier.
Reheating: The best way to reheat is in a skillet over medium heat for 3–4 minutes, or in a 375°F (190°C) oven for 8–10 minutes. This re-crisps the chicken and warms the sauce. Microwaving works in a pinch but will make the coating soft.
Freezer: This dish doesn’t freeze perfectly because the coating can become soggy when thawed. If you want to freeze a batch, freeze the fried chicken separately from the sauce. Reheat the chicken in the oven or air fryer, and warm the sauce on the stovetop.
Make ahead: You can coat and marinate the chicken up to 24 hours in advance. You can also prepare the sauce and chop the vegetables ahead of time and store them in the refrigerator. Fry and assemble just before serving.
Reheating assembled leftovers: Warm in a skillet over medium heat, adding a splash of water if the sauce looks thick. Toss gently until heated through.
What to Serve With It
This dish is a complete meal when served over rice, but a few sides round it out beautifully:
- Steamed white rice or fried rice
- Chow mein or pancit noodles
- Steamed broccoli or bok choy
- Egg rolls or spring rolls
- A light cucumber salad for a cool contrast
- A cold drink like iced tea or a fruit smoothie
Frequently Asked Questions
Can I use chicken thighs instead of breasts? Yes. Boneless, skinless chicken thighs are juicier and more flavorful. They work beautifully in this recipe.
Can I make this without deep-frying? Yes. You can bake the coated chicken at 400°F (200°C) for 15–20 minutes, or air fry it at 400°F (200°C) for 10–12 minutes. The coating won’t be quite as crispy, but it’s still delicious.
Why did my chicken turn out greasy? The oil temperature was too low, or you crowded the pot. Heat the oil to 350°F (175°C) and fry in small batches.
Why did my coating fall off? The chicken wasn’t coated evenly, or the oil wasn’t hot enough. Make sure every piece is fully coated, and let the coated chicken rest for a few minutes before frying.
Can I make the sauce ahead of time? Yes. Whisk the sauce ingredients together and store them in the refrigerator for up to 3 days. Stir well before using.
Can I use fresh pineapple instead of canned? Yes. Use about 1 cup of fresh pineapple chunks and add ¼ cup of pineapple juice to the sauce.
How do I make the sauce thicker? Add more of the cornstarch slurry, a little at a time, until the sauce reaches your desired consistency. Remember that the sauce will thicken slightly as it cools.
Is this dish spicy? Not at all. It’s sweet, tangy, and savory with no heat. If you want spice, add red pepper flakes or sriracha.
Can I make this gluten-free? Yes. Use gluten-free soy sauce (tamari) and gluten-free oyster sauce. Verify that your ketchup and vinegar are gluten-free.
How long does this last in the refrigerator? Up to 3 days in an airtight container. The coating will soften over time, so it’s best enjoyed fresh.
Can I freeze this dish? It doesn’t freeze perfectly because the coating can become soggy. If you want to freeze it, freeze the fried chicken and sauce separately.
Can I double this recipe? Yes. Fry the chicken in batches and use a larger skillet for the sauce and vegetables.
Final Thoughts
This Chowking-Inspired Sweet & Sour Chicken is everything a great homemade dinner should be: crispy, tangy, sweet, and packed with colorful vegetables and juicy pineapple. The chicken gets a light, crispy coating, the sauce strikes the perfect balance of flavors, and the whole dish comes together in about 75 minutes.
It’s perfect for a family dinner, a weekend treat, or anytime you’re craving takeout but want to make it at home. Serve it over steamed rice, and dinner is done.
If you make this dish, I’d love to hear how it turned out. Did you use chicken thighs? Make it spicier? Try a different vegetable? Drop a comment below and let me know — and if you’re planning to make it, save this recipe for your next homemade takeout night.