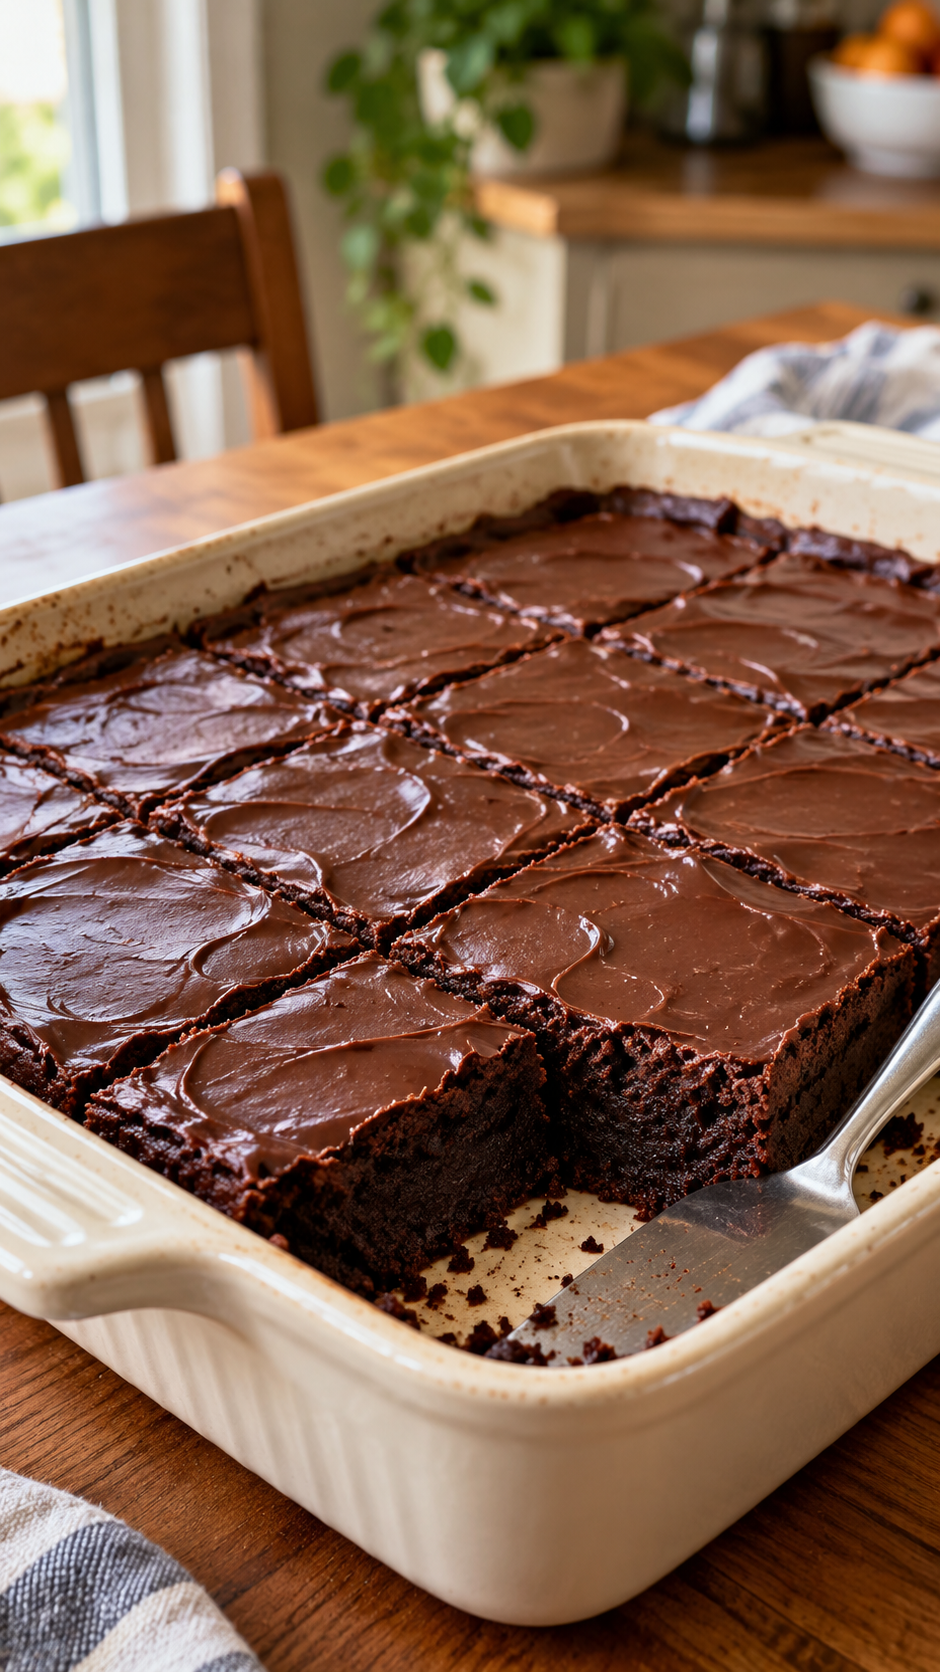
Some desserts are just meant to be shared. This
Chocolate-Topped Brownie Casserole is one of them. Rich, fudgy brownies get baked in one dish, cooled, and then finished with a smooth, glossy chocolate topping that sets into a beautiful, sliceable layer.
It’s the kind of dessert that feels indulgent but comes together with simple ingredients and minimal effort. The brownies are dense, chocolatey, and perfectly fudgy, while the chocolate topping adds a rich, silky finish that makes every bite feel special.
Prep takes 15 minutes, the brownies bake in 22 to 30 minutes, and they cool and chill for about 1 to 2 hours. The recipe makes 16 small squares — perfect for a family dessert, a potluck, or a cozy weekend treat.
Recipe Card
Chocolate-Topped Brownie Casserole 🍫
Rich, fudgy brownies baked in one dish and finished with a smooth chocolate topping.
Prep: 15 minutes |
Bake: 22–30 minutes |
Cooling and chilling: About 1–2 hours
Makes: 16 small squares
For the brownies
- ½ cup unsalted butter, melted
- 1 cup granulated sugar
- 2 large eggs
- 1 teaspoon vanilla extract
- ½ cup all-purpose flour
- ⅓ cup unsweetened cocoa powder
- ¼ teaspoon salt
For the chocolate topping
- 12 ounces semisweet or dark chocolate, chopped
- 1 tablespoon coconut oil
Instructions
- Preheat oven to 350°F (175°C). Lightly grease an 8×8-inch oven-safe casserole dish.
- Whisk melted butter and sugar together. Add eggs one at a time, whisking well, then stir in vanilla.
- Fold in flour, cocoa, and salt just until combined.
- Spread batter evenly in the dish. Bake for 22–30 minutes, checking at 22 minutes. A toothpick should come out with moist crumbs, without wet batter.
- Let the brownies cool completely.
- Microwave chocolate and coconut oil in 20–30-second bursts, stirring between each, until smooth.
- Spread over the cooled brownies. Refrigerate until the topping sets.
- Let stand for 10–15 minutes before cutting into squares with a sharp knife.
Why This Recipe Works
Melted butter creates a dense, fudgy brownie. Unlike softened butter, melted butter doesn’t trap as much air, which means the brownies bake up dense and fudgy rather than cakey. It’s the key to that rich, brownie-like texture.
Whisking the eggs in one at a time creates a smooth, glossy batter. Adding the eggs one at a time and whisking well between each ensures they’re fully incorporated and the batter is smooth and glossy.
Folding in the dry ingredients just until combined keeps the brownies fudgy. Overmixing develops gluten and makes the brownies tough and cakey. Mixing just until the flour disappears keeps them dense and fudgy.
The cocoa powder gives the brownies a deep, rich chocolate flavor. Unsweetened cocoa powder is the backbone of the brownie’s chocolate flavor. It’s what makes them taste like real, from-scratch brownies.
The chocolate topping is the finishing touch. A smooth, glossy layer of melted chocolate and coconut oil adds richness and a beautiful, professional finish. The coconut oil helps the chocolate set smoothly and gives it a slight shine.
Cooling the brownies completely before adding the topping is essential. If the brownies are still warm, the topping will melt and slide off. Patience here is rewarded with a clean, beautiful layer.
Chilling the topping sets it into a sliceable layer. Once the topping is chilled, it becomes firm and glossy, making the brownies easy to cut into neat squares.
Letting the brownies stand for 10–15 minutes before cutting prevents cracking. Room-temperature brownies cut more cleanly than cold ones. A sharp knife and a little patience give you picture-perfect squares.
Pro Tips for Perfect Results Every Time
Use a metal or ceramic 8×8-inch baking dish. A metal or ceramic dish distributes heat evenly and ensures the brownies bake evenly. Avoid glass, which can cause the edges to overbake.
Grease the dish thoroughly. A light coating of butter or cooking spray prevents the brownies from sticking and makes cleanup easier.
Melt the butter and let it cool slightly. Hot butter can cook the eggs. Let it cool for a few minutes before whisking it with the sugar.
Whisk the butter and sugar until smooth. This step dissolves the sugar and creates a smooth, glossy base for the brownies.
Add the eggs one at a time and whisk well between each. This ensures they’re fully incorporated and the batter is smooth and glossy.
Fold in the dry ingredients just until combined. Overmixing develops gluten and makes the brownies tough and cakey. Stop as soon as the flour disappears.
Spread the batter evenly in the dish. An even layer ensures even baking and consistent texture in every square.
Check the brownies at 22 minutes. Ovens vary, and brownies go from fudgy to dry quickly. A toothpick should come out with moist crumbs, not wet batter.
Let the brownies cool completely before adding the topping. Warm brownies will melt the topping and cause it to slide off.
Melt the chocolate and coconut oil in short bursts. Microwave in 20–30-second intervals, stirring between each, until smooth. Overheating can cause the chocolate to seize.
Spread the topping evenly over the cooled brownies. Use an offset spatula or the back of a spoon to spread it in an even layer.
Refrigerate until the topping is fully set. About 1 hour should do it. The topping should be firm and glossy.
Let the brownies stand at room temperature for 10–15 minutes before cutting. This makes them easier to cut without cracking the topping.
Use a sharp knife and wipe it between cuts. A sharp knife and a clean blade give you neat, picture-perfect squares.
Variations and Substitutions
Use milk chocolate for the topping. Milk chocolate gives a sweeter, creamier topping. Dark chocolate gives a richer, less sweet topping.
Add nuts to the brownies. A cup of chopped walnuts or pecans stirred into the batter adds crunch and flavor.
Add chocolate chips to the brownies. A cup of semisweet chocolate chips stirred into the batter adds pockets of melted chocolate.
Add a sprinkle of flaky sea salt. A pinch of flaky sea salt over the chocolate topping before it sets adds a sweet-salty contrast that’s absolutely delicious.
Add a drizzle of caramel. A drizzle of caramel over the chocolate topping adds a sweet, buttery finish.
Make them gluten-free. Use a 1-to-1 gluten-free all-purpose flour blend in place of the regular flour, and verify that all other ingredients are gluten-free.
Make them dairy-free. Use dairy-free butter, dairy-free chocolate, and coconut oil.
Make them a mint chocolate version. Add a teaspoon of peppermint extract to the topping for a mint chocolate twist.
Make them a peanut butter version. Swirl a few spoonfuls of peanut butter into the brownie batter before baking for a peanut butter-chocolate swirl.
Make them a s’mores version. Add crushed graham crackers and mini marshmallows to the batter for a s’mores-inspired twist.
Storage and Reheating
Refrigerator: Store the brownies in an airtight container in the refrigerator for up to 1 week. The topping stays firm and glossy.
Room temperature: These brownies can be stored at room temperature for a few hours, but they’re best kept cold so the topping stays firm.
Freezer: These brownies freeze beautifully. Cut them into squares, wrap each one tightly in plastic wrap and foil, and freeze for up to 3 months. Thaw in the refrigerator before serving.
Make ahead: These brownies are ideal for making ahead. Prepare them up to 3 days in advance and store them covered in the refrigerator.
No reheating needed: These brownies are served cold or at room temperature. Never heat them — the topping will melt.
Serving leftovers: Serve straight from the refrigerator. If the topping has softened at room temperature, return the brownies to the refrigerator for 15–20 minutes to firm up.
Food safety: Since these brownies contain eggs, butter, and dairy, keep them refrigerated and don’t leave them at room temperature for more than 2 hours.
What to Serve With Them
These brownies are delicious on their own, but a few accompaniments take them to the next level:
- A scoop of vanilla ice cream — the classic pairing
- A dollop of whipped cream for extra indulgence
- A drizzle of caramel sauce for a sweet, buttery finish
- A cup of hot coffee or tea for an afternoon treat
- A glass of cold milk
- Fresh berries for a tart contrast
Frequently Asked Questions
Can I use a different type of chocolate for the topping?
Yes. Milk chocolate gives a sweeter, creamier topping. Dark chocolate gives a richer, less sweet topping.
Why did my brownies turn out cakey?
They were overmixed, or they were overbaked. Mix just until the flour disappears, and check for doneness at 22 minutes. A toothpick should come out with moist crumbs, not wet batter.
Why did my topping slide off?
The brownies weren’t completely cool before the topping was added. Let them cool completely before spreading the topping.
Can I make these ahead of time?
Yes. These brownies are ideal for making ahead. Prepare them up to 3 days in advance and store them covered in the refrigerator.
Can I freeze these brownies?
Yes, for up to 3 months. Cut them into squares, wrap each one tightly in plastic wrap and foil, and freeze. Thaw in the refrigerator before serving.
Can I add nuts or chocolate chips?
Yes. A cup of chopped walnuts, pecans, or chocolate chips stirred into the batter adds crunch and flavor.
Can I make these gluten-free?
Yes. Use a 1-to-1 gluten-free all-purpose flour blend in place of the regular flour, and verify that all other ingredients are gluten-free.
Can I make these dairy-free?
Yes. Use dairy-free butter, dairy-free chocolate, and coconut oil.
Can I add flaky sea salt?
Yes. A pinch of flaky sea salt over the chocolate topping before it sets adds a sweet-salty contrast that’s absolutely delicious.
How long do these last in the refrigerator?
Up to 1 week in an airtight container. The topping stays firm and glossy.
Can I double this recipe?
Yes. Use a 9×13-inch baking dish and adjust the bake time as needed.
What’s the best way to cut these brownies?
Let them stand at room temperature for 10–15 minutes, then use a sharp knife and wipe it between cuts for neat, picture-perfect squares.
Final Thoughts
This
Chocolate-Topped Brownie Casserole is everything an indulgent dessert should be: rich, fudgy, and topped with a smooth, glossy layer of chocolate. The brownies are dense and chocolatey, and the topping adds a silky finish that makes every bite feel special.
It’s perfect for a family dessert, a potluck, or a cozy weekend treat. And because it’s easy to make and stores beautifully, it’s the kind of dessert you’ll come back to again and again.
If you make these brownies, I’d love to hear how they turned out. Did you add nuts? Sprinkle on flaky sea salt? Try a mint chocolate version? Drop a comment below and let me know — and if you’re planning to make them, save this recipe for your next cozy baking day.