
Why This Recipe Is an Absolute Keeper
Before we dive into the method, here’s why these caramel apple pie bars will become a staple in your kitchen:
-
All the flavor of apple pie, none of the fuss.No rolling, no crimping, no soggy bottoms.
-
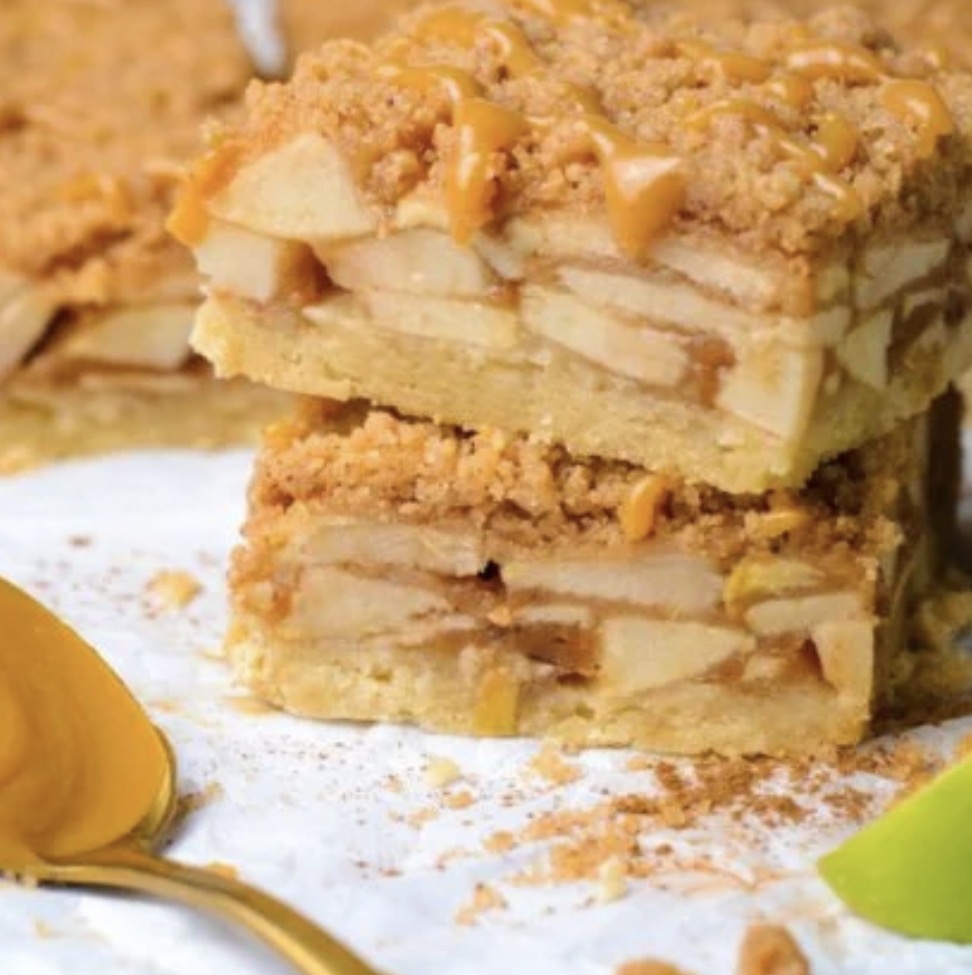
Three delicious layers. Buttery shortbread crust, cinnamon apple filling, and crumbly streusel topping.
-
Caramel drizzle. Takes them from delicious to absolutely irresistible.
-
Perfect for any occasion. Holidays, potlucks, bake sales, or a cozy night in.
-
Crowd-pleasing. Everyone loves these—kids and adults alike.
-
Make-ahead friendly. They actually taste better after chilling overnight.
-
Portable. Easy to slice and serve, no plates or forks required.
-
Customizable. Add nuts, swap the caramel, or use different apples.
-
Beautiful presentation. Looks like they came from a fancy bakery.
-
Great for leftovers. Store in the fridge for up to a week.
The Ingredients
This recipe uses simple, wholesome ingredients that come together beautifully.
For the Shortbread Crust:
-
1¼ cups all-purpose flour – The base of the buttery crust.
-
¼ cup light brown sugar – Adds sweetness and moisture.
-
½ cup unsalted butter, melted and cooled – The key to a tender, buttery crust.
-
½ teaspoon vanilla extract – For warmth and depth.
-
¼ teaspoon salt – Balances the sweetness.
For the Cinnamon Apple Filling:
-
4 medium apples, sliced – Honeycrisp, Fuji, or Granny Smith work beautifully.
-
2 tablespoons all-purpose flour – Thickens the filling.
-
2 tablespoons light brown sugar – Sweetens the apples.
-
1 teaspoon ground cinnamon – The essential warm spice.
-
Pinch of nutmeg – Adds depth and warmth.
-
1 teaspoon vanilla extract – Enhances the apple flavor.
For the Crumb Topping:
-
¾ cup all-purpose flour – The base of the crumble.
-
½ cup light brown sugar – For sweetness and moisture.
-
5 tablespoons unsalted butter, melted and cooled – Creates the crumbly texture.
-
1 teaspoon ground cinnamon – For warmth.
-
¼ teaspoon salt – Balances the sweetness.
For the Topping:
-
Caramel sauce – For drizzling. Store-bought or homemade both work.
Step-by-Step Instructions
Step 1: Preheat and Prep
Preheat the oven to 300°F. Line a 9×9-inch pan with parchment paper, leaving overhang on the sides for easy removal. Set aside.
Pro Tip: Parchment paper is essential for these bars—it makes removing them from the pan and slicing them so much easier.
Step 2: Make the Shortbread Crust
In a medium bowl, stir together the melted butter, light brown sugar, salt, and vanilla. Add the flour and stir until well combined. The mixture will be soft and slightly crumbly.
Pro Tip: Make sure the butter is melted but cooled to room temperature. Hot butter can make the crust greasy.
Step 3: Press and Bake the Crust
Spread the batter evenly into the prepared pan, pressing it down with your fingers or the back of a spoon. Bake for 15 minutes, then remove from the oven.
Pro Tip: Press the crust firmly and evenly. This ensures a solid base for the apple filling.
Step 4: Make the Apple Filling
While the crust bakes, make the apple filling. In a large bowl, combine the sliced apples, vanilla, cinnamon, nutmeg, light brown sugar, and flour. Stir until all of the apple slices are evenly coated.
Pro Tip: Slice the apples thinly and evenly so they cook at the same rate. About ¼-inch thick is perfect.
Step 5: Make the Crumb Topping
In a medium bowl, combine the melted butter, cinnamon, and sugar. Add the flour and salt. Mix with a fork until crumbly. Set aside.
Pro Tip: Don’t overmix the crumble. You want it to be crumbly, not a solid dough.
Step 6: Layer the Apples
Layer the apples on top of the warm crust. Press them down to layer them tightly. This helps them fit in an even layer and ensures every bite has plenty of apple.
Pro Tip: Press the apples down firmly. They’ll shrink as they bake, so a tight layer is key.
Step 7: Add the Crumb Topping
Top the apples with the crumb mixture, spreading it evenly over the surface. Don’t press it down—you want a light, crumbly layer.
Step 8: Bake to Golden Perfection
Bake for 30–35 minutes until golden brown and bubbly around the edges. The apples should be tender, and the topping should be crisp and golden.
Pro Tip: If the topping starts to brown too quickly, cover the pan loosely with foil.
Step 9: Cool and Chill
Remove from the oven and allow to cool for 20–30 minutes at room temperature. Then chill in the fridge for at least 1 hour or overnight. Chilling is essential—it sets the bars and makes them easier to slice.
Pro Tip: Don’t skip the chilling step! Warm bars will fall apart when you try to cut them.
Step 10: Slice and Drizzle
Cut into 9 bars and drizzle each bar with caramel topping. Serve and enjoy!
Pro Tip: For clean cuts, use a sharp knife and wipe it clean between each slice.
How to Serve It Like a Pro
These bars are delicious on their own, but a few simple touches make them even better:
-
With a scoop of vanilla ice cream – The ultimate pairing.
-
With a dollop of whipped cream – Light and fluffy.
-
With a cup of hot coffee – Perfect for fall mornings.
-
With a glass of cold milk – Classic.
-
With a drizzle of extra caramel – Because more is more.
-
With a sprinkle of flaky sea salt – For a sweet-salty contrast.
-
With chopped nuts – Pecans or walnuts add crunch.
-
With a dusting of powdered sugar – For a beautiful finish.
-
At room temperature – The flavors meld beautifully.
-
Chilled – The bars are firmer and easier to eat.
Variations & Swaps (Because Life Happens)
One of the best things about this recipe is how flexible it is. Here are some easy ways to make it your own:
Make It with Different Apples
-
Honeycrisp – Sweet and crisp.
-
Fuji – Sweet and juicy.
-
Granny Smith – Tart and firm.
-
Pink Lady – Sweet-tart and holds shape.
-
Gala – Mild and sweet.
Make It with Different Toppings
-
Vanilla glaze – Instead of caramel.
-
Maple glaze – For a fall twist.
-
Chocolate drizzle – For chocolate lovers.
-
Powdered sugar – For a simple finish.
-
Streusel with nuts – Add chopped pecans or walnuts.
Make It with Add-Ins
-
Nuts – Pecans, walnuts, or almonds in the crumble.
-
Dried fruit – Raisins or cranberries in the filling.
-
Oats – Add ¼ cup rolled oats to the crumble.
-
Coconut – Add shredded coconut to the crumble.
-
Chocolate chips – Sprinkle over the apples before adding the crumble.
Make It with Different Spices
-
Apple pie spice – Instead of cinnamon and nutmeg.
-
Cardamom – A pinch for warmth.
-
Ginger – A pinch for zing.
-
Cloves – A tiny pinch for depth.
Make It Gluten-Free
-
Use gluten-free all-purpose flour blend in the crust, filling, and crumble.
Make It Vegan
-
Use vegan butter and vegan caramel sauce.
Pro Tips for the Best Caramel Apple Pie Bars
-
Use a mix of apples. A combination of sweet and tart apples gives the best flavor.
-
Slice apples evenly. Uniform slices cook at the same rate.
-
Don’t skip the chilling. Chilled bars slice cleanly and hold together.
-
Press the crust firmly. A solid base prevents crumbling.
-
Don’t overmix the crumble. You want it crumbly, not doughy.
-
Watch the topping. If it browns too quickly, cover with foil.
-
Use a sharp knife. For clean cuts, wipe the blade between slices.
-
Drizzle caramel after slicing. This keeps the bars neat and pretty.
-
Store in the fridge. They keep for up to a week.
-
Serve at room temperature or chilled. Both are delicious.
Frequently Asked Questions
Can I use a different size pan?
Yes. An 8×8 pan will give you thicker bars; a 9×13 will give you thinner bars. Adjust baking time accordingly.
Can I use store-bought pie crust instead of making the shortbread?
Yes. Press a refrigerated pie crust into the pan and bake according to the package directions.
Can I use canned apple pie filling?
Yes. Use about 2 cups of apple pie filling instead of the fresh apples and spices.
Can I make these ahead of time?
Yes. These bars actually taste better the next day. Store in the fridge for up to a week.
Can I freeze these bars?
Yes. Wrap individual bars tightly in plastic wrap and freeze for up to 3 months. Thaw in the fridge overnight.
How do I keep the apples from getting mushy?
Use firm apples like Honeycrisp or Granny Smith, and don’t overbake.
Why are my bars falling apart?
They may not have chilled long enough. Chill for at least 1 hour before slicing.
Can I make these gluten-free?
Yes. Use gluten-free all-purpose flour in the crust, filling, and crumble.
Can I make these vegan?
Yes. Use vegan butter and vegan caramel sauce.
Can I add nuts?
Absolutely! Add chopped pecans or walnuts to the crumble topping.
How long do leftovers last?
Store in an airtight container in the refrigerator for up to 5 days.
Can I double the recipe?
Yes. Use a 9×13 pan and increase the baking time by 5-10 minutes.
Storage & Reheating
Refrigerator
-
Store cooled bars in an airtight container for up to 5 days.
-
Serve chilled or at room temperature.
Freezer
-
Wrap individual bars tightly in plastic wrap, then store in a freezer bag for up to 3 months.
-
Thaw in the refrigerator overnight before serving.
Reheating Tips
-
Oven: Warm at 350°F for 5-7 minutes.
-
Microwave: Heat in 15-second intervals until warm.
-
Air Fryer: Warm at 350°F for 3-4 minutes.
Make-Ahead Tips
-
Prep Ahead: Make the crust, filling, and crumble up to 24 hours in advance and store separately in the fridge.
-
Assemble Ahead: Assemble the bars, cover, and refrigerate overnight. Bake as directed.
-
Freeze Ahead: Freeze baked bars for up to 3 months. Thaw and serve.
The Beauty of Simple, Elegant Desserts
There’s something deeply satisfying about a recipe that delivers big flavor with minimal effort. These Caramel Apple Pie Bars are the kind of dessert that makes people happy—the kind that brings everyone to the table with a smile.
They’re not fancy. They’re not complicated. But they are reliable, crowd-pleasing, and absolutely delicious. And isn’t that what great desserts are all about?
So keep flour, brown sugar, butter, apples, and caramel sauce in your kitchen. And when you need a simple, impressive dessert that delivers big flavor with minimal fuss, you’ll know exactly what to make.
Final Verdict
Rating: 5 out of 5
Difficulty: Easy
Prep Time: 25 minutes
Cook Time: 50 minutes
Total Time: 1 hour 15 minutes (plus chilling)
Yield: 9 servings
Cleanup: Moderate (a few bowls + one pan)
Leftover potential: Excellent — tastes even better the next day
Best for: Holidays, potlucks, bake sales, and anytime you need a crowd-pleasing dessert