
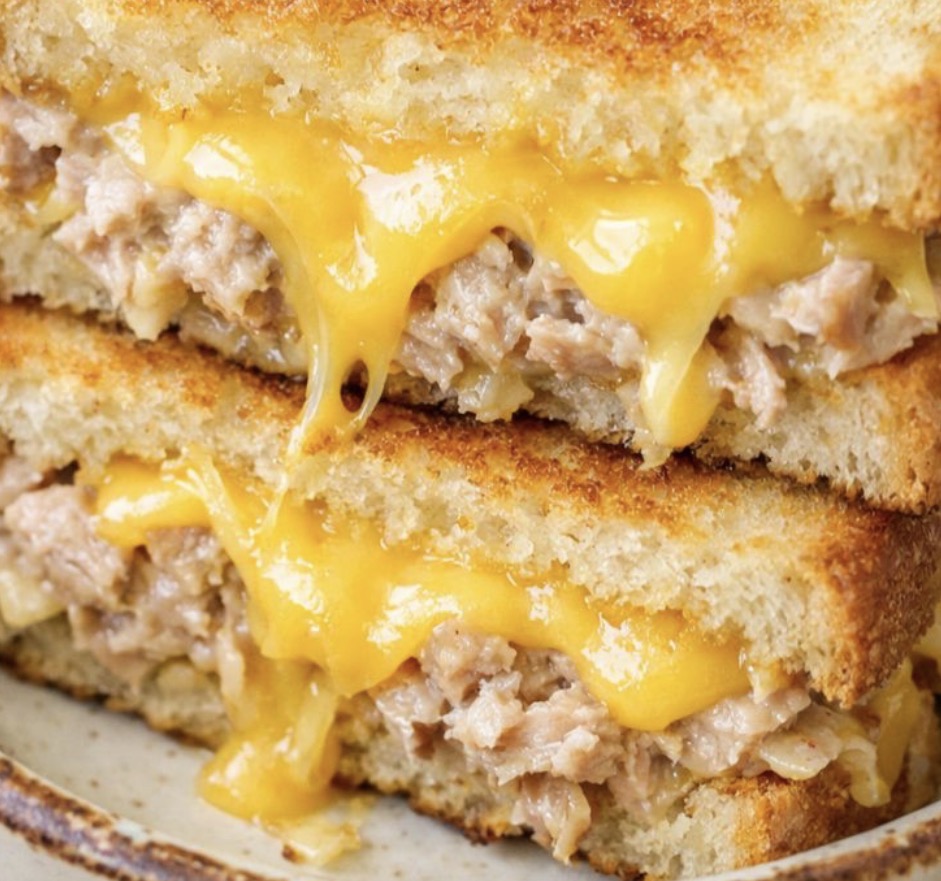
Why This Recipe Is an Absolute Keeper
Before we dive into the method, here’s why this tuna melt will become a staple in your kitchen:
-
Just 4 ingredients. Tuna, mayonnaise, bread, and yellow cheese. That’s it!
-
Quick and easy. Ready in about 10 minutes from start to finish.
-
Crispy, golden, and gooey. Every bite is perfect.
-
Crowd-pleasing. Kids and adults alike love this sandwich.
-
Perfect for any occasion. Lunch, dinner, or a late-night snack.
-
Budget-friendly. Simple, affordable ingredients.
-
Minimal cleanup. One bowl, one skillet.
-
No butter needed. The dry skillet method creates a perfect golden crust.
-
Nostalgic and comforting. Tastes like childhood in every bite.
-
Customizable. Add pickles, onions, or different cheeses.
The Ingredients
This recipe uses simple, affordable ingredients that come together beautifully.
-
1 (5-ounce) can tuna, drained well – Chunk light or solid white albacore both work beautifully.
-
¼ cup mayonnaise – Use a good-quality mayonnaise like Duke’s or Hellmann’s.
-
4 slices sandwich bread – White, wheat, or sourdough all work. White bread is classic.
-
4 slices yellow cheese (American or mild cheddar) – For that gooey, melty, nostalgic finish.
Step-by-Step Instructions
Step 1: Mix the Tuna
In a small bowl, break up the drained tuna with a fork, then stir in the mayonnaise until the fish is evenly coated and creamy. Taste and adjust the mayo if you like it looser or richer.
Pro Tip: Drain the tuna well! Excess liquid makes the sandwich soggy.
Step 2: Assemble the Sandwiches
Lay the 4 slices of bread on the counter. Divide the tuna mixture evenly over 2 slices, spreading it almost to the edges so every bite is creamy. Top the tuna on each sandwich with 2 slices of yellow cheese, overlapping them slightly so they cover the tuna and will melt into a gooey blanket.
Pro Tip: Spread the tuna all the way to the edges—every bite should have tuna and cheese.
Step 3: Top and Press
Place the remaining 2 slices of bread on top of the cheese to form 2 sandwiches, pressing gently so they hold together.
Pro Tip: Press gently but firmly—you want the sandwiches to hold together without squishing the filling out.
Step 4: Toast in a Dry Skillet
Warm a large skillet over medium heat. Once hot, add the sandwiches dry (no butter needed for this version) and cook until the bottom side is golden and crisp, 3 to 4 minutes. Press lightly with a spatula to help the centers heat through and the cheese start to melt.
Pro Tip: No butter needed! The dry skillet creates a perfect golden crust without any added fat.
Step 5: Flip and Finish
Carefully flip each sandwich and cook the second side until it is deeply golden, the bread is crunchy, and the cheese is fully melted and oozing at the edges, another 3 to 4 minutes. If the bread browns too fast, lower the heat so the centers stay gooey without burning the outside.
Pro Tip: Watch the heat! If the bread is browning too quickly, turn the heat down to medium-low.
Step 6: Rest and Serve
Transfer the sandwiches to a plate or a vintage-style bowl if you have one, just like my mother did. Let them sit for a minute to settle, then cut in half and serve while the bread is still crunchy and the cheese is gooey.
Pro Tip: Let them rest for a minute before cutting—this allows the cheese to settle and the bread to stay crunchy.
How to Serve It Like a Pro
This tuna melt is delicious on its own, but a few simple accompaniments make it even better:
-
With tomato soup – The classic pairing.
-
With potato chips – For crunch.
-
With pickles – For tangy contrast.
-
With a simple green salad – Balances the richness.
-
With a bowl of fruit – For a light lunch.
-
With sweet tea – The Southern way.
-
With a glass of cold milk – Classic pairing.
-
With hot sauce – For heat lovers.
-
With extra pickles on the side – For tang.
-
With a sprinkle of fresh dill – For brightness.
Variations & Swaps (Because Life Happens)
One of the best things about this recipe is how flexible it is. Here are some easy ways to make it your own:
Make It with Different Cheeses
-
Swiss – Nutty and elegant.
-
Pepper Jack – For a spicy kick.
-
Monterey Jack – Mild and melty.
-
Colby Jack – A crowd-pleasing favorite.
-
Gruyère – Rich and sophisticated.
Make It with Different Breads
-
Sourdough – Tangy and crusty.
-
Rye – Earthy and hearty.
-
Whole wheat – For a healthier option.
-
Ciabatta – Rustic and chewy.
-
Croissant – Buttery and flaky.
Make It with Add-Ins
-
Pickles – Chopped and mixed into the tuna.
-
Celery – Diced for crunch.
-
Red onion – Finely diced for bite.
-
Green onions – Sliced for freshness.
-
Dill – Fresh for herbal brightness.
-
Lemon juice – A squeeze for tang.
-
Hot sauce – A few dashes for kick.
Make It with Different Tuna
-
Albacore – Solid white, milder flavor.
-
Chunk light – Flakier, more robust flavor.
-
Salmon – Canned salmon works beautifully.
-
Chicken – Canned or shredded chicken for a twist.
Make It in Different Ways
-
Panini press: Press the sandwiches for 5-7 minutes until golden and melty.
-
Oven: Bake at 400°F for 10-12 minutes, flipping halfway.
-
Air Fryer: Cook at 375°F for 6-8 minutes, flipping halfway.
-
Broiler: Assemble open-faced and broil for 2-3 minutes until the cheese is bubbly.
Pro Tips for the Best Tuna Melt
-
Drain the tuna well. Excess liquid makes the sandwich soggy.
-
Use good mayonnaise. Duke’s or Hellmann’s are the gold standard.
-
Spread tuna to the edges. Every bite should have filling.
-
Use 2 slices of cheese. For maximum gooeyness.
-
No butter needed. The dry skillet creates a perfect golden crust.
-
Press lightly. Helps the centers heat through and the cheese melt.
-
Watch the heat. If the bread browns too fast, lower the heat.
-
Let it rest. A minute off heat lets the cheese settle.
-
Cut in half. For easy eating and a beautiful presentation.
-
Serve immediately. These are best fresh from the skillet.
Frequently Asked Questions
Can I use a different type of tuna?
Yes. Albacore, chunk light, or even canned salmon all work beautifully.
Can I use a different type of cheese?
Yes. Swiss, Pepper Jack, Monterey Jack, Colby Jack, or Gruyère all work beautifully.
Can I use a different type of bread?
Yes. Sourdough, rye, whole wheat, ciabatta, or croissant all work beautifully.
Can I make this without mayonnaise?
Yes. Use Greek yogurt, sour cream, or mashed avocado instead.
Can I make this ahead of time?
Yes. Mix the tuna salad up to 2 days in advance and store in the refrigerator. Assemble and cook when ready.
How long do leftovers last?
Store leftover tuna salad in an airtight container in the refrigerator for up to 3 days. Assembled sandwiches are best enjoyed fresh.
Can I freeze this sandwich?
Freezing is not recommended, as the bread and filling can become soggy upon thawing.
Why is my sandwich soggy?
The tuna wasn’t drained well, or the bread absorbed moisture from the filling. Drain the tuna well and assemble just before cooking.
Why is my cheese not melting?
The heat may be too low, or the cheese is too thick. Use medium heat and cover the skillet with a lid to help the cheese melt.
Can I add pickles?
Absolutely! Chopped pickles or relish add a delicious tangy crunch.
Can I make this in the oven?
Yes. Assemble the sandwiches and bake at 400°F for 10-12 minutes, flipping halfway.
Is this recipe gluten-free?
Use gluten-free bread for a gluten-free version.
Storage & Reheating
Refrigerator
-
Store leftover tuna salad in an airtight container for up to 3 days.
-
Assembled sandwiches are best enjoyed fresh but can be stored for up to 1 day.
Freezer
-
Freezing is not recommended due to texture changes in the bread and filling.
Reheating Tips
-
Skillet: Best method. Reheat in a dry skillet over medium heat for 2-3 minutes per side.
-
Oven: Reheat at 350°F for 5-7 minutes.
-
Air Fryer: Reheat at 350°F for 3-4 minutes.
-
Microwave: Works in a pinch but will soften the bread.
Make-Ahead Tips
-
Prep Ahead: Mix the tuna salad up to 2 days in advance and store in the refrigerator.
-
Assemble Ahead: Assemble the sandwiches up to 1 day in advance and store in the refrigerator. Cook when ready.
-
Serve Fresh: These sandwiches are best enjoyed fresh from the skillet.
The Beauty of Simple, Nostalgic Sandwiches
There’s something deeply satisfying about a recipe that delivers big flavor with minimal effort. This 4-Ingredient Tuna Melt is the kind of meal that makes people happy—the kind that brings back childhood memories and creates new ones.
It’s not fancy. It’s not complicated. But it is reliable, crowd-pleasing, and absolutely delicious. And isn’t that what great sandwiches are all about?
So keep tuna, mayonnaise, bread, and yellow cheese in your kitchen. And when you need a simple, impressive meal that delivers big flavor with minimal fuss, you’ll know exactly what to make.
Final Verdict
Rating: 5 out of 5
Difficulty: Easy
Prep Time: 5 minutes
Cook Time: 6-8 minutes
Total Time: Approximately 10-15 minutes
Yield: 2 servings
Cleanup: Minimal (one bowl + one skillet)
Leftover potential: Good — tuna salad keeps for up to 3 days
Best for: Quick lunches, busy weeknights, lazy weekends, and anytime you need a comforting, nostalgic meal