
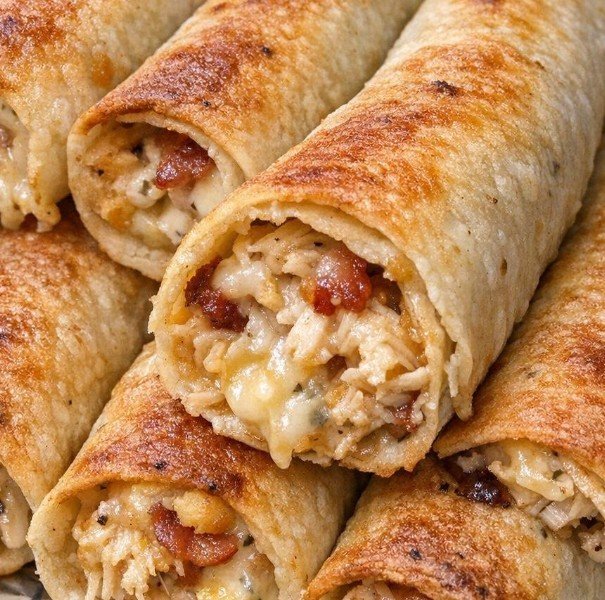
These Baked Chicken Bacon Ranch Taquitos wrap tender shredded chicken, smoky bacon, ranch dressing, and melted cheddar in crisp flour tortillas. The filling comes together in one bowl, and all 12 taquitos bake on a single sheet pan.
What You’ll Need
- Cooked shredded chicken. Break up any long shreds so the filling is easy to portion and roll.
- Crisp bacon. Cook eight slices until crisp, then drain and crumble them. Small pieces distribute evenly through the filling.
- Ranch dressing. Half a cup coats the chicken and holds the filling together.
- Shredded cheddar. Mild cheddar gives the filling a mellow flavor, while sharp cheddar stands out alongside the bacon and ranch.
- Small flour tortillas. Warm them briefly so they bend easily around the filling.
How to Make Chicken Bacon Ranch Taquitos
Mix the chicken, bacon, ranch, and cheddar until evenly combined. Warm the tortillas for a few seconds in the microwave, then divide the filling among them. Spoon it in a narrow line near one edge of each tortilla, leaving a little space at both ends.
Roll each tortilla snugly and place it seam-side down on a lined baking sheet. Leave a little room between the rolls so the exposed sides can crisp. Bake at 425°F (220°C) for 15–18 minutes, until the tortillas are golden and crisp and the filling is hot with melted cheese.
Let the taquitos cool on the tray for a couple of minutes before serving. That short rest lets the melted cheese settle and makes the rolls easier to pick up.
Tips for Crisp Taquitos
- Warm the tortillas in small batches. They’re easiest to roll while still pliable.
- Spread the filling in a narrow line. A compact layer rolls more neatly than a large mound and leaves room for the tortilla to overlap.
- Keep the seam underneath. The weight of the roll helps keep it closed as it bakes.
- Serve dips on the side. The shells stay crisp longer when guests dip each taquito as they eat.
Serving and Reheating
Serve with extra ranch, salsa, or guacamole. For dinner, add a crisp green salad, black beans, or a simple cabbage slaw.
For a head start, mix the filling and refrigerate it in a covered container until you’re ready to roll. Refrigerate baked leftovers promptly and reheat them on a baking sheet until hot throughout to help crisp the tortillas again.
Frequently Asked Questions
Can I use rotisserie chicken?
Yes. Remove the skin and bones, then measure 2 cups of shredded meat. Both breast and thigh meat work well.
Why did my tortillas crack while rolling?
They may have cooled or dried out. Warm them briefly, keep the stack covered with a clean towel, and roll a few at a time.
Can I use a different cheese?
Yes. Use the same amount of Monterey Jack or Colby Jack. Pepper Jack adds a little heat.
Chicken Bacon Ranch Taquitos Recipe Card
Crisp baked flour tortillas filled with shredded chicken, bacon, ranch, and melted cheddar.
- Prep time — About 15 minutes with cooked chicken and bacon
- Bake time — 15–18 minutes
- Yield — 12 taquitos
- Servings — 6, with 2 taquitos each
Ingredients
- 2 cups cooked shredded chicken
- 8 slices bacon, cooked crisp and crumbled
- ½ cup ranch dressing
- 1½ cups shredded cheddar cheese
- 12 small flour tortillas
Instructions
- Preheat the oven to 425°F (220°C). Line a rimmed baking sheet with foil or parchment rated for that temperature.
- Stir together the shredded chicken, crumbled bacon, ranch dressing, and cheddar in a mixing bowl.
- Warm the tortillas briefly until pliable. Divide the filling evenly among them, spooning it near one edge of each tortilla.
- Roll the tortillas snugly and place them seam-side down on the prepared baking sheet with space between them.
- Bake for 15–18 minutes, until the tortillas are crisp and golden and the filling is hot with melted cheese.
- Rest for about 2 minutes, then transfer to a platter and serve warm.