
Why This Recipe Is an Absolute Keeper
Before we dive into the method, here’s why these buttery cheese squares will become a staple in your kitchen:
-
Just 3 ingredients. Self-rising flour, shredded sharp cheddar cheese, and melted butter. That’s it!
-
Quick and easy. Ready in about 40 minutes from start to finish.
-
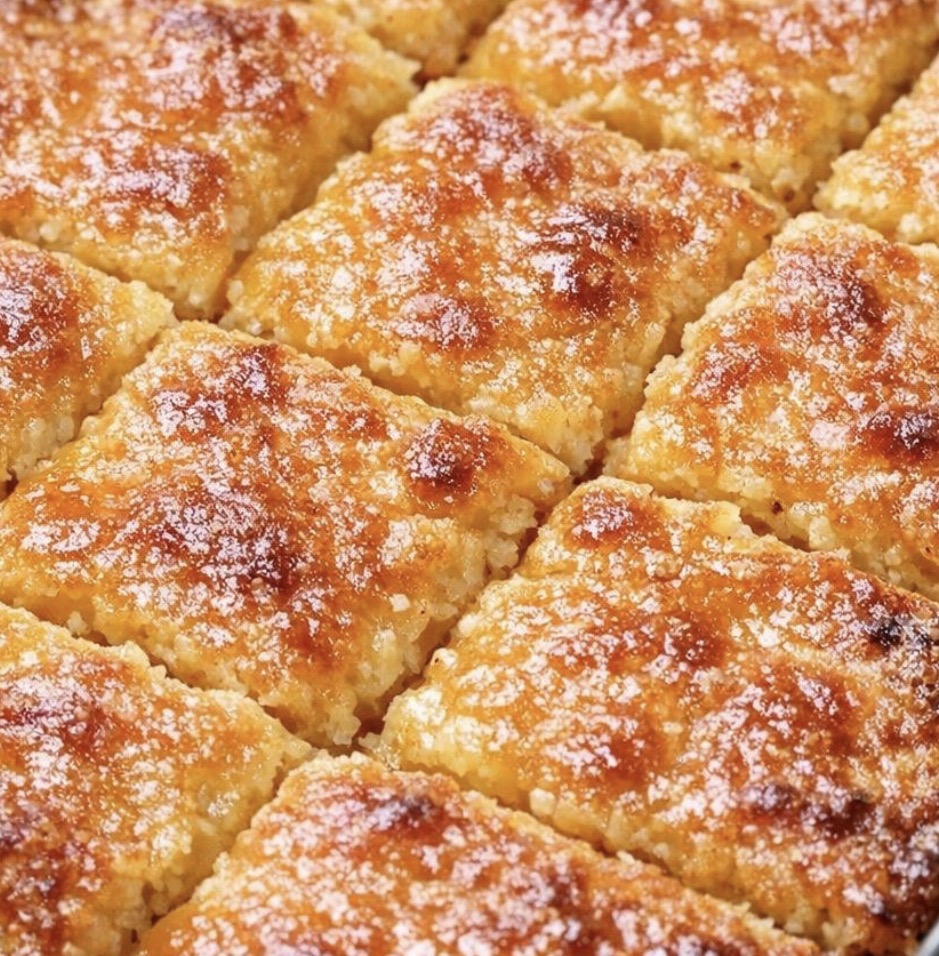
Buttery, cheesy, and golden. Every bite is perfect.
-
Crispy, golden edges. They add texture and depth.
-
Tender, cheesy center. It melts in your mouth.
-
Rich, melted butter. It adds depth and richness.
-
Crowd-pleasing. Kids and adults alike devour these.
-
Perfect for any occasion. Holiday parties, game days, or potlucks.
-
Budget-friendly. Simple, affordable ingredients.
-
Beautiful presentation. Looks like they came from a fancy bakery.
The Ingredients
This recipe uses simple, affordable ingredients that come together beautifully.
-
2 cups self-rising flour – For structure and a tender crumb.
-
2 cups shredded sharp cheddar cheese – For bold, savory flavor.
-
1 cup unsalted butter, melted – For richness and golden crispiness.
Step-by-Step Instructions
Step 1: Preheat and Prep
Preheat the oven to 350°F and lightly grease an 8-inch square baking dish or small casserole dish.
Pro Tip: Grease the dish well so the cheese squares release easily.
Step 2: Combine the Flour and Cheese
In a medium mixing bowl, stir together the self-rising flour and shredded cheddar cheese until the cheese is evenly coated in flour.
Pro Tip: Coating the cheese in flour helps it distribute evenly throughout the dough.
Step 3: Add the Butter
Pour in the melted butter and mix just until a thick, slightly sticky dough forms with no dry pockets of flour remaining.
Pro Tip: Don’t overmix—stir just until the dough comes together.
Step 4: Press into the Dish
Press the dough evenly into the prepared baking dish, smoothing the top so it bakes into neat squares.
Pro Tip: Press firmly and evenly for uniform squares.
Step 5: Bake to Golden Perfection
Bake for 25 to 30 minutes, until the top is deeply golden and the edges are crisp and bubbling.
Pro Tip: Watch the edges—they’ll brown first. That’s where the crispiness is.
Step 6: Cool and Serve
Let the cheese squares rest for 10 minutes, then cut into 12 squares and serve warm.
Pro Tip: Serve warm with a pat of butter or a drizzle of honey for extra flavor.
Variations & Tips
Use extra-sharp cheddar: If you want a more pronounced cheese flavor, choose extra-sharp cheddar rather than mild. Because the ingredient list is so short, the flavor of the cheese makes a noticeable difference in the finished squares.
-
For a spicier kick: Add a pinch of cayenne, red pepper flakes, or diced jalapeños.
-
For extra flavor: Add garlic powder, onion powder, or dried herbs to the flour mixture.
-
For a cheesy twist: Use a blend of cheddar, Gruyère, and Parmesan.
-
For a golden top: Brush the tops with melted butter before baking.
-
For a crispier texture: Bake for an additional 3-5 minutes.
-
For a softer texture: Bake for the minimum time and cover with foil if the top browns too quickly.
-
For a gluten-free version: Use gluten-free self-rising flour.
-
For a vegan version: Use vegan butter and vegan cheddar cheese.
How to Serve It Like a Pro
These buttery cheese squares are delicious on their own, but a few simple accompaniments make them even better:
-
With a bowl of soup – For dipping.
-
With a simple green salad – Balances the richness.
-
With a cup of coffee – Perfect for breakfast.
-
With a glass of cold milk – Classic pairing.
-
With a glass of sweet tea – The Southern way.
-
On a party platter – Arrange with other appetizers.
-
With a pat of butter – For extra richness.
-
With a drizzle of honey – For a sweet-savory twist.
-
With a sprinkle of flaky sea salt – For extra flavor.
-
With a dash of hot sauce – For heat lovers.
Pro Tips for the Best Buttery Cheese Squares
-
Use sharp cheddar. It gives the best flavor.
-
Shred your own cheese. Freshly shredded melts better than pre-shredded.
-
Coat the cheese in flour. Helps it distribute evenly.
-
Don’t overmix. Stir just until the dough comes together.
-
Press firmly. For uniform squares.
-
Watch the edges. They’ll brown first. That’s where the crispiness is.
-
Let them rest. The 10-minute rest allows the squares to set.
-
Serve warm. These are best fresh from the oven.
-
Make extra. They disappear fast!
-
Experiment with add-ins. Make them your own.
Frequently Asked Questions
Can I use a different type of cheese?
Yes. Extra-sharp cheddar, Gruyère, Parmesan, or Pepper Jack all work beautifully.
Can I use all-purpose flour instead of self-rising flour?
Yes, but you’ll need to add 1½ teaspoons baking powder and ¼ teaspoon salt per cup of flour.
Can I use salted butter?
Yes. Salted butter adds a nice contrast, but reduce any added salt.
Can I make these ahead of time?
Yes. Assemble the dough, press it into the dish, cover, and refrigerate for up to 24 hours. Bake as directed, adding a few minutes if needed.
How long do leftovers last?
Store in an airtight container at room temperature for up to 3 days, or in the refrigerator for up to 5 days. Reheat in the oven or microwave.
Can I freeze these cheese squares?
Yes. Freeze baked squares in a freezer bag for up to 3 months. Thaw at room temperature and reheat in the oven.
Why are my cheese squares dry?
You may have overbaked them. Check at the minimum time.
Why are my cheese squares crumbly?
The dough may have been too dry, or you didn’t press it firmly enough. Add a tablespoon of milk if needed and press firmly.
Can I add vegetables?
Absolutely! Diced jalapeños, bell peppers, or green onions all work beautifully.
Can I make these in the air fryer?
Yes. Air fry at 350°F for 15-20 minutes, until golden and crispy.
Can I double the recipe?
Yes. Use a 9×13 baking dish and increase the baking time by 5-10 minutes.
Is this recipe gluten-free?
Use gluten-free self-rising flour for a gluten-free version.
Storage & Reheating
Room Temperature
-
Store in an airtight container for up to 3 days.
Refrigerator
-
Store in an airtight container for up to 5 days. Reheat in the oven or microwave.
Freezer
-
Freeze baked squares in a freezer bag for up to 3 months. Thaw at room temperature and reheat in the oven.
Reheating Tips
-
Oven: Best method. 350°F for 5-7 minutes to restore crispiness.
-
Air Fryer: 350°F for 3-5 minutes.
-
Microwave: Works in a pinch but will soften the squares.
Make-Ahead Tips
-
Prep Ahead: Mix the dry ingredients up to 3 days in advance.
-
Assemble Ahead: Press the dough into the dish, cover, and refrigerate for up to 24 hours. Bake as directed.
-
Freeze Ahead: Freeze baked squares for up to 3 months. Thaw and reheat gently.
The Beauty of Simple, Buttery, Cheesy Southern Squares
There’s something deeply satisfying about a recipe that delivers big flavor with minimal effort. These Southern 3-Ingredient Buttery Cheese Squares are the kind of treat that makes people happy—the kind that brings everyone to the table with a smile.
They’re not fancy. They’re not complicated. But they are reliable, crowd-pleasing, and absolutely delicious. And isn’t that what great Southern cooking is all about?
So keep self-rising flour, shredded sharp cheddar cheese, and butter in your kitchen. And when you need a simple, impressive treat that delivers big flavor with minimal fuss, you’ll know exactly what to make.
Final Verdict
Rating: 5 out of 5
Difficulty: Easy
Prep Time: 10 minutes
Cook Time: 25-30 minutes
Total Time: Approximately 40-45 minutes
Yield: 12 squares
Cleanup: Minimal (one bowl + one baking dish)
Leftover potential: Good — reheat in oven or microwave
Best for: Holiday parties, game days, potlucks, and anytime you need a crowd-pleasing treat