
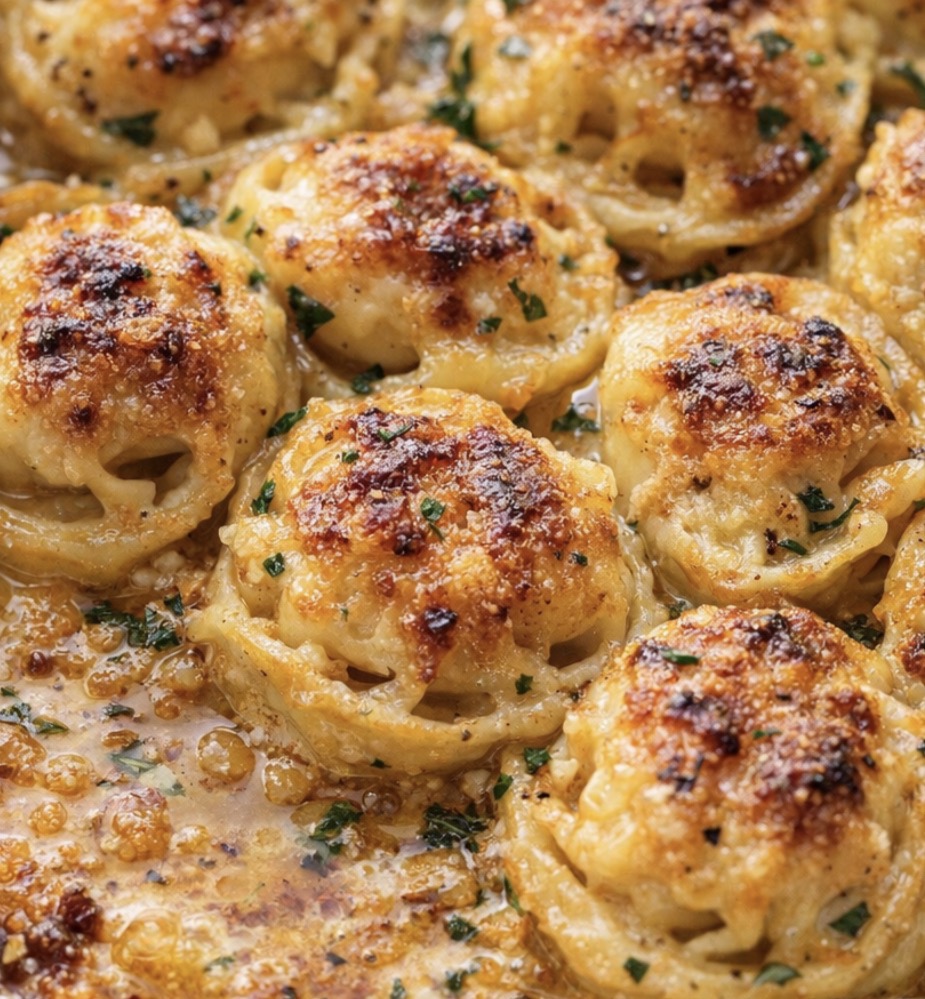
Why This Recipe Is an Absolute Keeper
Before we dive into the method, here’s why this garlic butter tortellini will become a staple in your kitchen:
-
Just 4 ingredients. Cheese tortellini, butter, garlic, and Parmesan cheese. That’s it!
-
Quick and easy. Ready in about 25 minutes from start to finish.
-
Crispy, golden, and garlicky. Every bite is perfect.
-
Rich, buttery garlic sauce. It soaks into every crevice.
-
Golden, crusty Parmesan topping. It bakes into a crispy, irresistible layer.
-
Crowd-pleasing. Kids and adults alike devour this.
-
Perfect for any occasion. Busy weeknights, lazy Sundays, or holiday dinners.
-
Budget-friendly. Simple, affordable ingredients.
-
Minimal cleanup. One pot, one baking sheet.
-
Beautiful presentation. Looks like it came from a fancy Italian restaurant.
The Ingredients
This recipe uses simple, affordable ingredients that come together beautifully.
-
1 pound refrigerated cheese tortellini – The star of the show.
-
½ cup (1 stick) unsalted butter – For richness and to create the garlic butter sauce.
-
4 large cloves garlic, finely minced – For aromatic, savory depth.
-
1 cup grated Parmesan cheese, divided – For a salty, nutty, golden crust.
Step-by-Step Instructions
Step 1: Preheat and Prep
Preheat your oven to 400°F (200°C). Line a rimmed baking sheet with aluminum foil, making sure the foil comes up the sides a bit to catch the butter. Lightly grease the foil with a small dab of butter or cooking spray to help prevent sticking.
Pro Tip: Foil makes cleanup a breeze and catches the butter so it doesn’t burn on the pan.
Step 2: Cook the Tortellini
Bring a large pot of salted water to a boil. Add the cheese tortellini and cook just until they float and are barely tender, 2–3 minutes less than the package directions (they will finish in the oven). Drain well, shaking the colander gently so excess water doesn’t thin the butter sauce.
Pro Tip: Undercook the tortellini slightly—they’ll finish cooking in the oven.
Step 3: Make the Garlic Butter
While the tortellini cook, melt the butter in a small saucepan over low heat. Add the minced garlic and cook, stirring often, for 1–2 minutes until fragrant and just starting to turn a light golden color. Do not let the garlic brown too much or it will taste bitter. Remove from heat.
Pro Tip: Keep the heat low—burnt garlic is bitter and will ruin the dish.
Step 4: Toss the Tortellini
In a large bowl, combine the drained tortellini with the melted garlic butter and ½ cup of the grated Parmesan. Gently toss until every piece of tortellini is coated in the garlicky butter and cheese.
Pro Tip: Toss gently so the tortellini don’t break apart.
Step 5: Spread on the Baking Sheet
Spread the coated tortellini out in a single, even layer on the prepared foil-lined baking sheet. Scrape every bit of the garlic butter from the bowl over the pasta so nothing is wasted.
Pro Tip: Single layer = crispy edges. Don’t overcrowd the pan.
Step 6: Add the Parmesan
Sprinkle the remaining ½ cup Parmesan evenly over the top of the tortellini, making sure to cover as much of the surface as you can. This will create that crusty, golden cheese layer as it bakes.
Pro Tip: Be generous with the Parmesan—it creates that golden, crusty topping.
Step 7: Bake to Golden Perfection
Place the baking sheet in the preheated oven and bake for 15–20 minutes, or until the tortellini edges are lightly crisp, the garlic butter is bubbling, and the Parmesan on top is melted and golden brown with some crusty spots.
Pro Tip: Watch them closely toward the end—the cheese can go from golden to burnt quickly.
Step 8: Optional Broil
For an extra-crispy top, you can move the pan under the broiler for 1–2 minutes at the end, watching closely so the cheese does not burn.
Pro Tip: Stay by the oven! Broiling can go from perfect to burnt in seconds.
Step 9: Rest and Serve
Remove from the oven and let the tortellini rest on the sheet for 3–5 minutes; the butter will settle into a silky sauce and the cheese crust will firm up slightly. Serve straight from the pan or transfer to a warm serving dish, spooning any garlic butter and crispy cheese bits from the foil over the top.
Pro Tip: The rest time allows the butter to settle and the cheese to firm up.
How to Serve It Like a Pro
This garlic butter tortellini is delicious on its own, but a few simple accompaniments make it a complete meal:
-
With a simple green salad – Balances the richness.
-
With roasted vegetables – Broccoli, zucchini, or asparagus.
-
With crusty bread – For soaking up the garlic butter.
-
With a sprinkle of red pepper flakes – For heat.
-
With fresh herbs – Basil, parsley, or oregano.
-
With a glass of white wine – Chardonnay or Sauvignon Blanc.
-
With a glass of red wine – Chianti or Merlot.
-
As a side dish – Serve alongside a roast or chicken.
-
As a main course – Serve with a side of marinara for dipping.
-
With a sprinkle of lemon zest – For bright citrus flavor.
Variations & Swaps (Because Life Happens)
One of the best things about this recipe is how flexible it is. Here are some easy ways to make it your own:
Make It with Different Tortellini
-
Meat tortellini – For a heartier twist.
-
Spinach and ricotta tortellini – For a veggie boost.
-
Mushroom tortellini – For earthy depth.
-
Gluten-free tortellini – For dietary needs.
Make It with Different Cheeses
-
Pecorino Romano – For a sharper, saltier flavor.
-
Asiago – For a nutty, savory twist.
-
Gruyère – Nutty and sophisticated.
-
Mozzarella – For a gooey, melty twist.
Make It with Add-Ins
-
Red pepper flakes – A pinch for heat.
-
Fresh herbs – Basil, parsley, or oregano.
-
Sun-dried tomatoes – Chopped for tang.
-
Spinach – Wilted and tossed with the tortellini.
-
Mushrooms – Sliced and sautéed.
-
Bacon – Crumbled for smoky crunch.
Make It Spicier
-
Add cayenne – A pinch for heat.
-
Add red pepper flakes – A pinch for warmth.
-
Add jalapeños – Minced for fresh heat.
-
Add hot sauce – A few dashes for kick.
Make It in the Air Fryer
-
Air fry at 375°F for 8-10 minutes, shaking the basket halfway through.
Pro Tips for the Best Garlic Butter Tortellini
-
Undercook the tortellini. They’ll finish cooking in the oven.
-
Drain well. Excess water thins the butter sauce.
-
Keep the garlic from burning. Burnt garlic is bitter.
-
Toss gently. Don’t break the tortellini apart.
-
Single layer on the pan. For crispy edges.
-
Be generous with Parmesan. It creates the golden crust.
-
Watch them closely. The cheese can go from golden to burnt quickly.
-
Let them rest. The 3-5 minute rest allows the butter to settle.
-
Serve warm. These are best fresh from the oven.
-
Make extra. They disappear fast!
Frequently Asked Questions
Can I use a different type of tortellini?
Yes. Meat, spinach and ricotta, mushroom, or gluten-free tortellini all work beautifully.
Can I use dried tortellini instead of refrigerated?
Yes. Cook according to package directions, then proceed with the recipe.
Can I use a different type of cheese?
Yes. Pecorino Romano, Asiago, Gruyère, or mozzarella all work beautifully.
Can I use salted butter?
Yes. Salted butter adds a nice contrast, but the Parmesan is already salty, so you may want to use unsalted butter.
Can I make this ahead of time?
Yes. Assemble the tortellini on the baking sheet, cover, and refrigerate for up to 4 hours. Bake as directed.
How long do leftovers last?
Store in an airtight container in the refrigerator for up to 3 days. Reheat in the oven or air fryer to restore crispiness.
Can I freeze this dish?
Freezing is not recommended, as the tortellini can become mushy upon thawing.
Why are my tortellini not crispy?
They may have been overcrowded on the pan, or the oven wasn’t hot enough. Spread them in a single layer and bake at 400°F.
Why did my garlic burn?
The heat was too high, or you cooked it too long. Keep the heat low and stir constantly.
Can I add vegetables?
Absolutely! Spinach, mushrooms, or sun-dried tomatoes all work beautifully.
Can I make this in the air fryer?
Yes. Air fry at 375°F for 8-10 minutes, shaking the basket halfway through.
Can I double the recipe?
Yes. Use two baking sheets and rotate them halfway through baking.
Storage & Reheating
Refrigerator
-
Store cooled tortellini in an airtight container for up to 3 days.
-
Reheat in the oven at 375°F for 5-7 minutes, or in the air fryer at 375°F for 3-5 minutes.
Freezer
-
Freezing is not recommended due to texture changes in the tortellini.
Reheating Tips
-
Oven: Best method. 375°F for 5-7 minutes to restore crispiness.
-
Air Fryer: 375°F for 3-5 minutes.
-
Microwave: Works in a pinch but will soften the tortellini.
Make-Ahead Tips
-
Prep Ahead: Cook the tortellini and make the garlic butter up to 24 hours in advance. Store separately in the refrigerator.
-
Assemble Ahead: Toss the tortellini with garlic butter and Parmesan, spread on a baking sheet, cover, and refrigerate for up to 4 hours. Bake as directed.
-
Freeze Ahead: Freezing is not recommended.
The Beauty of Simple, Crispy, Garlicky Tortellini
There’s something deeply satisfying about a recipe that delivers big flavor with minimal effort. This Oven Baked 4-Ingredient Garlic Butter Tortellini is the kind of meal that makes people happy—the kind that brings everyone to the table with a smile.
It’s not fancy. It’s not complicated. But it is reliable, crowd-pleasing, and absolutely delicious. And isn’t that what great comfort food is all about?
So keep cheese tortellini, butter, garlic, and Parmesan cheese in your kitchen. And when you need a simple, impressive meal that delivers big flavor with minimal fuss, you’ll know exactly what to make.
Final Verdict
Rating: 5 out of 5
Difficulty: Easy
Prep Time: 10 minutes
Cook Time: 15-20 minutes
Total Time: Approximately 25-30 minutes
Yield: 4 servings
Cleanup: Minimal (one pot + one baking sheet)
Leftover potential: Good — reheat in oven or air fryer
Best for: Busy weeknights, lazy Sundays, holiday dinners, and anytime you need a crowd-pleasing meal