
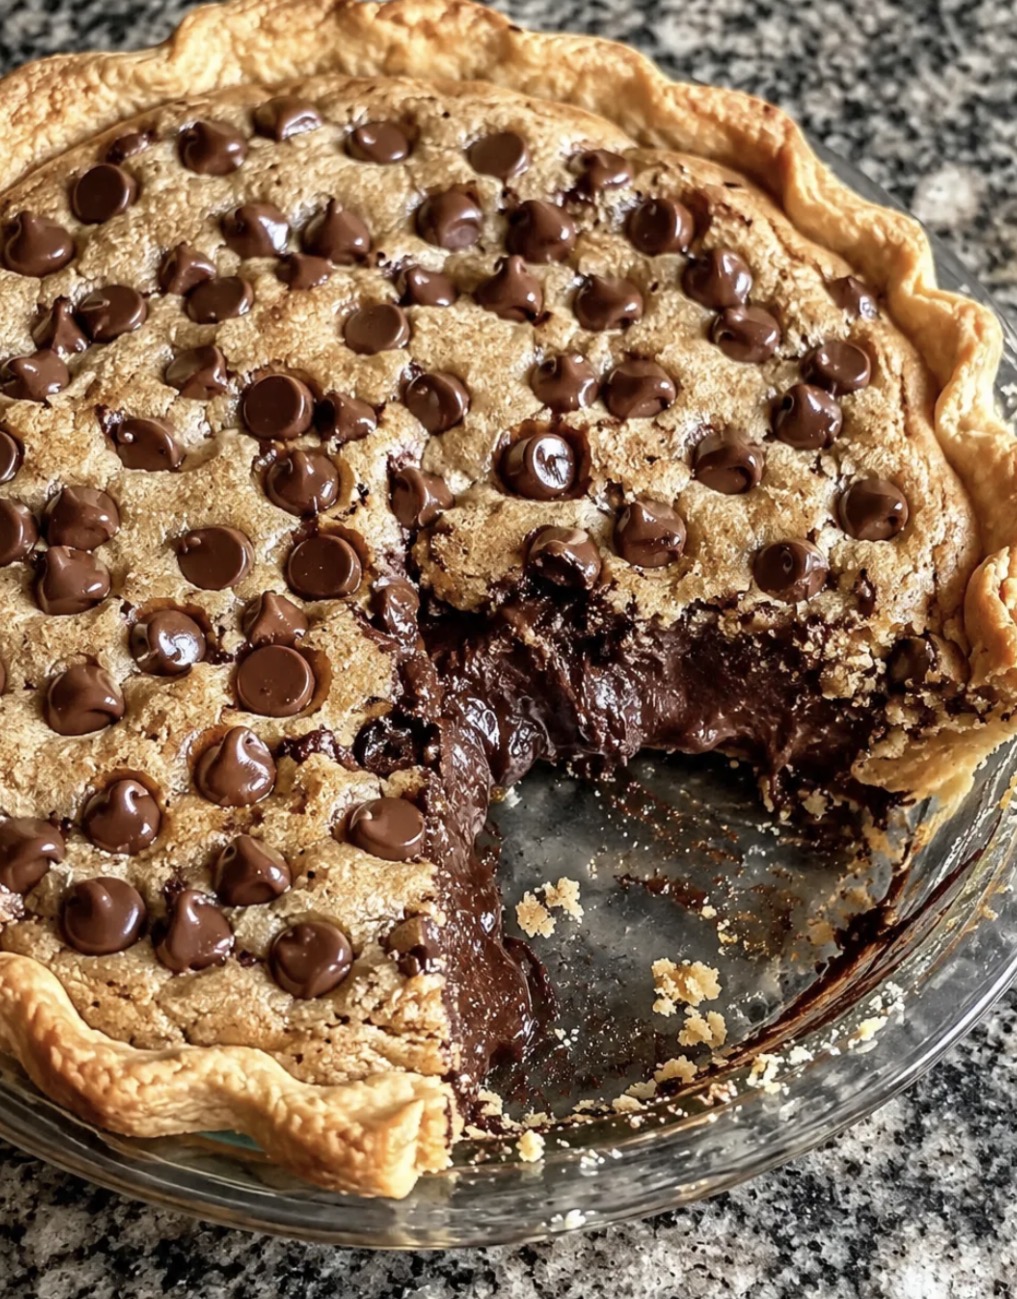
Why This Pie Exists – The Skillet Connection
Frustration drove the invention of this dessert style. Home bakers grew tired of watching their carefully portioned dough mounds melt into flat puddles across hot metal trays. Baking everything in one vessel solves that problem entirely. The high ceramic walls force the expanding dough upward instead of outward during the intense heat of the oven cycle.
Restaurants popularized this concept decades ago. Diners served massive cast iron skillet treats straight from the flames to eager customers holding large metal spoons. I adapted that diner tradition for standard home kitchens. Most people own a standard glass pie plate rather than a heavily seasoned vintage cast iron pan.
This approach caters directly to the chronically exhausted baker. Rolling out individual spheres of sticky dough takes away valuable evening relaxation time. You skip the chilling step completely here. Dropping raw batter straight into a greased dish gets dessert on the table much faster than traditional preparation methods.
This structural change fundamentally alters the eating experience. The outer rim gets remarkably crunchy while the deep center stays delightfully gooey and slightly underbaked. I consider this a heavily guarded baking shortcut. My family constantly requests this exact recipe whenever they crave something warm and heavily studded with chocolate chunks.
The Melted Butter Trick – The Science
Science dictates the final texture of this bake entirely. Using fully liquid butter fundamentally changes how the fat interacts with the flour proteins. Creaming softened butter traps countless tiny air bubbles. Those trapped air pockets expand in the heat and create a light, fluffy, and completely cake-like crumb structure. We want a fudgy interior instead of a dry cake. Liquid fat coats the flour molecules heavily and prevents them from forming strong elastic gluten networks.
I learned this lesson the hard way last year. I creamed the butter purely out of habit and ended up with a terribly dry wedge that crumbled instantly. That mistake ruined my entire weekend dessert plan. Slicing through a tall cakey wedge feels entirely wrong when you expect a dense and chewy mouthful.
Hot butter aggressively dissolves the sugar granules. This early dissolution creates a fundamentally thicker and shinier batter right from the very start of mixing. Let the liquid fat cool slightly before mixing. Pouring scalding hot grease directly onto a raw egg will scramble the yolk immediately. The resulting density allows for proper structural integrity. A correctly made pie holds its shape beautifully when you slice it warm with a sharp chef knife.
Ingredient Spotlight – The Brown Sugar Magic
Notice the complete absence of granulated white sugar. This recipe relies exclusively on a full cup of densely packed dark brown sugar to provide deep foundational flavor. Molasses acts as the secret heavy lifter here. That dark syrup retains significant moisture to guarantee a thoroughly chewy center even after two days on the kitchen counter.
Your flour requires careful preparation beforehand. Sifting the powdery white starch prevents dense lumps from ruining the otherwise smooth consistency of your wet batter. I strongly suggest using a fine mesh strainer. Forcing the dry ingredients through wire mesh guarantees a completely uniform distribution of the essential chemical leavening agents.
The chocolate chip placement matters significantly. Sprinkling them entirely across the top surface prevents them from sinking into a muddy layer at the very bottom. They melt into visually appealing distinct puddles. Folding them directly into the wet dough often results in a smeared and unappetizing brown appearance after baking.
I prefer semi-sweet morsels over milk chocolate. The slight bitterness counters the intense molasses notes beautifully to keep the overall sugar levels balanced. This specific ingredient ratio forms a very thick paste. The batter requires a sturdy spatula to push it aggressively into the corners of your ceramic dish.
Ingredients
-
½ cup unsalted butter, melted and slightly cooled – The key to a fudgy, not cakey, texture.
-
1 cup packed dark brown sugar – For deep molasses flavor and chewiness.
-
1 large egg – For structure and richness.
-
2 teaspoons vanilla extract – For warmth and depth.
-
1 cup all-purpose flour – The base of the batter.
-
¼ teaspoon baking powder – For a little lift.
-
¼ teaspoon baking soda – For browning and lift.
-
½ teaspoon salt – Balances the sweetness.
-
1 cup semi-sweet chocolate chips – For gooey, melty pockets.
Step-by-Step Instructions with Personal Notes
1. Preheat the oven to 350°F (175°C) and grease a pie plate or 9×9-inch pan.Preparation prevents absolute disaster. I once forgot to grease the dish and lost half the crust when trying to pry it out with a metal spatula.
2. In a mixing bowl, whisk together melted butter and brown sugar until well combined.The mixture should look like wet sand. Vigorously stirring these two together forces the molasses to distribute evenly through the warm liquid fat.
3. Add vanilla extract, then mix in the egg until fully incorporated. Check the temperature of your bowl first. I always touch the side of the glass to ensure the batter will not cook my raw egg prematurely.
4. Gradually sift in the flour and gently mix to avoid lumps. Add baking powder, salt, and baking soda, mixing until everything is well combined. Stop stirring the moment the white streaks disappear. Overworking the gluten here creates a tough and unyielding rubbery texture that ruins the entire eating experience.
5. Pour the batter into the prepared pan and spread it evenly. The dough will resist spreading. I use the back of a wet metal spoon to coax the sticky mass all the way to the ceramic edges.
6. Sprinkle the chocolate chips evenly on top of the batter. Do not hold back on the chocolate. My youngest son always demands I add an extra handful right in the very center before it goes into the heat.
7. Bake for 20-25 minutes until golden brown and slightly firm to the touch. This is where I check the oven temperature twice. An uncalibrated oven will burn the outer edges severely while leaving the deep middle entirely liquid.
8. Allow the pie to cool slightly before serving. Patience rewards the home baker. Waiting fifteen minutes allows the molten internal structure to solidify enough for a genuinely clean knife cut.
How to Serve It Like a Pro
-
With a scoop of vanilla ice cream – The ultimate pairing.
-
With a drizzle of caramel – For extra gooeyness.
-
With a dollop of whipped cream – Light and fluffy.
-
With a glass of cold milk – Classic pairing.
-
With a cup of coffee – The bitterness balances the sweetness.
-
With a sprinkle of flaky sea salt – For a sweet-salty contrast.
-
With fresh berries – For a pop of color and freshness.
-
With a drizzle of hot fudge – For chocolate lovers.
-
At room temperature – The texture is best at room temperature.
-
Warm from the oven – For the gooiest, most indulgent experience.
Variations & Swaps (Because Life Happens)
Make It with Different Chocolate
-
Milk chocolate – Sweeter and creamier.
-
Dark chocolate – Less sweet, more intense.
-
White chocolate – For a beautiful contrast.
-
Peanut butter chips – For a nutty twist.
-
Butterscotch chips – For a rich, caramel flavor.
Make It with Add-Ins
-
Chopped nuts – Pecans or walnuts for crunch.
-
Toffee bits – For buttery crunch.
-
Dried cranberries – For tang.
-
Shredded coconut – For a tropical twist.
-
M&M candies – For a colorful twist.
Make It Gluten-Free
-
Use gluten-free all-purpose flour blend.
Make It Vegan
-
Use vegan butter, a flax egg, and vegan chocolate chips.
Make It in a Cast Iron Skillet
-
Grease a 9-inch cast iron skillet and bake as directed for a crispy, restaurant-style edge.
Pro Tips for the Best Chocolate Chip Cookie Pie
-
Use melted butter, not creamed butter. It’s the key to a fudgy texture.
-
Let the butter cool slightly. Hot butter will scramble the egg.
-
Use dark brown sugar. It adds moisture and deep molasses flavor.
-
Sift the dry ingredients. Prevents lumps and ensures even distribution.
-
Don’t overmix. Stop stirring the moment the flour disappears.
-
Spread the batter evenly. Use a wet spoon to coax it to the edges.
-
Sprinkle the chocolate chips on top.Prevents them from sinking.
-
Watch the oven temperature. An uncalibrated oven will burn the edges.
-
Let it cool before slicing. For clean, neat wedges.
-
Make extra. It disappears fast!
Frequently Asked Questions
Can I use granulated sugar instead of brown sugar?
No. The dark brown sugar is essential for the molasses flavor and chewy texture.
Can I use softened butter instead of melted?
No. Melted butter is the key to the fudgy texture. Softened butter will make it cakey.
Can I use milk chocolate instead of semi-sweet?
Yes. Milk chocolate is sweeter and creamier.
Can I add nuts?
Absolutely! Chopped pecans or walnuts add a delicious crunch.
Can I make this ahead of time?
Yes. This pie tastes even better the next day. Store in an airtight container at room temperature for up to 3 days.
How long do leftovers last?
Store in an airtight container at room temperature for up to 3 days.
Can I freeze this pie?
Yes. Wrap individual slices tightly in plastic wrap and freeze for up to 3 months. Thaw at room temperature.
Why is my pie dry?
You may have used creamed butter instead of melted, or you overbaked it. Use melted butter and check at the minimum time.
Why is my pie cakey?
You may have overmixed the batter, or you used softened butter. Stir just until the flour disappears and use melted butter.
Can I make this in a 9×13 pan?
Yes. Use a 9×13 pan for thinner bars. Adjust baking time to 18-22 minutes.
Can I double the recipe?
Yes. Use two pie plates or a 9×13 pan and adjust baking time slightly.
Is this recipe gluten-free?
Use gluten-free all-purpose flour blend for a gluten-free version.
Storage & Reheating
Room Temperature
-
Store in an airtight container for up to 3 days.
Refrigerator
-
Store in an airtight container for up to 1 week. Bring to room temperature or warm gently before serving.
Freezer
-
Wrap individual slices tightly in plastic wrap, then store in a freezer bag for up to 3 months.
-
Thaw at room temperature before serving.
Reheating Tips
-
Oven: Warm at 300°F for 5-7 minutes.
-
Microwave: Heat in 15-second intervals until warm.
-
Air Fryer: Warm at 300°F for 3-5 minutes.
Make-Ahead Tips
-
Prep Ahead: Measure the dry ingredients up to 3 days in advance.
-
Bake Ahead: Bake the pie up to 3 days in advance and store in an airtight container.
-
Freeze Ahead: Freeze baked pie for up to 3 months. Thaw and warm gently.
The Beauty of Simple, Fudgy, Chocolate Chip Cookie Pie
There’s something deeply satisfying about a recipe that delivers big flavor with minimal effort. This Chocolate Chip Cookie Pie is the kind of dessert that makes people happy—the kind that brings everyone to the table with a smile.
It’s not fancy. It’s not complicated. But it is reliable, crowd-pleasing, and absolutely delicious. And isn’t that what great desserts are all about?
So keep melted butter, dark brown sugar, eggs, vanilla, flour, baking powder, baking soda, salt, and chocolate chips in your kitchen. And when you need a simple, impressive dessert that delivers big flavor with minimal fuss, you’ll know exactly what to make.
Final Verdict
Rating: 5 out of 5
Difficulty: Easy
Prep Time: 10 minutes
Cook Time: 20-25 minutes
Cooling Time: 15 minutes
Total Time: Approximately 45-50 minutes
Yield: 8 servings
Cleanup: Minimal (one bowl + one pie plate)
Leftover potential: Excellent — store in an airtight container for up to 3 days
Best for: Potlucks, bake sales, holiday trays, and anytime you need a crowd-pleasing dessert