
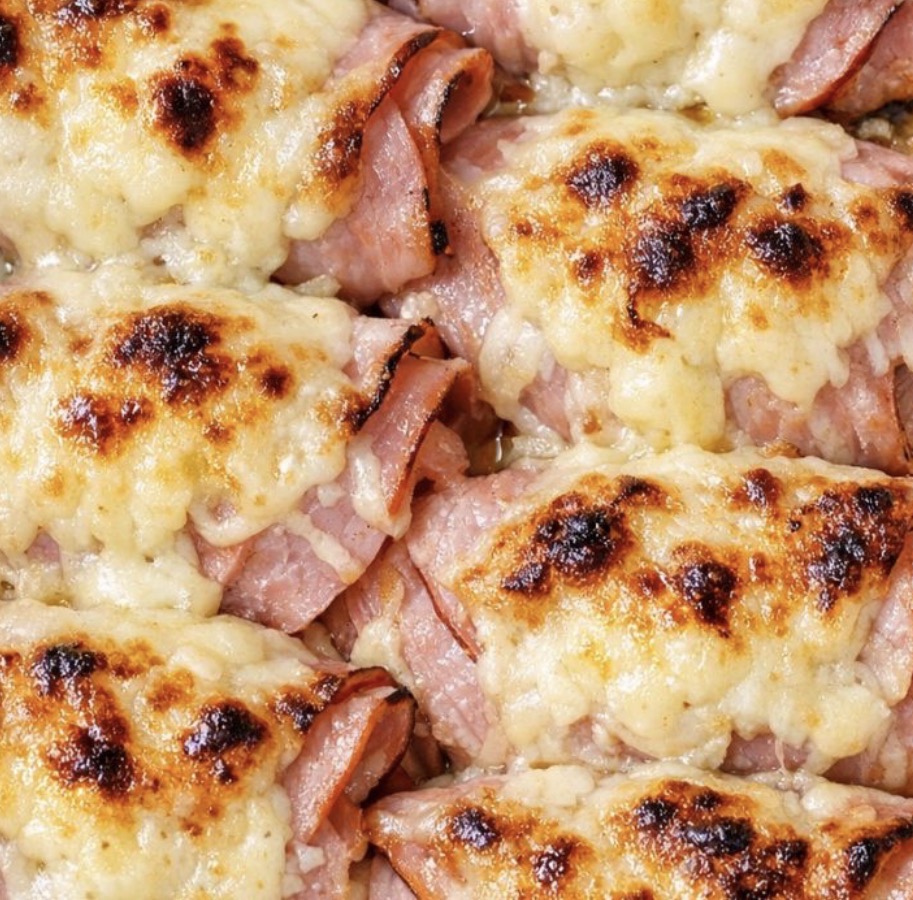
Why This Recipe Is an Absolute Keeper
Before we dive into the method, here’s why this ham and cheese bake will become a staple in your kitchen:
-
Just 3 main ingredients. Ham, white cheddar cheese, and heavy cream. That’s it!
-
Low carb and keto-friendly. Perfect for low-carb lifestyles.
-
Quick and easy. Ready in about 30 minutes from start to finish.
-
Rich, creamy, and cheesy. Every bite is pure comfort.
-
Crowd-pleasing. Kids and adults alike devour this.
-
Perfect for any occasion. Weeknight dinners, brunch, or holiday leftovers.
-
Budget-friendly. Simple, affordable ingredients.
-
Minimal cleanup. One bowl, one casserole dish.
-
Customizable. Add veggies, swap cheeses, or use different meats.
-
Beautiful presentation. Looks like it came from a fancy brunch spot.
The Ingredients
This recipe uses simple, wholesome ingredients that come together beautifully.
-
1 pound thinly sliced deli ham (preferably large, round slices) – For savory, salty depth.
-
2 cups shredded white cheddar cheese, divided – White cheddar melts beautifully and has a sharp, creamy flavor.
-
½ cup heavy whipping cream – For richness and to create the creamy sauce.
-
Butter or nonstick spray – For greasing the dish.
Step-by-Step Instructions
Step 1: Preheat and Prep
Preheat your oven to 400°F (200°C). Lightly grease a medium ceramic casserole dish (about 8×10 inches or similar) with a little butter or nonstick spray so the cheese doesn’t stick too much.
Pro Tip: A ceramic or glass dish heats evenly and lets you see the beautiful golden crust forming.
Step 2: Make the Cream and Cheese Mixture
In a small bowl or measuring cup, whisk together the heavy whipping cream with 1 cup of the shredded white cheddar cheese until it’s mostly combined. It will be thick and a little lumpy—that’s okay. This mixture will help everything melt into a rich, savory layer.
Pro Tip: Don’t worry about lumps. They’ll melt into the sauce as it bakes.
Step 3: Layer the Ham
Lay a single layer of sliced ham over the bottom of the casserole dish, slightly overlapping the pieces so there are no big gaps. Tear slices as needed to fit the corners and edges.
Pro Tip: Overlap the ham slightly so the layers hold together and create a solid base.
Step 4: Add the Cream Mixture
Spoon a few tablespoons of the cream-and-cheese mixture over the ham layer and gently spread it around. You don’t need full coverage; just dot it fairly evenly so it can melt down between the folds.
Pro Tip: Dotting the mixture evenly ensures it melts into every layer.
Step 5: Repeat the Layers
Add another layer of ham slices on top, folding or loosely crumpling them a bit so you get those nice ruffly edges that brown up in the oven. Repeat with more of the cream-and-cheese mixture, then continue layering ham and the mixture until you’ve used all the ham and cream mixture. Try to finish with a ham layer on top.
Pro Tip: Crumpling the ham creates texture and helps the cheese cling to every surface.
Step 6: Top with Cheese
Sprinkle the remaining 1 cup of shredded white cheddar cheese evenly over the top layer of ham, making sure to cover as much surface area as possible. This is what will bubble and char into that golden brown, irresistible crust.
Pro Tip: Cover as much surface area as possible with cheese for maximum golden crust.
Step 7: Bake to Golden Perfection
Place the casserole dish on the middle rack of the preheated oven and bake for 18–22 minutes, or until the cheese is fully melted, bubbling around the edges, and browned in spots on top. If you like a deeper golden char, you can switch the oven to broil for 1–2 extra minutes, watching closely so it doesn’t burn.
Pro Tip: Watch closely if you broil! Cheese can go from golden to burnt in seconds.
Step 8: Rest and Serve
Remove the dish from the oven and let it rest for about 5 minutes. This short rest helps the cheesy layers set up just enough so you can cut or scoop neat portions without everything sliding apart.
Pro Tip: The rest time is important—it allows the cheese to set and the layers to hold together.
How to Serve It Like a Pro
This ham and cheese bake is delicious on its own, but a few simple sides make it a complete meal:
-
With a simple green salad – Balances the richness.
-
With roasted vegetables – Broccoli, asparagus, or Brussels sprouts.
-
With a slice of low-carb bread – For dipping.
-
With sliced tomatoes – For freshness.
-
With a dollop of sour cream – Cool and creamy.
-
With fresh chives – For a pop of color and freshness.
-
With a sprinkle of red pepper flakes – For heat.
-
With a glass of white wine – Chardonnay or Sauvignon Blanc.
-
With a glass of iced tea – The Southern way.
-
At a brunch – With scrambled eggs and fruit.
Variations & Swaps (Because Life Happens)
One of the best things about this recipe is how flexible it is. Here are some easy ways to make it your own:
Make It with Different Meats
-
Turkey – Sliced deli turkey works beautifully.
-
Chicken – Sliced or shredded chicken.
-
Bacon – Cooked and crumbled for smoky crunch.
-
Sausage – Cooked and crumbled.
-
Roast beef – Sliced deli roast beef.
Make It with Different Cheeses
-
Sharp cheddar – For a bolder flavor.
-
Gruyère – Nutty and sophisticated.
-
Swiss – Classic and creamy.
-
Pepper Jack – For a spicy kick.
-
Monterey Jack – Mild and melty.
Make It with Add-Ins
-
Spinach – Wilted and layered with the ham.
-
Mushrooms – Sautéed and layered.
-
Bell peppers – Diced for color and flavor.
-
Onions – Caramelized and layered.
-
Jalapeños – Minced for heat.
-
Sun-dried tomatoes – Chopped for tang.
Make It Spicier
-
Add cayenne – A pinch for heat.
-
Add red pepper flakes – A pinch for warmth.
-
Add jalapeños – Minced for fresh heat.
-
Use pepper jack cheese – For extra kick.
Make It in the Slow Cooker
-
Layer everything in the slow cooker.
-
Cook on LOW for 3-4 hours or HIGH for 1½-2 hours.
-
Broil the top in the oven for a crispy crust.
Pro Tips for the Best Ham & Cheese Bake
-
Use good ham. Deli ham is best—avoid processed ham.
-
Shred your own cheese. Freshly shredded melts better than pre-shredded.
-
Use heavy cream. It creates the richest, creamiest sauce.
-
Layer evenly. Alternate ham, cream mixture, and cheese.
-
Crumple the ham. Creates texture and helps the cheese cling.
-
Cover with cheese. For maximum golden crust.
-
Watch the broiler. Cheese can go from golden to burnt quickly.
-
Let it rest. A few minutes off heat lets the cheese set.
-
Serve warm. This is best fresh from the oven.
-
Make extra. It disappears fast!
Frequently Asked Questions
Can I use a different type of ham?
Yes. Sliced deli ham, leftover spiral ham, or ham steaks all work beautifully.
Can I use a different type of cheese?
Yes. Sharp cheddar, Gruyère, Swiss, Pepper Jack, or Monterey Jack all work beautifully.
Can I use milk instead of heavy cream?
Heavy cream is essential for the rich, creamy texture. Milk will result in a thinner sauce.
Can I make this dairy-free?
Yes. Use dairy-free cheese and coconut cream.
Can I make this ahead of time?
Yes. Assemble the bake, cover, and refrigerate for up to 24 hours. Add 5-10 minutes to the baking time.
How long do leftovers last?
Store in an airtight container in the refrigerator for up to 4 days.
Can I freeze this dish?
Yes. Freeze cooled bake in a freezer bag for up to 3 months. Thaw overnight in the fridge and reheat gently.
Why is my bake watery?
The ham may have released too much liquid, or the cream may have separated. Use good-quality ham and heavy cream.
Why is my cheese not melting?
The oven may not be hot enough, or the cheese is too thick. Bake until bubbly and golden.
Can I add vegetables?
Absolutely! Spinach, mushrooms, bell peppers, or onions all work beautifully.
Can I double the recipe?
Yes. Use a larger casserole dish and increase the baking time by 5-10 minutes.
Is this recipe gluten-free?
Yes, as written, this recipe is naturally gluten-free.
Storage & Reheating
Refrigerator
-
Store cooled bake in an airtight container for up to 4 days.
-
Reheat gently in the microwave or oven until hot.
Freezer
-
Freeze cooled bake in a freezer bag for up to 3 months.
-
Thaw overnight in the refrigerator before reheating.
Reheating Tips
-
Microwave: Quick and easy. Heat in 1-minute intervals until hot.
-
Oven: Transfer to a baking dish, cover with foil, and bake at 350°F for 15-20 minutes.
-
Air Fryer: Reheat at 350°F for 5-7 minutes.
Make-Ahead Tips
-
Prep Ahead: Slice the ham and shred the cheese up to 2 days in advance.
-
Assemble Ahead: Layer everything in the casserole dish, cover, and refrigerate overnight. Add 5-10 minutes to the baking time.
-
Freeze Ahead: Assemble in a freezer bag and freeze for up to 3 months. Thaw overnight and bake as directed.
The Beauty of Simple, Low-Carb Comfort
There’s something deeply satisfying about a recipe that delivers big flavor with minimal effort. This Low Carb Ham & Cheese Bake is the kind of meal that makes people happy—the kind that brings everyone to the table with a smile.
It’s not fancy. It’s not complicated. But it is reliable, crowd-pleasing, and absolutely delicious. And isn’t that what great comfort food is all about?
So keep deli ham, white cheddar cheese, and heavy cream in your kitchen. And when you need a simple, impressive meal that delivers big flavor with minimal fuss, you’ll know exactly what to make.
Final Verdict
Rating: 5 out of 5
Difficulty: Easy
Prep Time: 10 minutes
Cook Time: 18-22 minutes
Total Time: Approximately 30-35 minutes
Yield: 6 servings
Cleanup: Minimal (one bowl + one casserole dish)
Leftover potential: Good — reheat gently
Best for: Busy weeknights, brunch gatherings, holiday leftovers, and anytime you need a low-carb comfort meal