
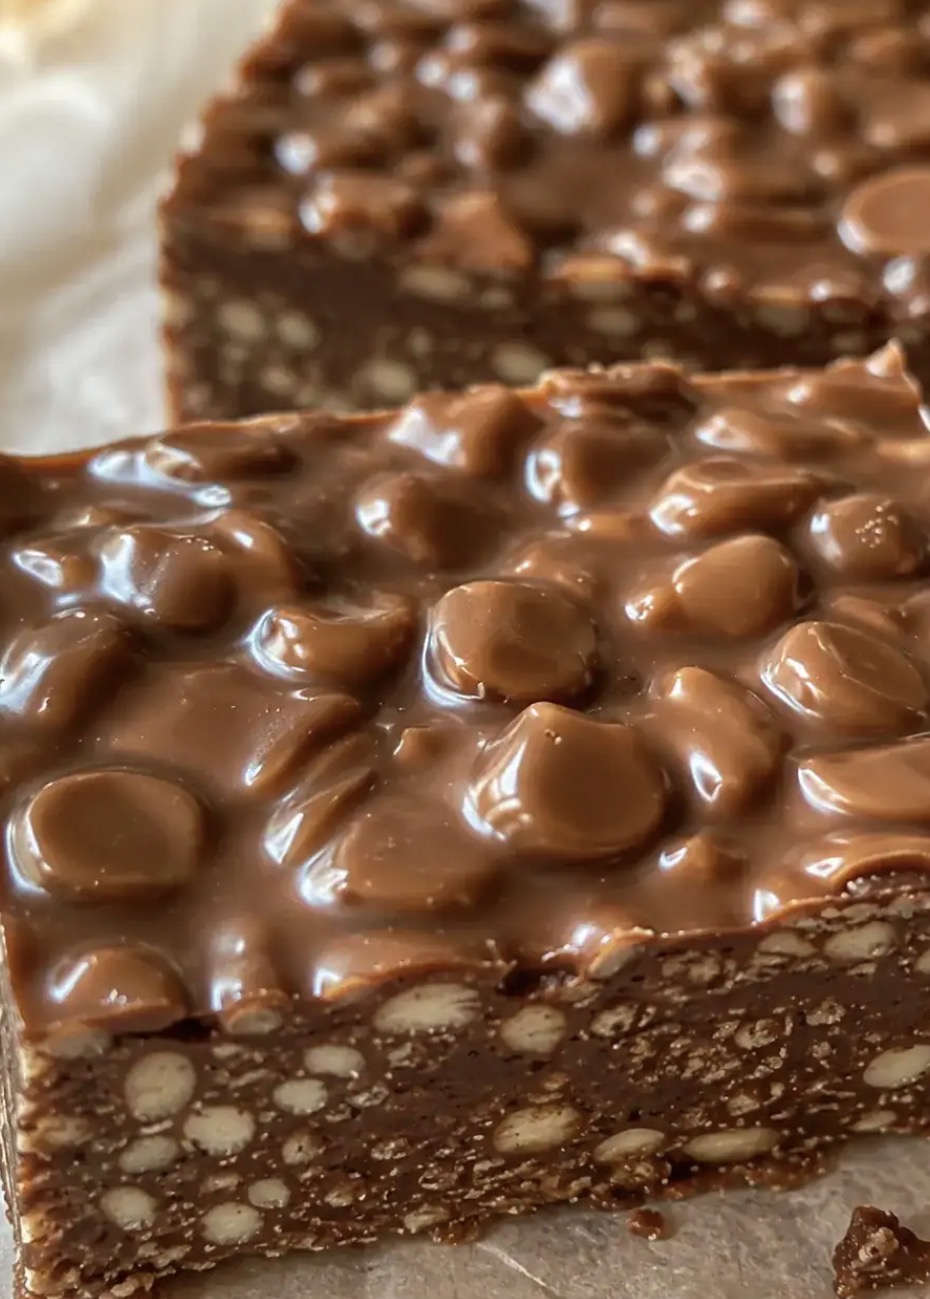
Why This Recipe Is an Absolute Keeper
Before we dive into the method, here’s why these Homemade Crunch Bars will become a staple in your kitchen:
-
Just 5 ingredients. Crispy rice cereal, chocolate chips, peanut butter, maple syrup, and coconut oil. That’s it!
-
No-bake. Just melt, mix, and chill.
-
5 minutes of prep. Quick and easy.
-
Naturally vegan, gluten-free, and dairy-free. Perfect for anyone with dietary restrictions.
-
Rich and chocolatey. Tastes like a fancy candy bar.
-
Crispy and crunchy. The rice cereal provides the perfect texture.
-
Crowd-pleasing. Kids and adults alike devour these.
-
Perfect for any occasion. Holidays, potlucks, or just because.
-
Budget-friendly. Simple, affordable ingredients.
-
Make-ahead friendly. Store in the fridge or freezer for later.
The Ingredients
This recipe uses simple, wholesome ingredients that come together beautifully.
-
3 cups crispy rice cereal – The base of the bars. Rice Krispies or any puffed rice cereal works.
-
1½ cups chocolate chips (paleo or vegan, if desired) – For richness and chocolate flavor.
-
1 cup peanut butter (creamy; can substitute almond or sunflower seed butter) – For creaminess and flavor.
-
½ cup maple syrup (or keto maple syrup) – For sweetness.
-
¼ cup coconut oil (can substitute grass-fed butter) – For richness and to help the bars set.
Step-by-Step Instructions
Step 1: Prep the Pan
Line an 8×8-inch baking dish with parchment paper, leaving an overhang on the edges for easy removal.
Pro Tip: Parchment paper makes removing the bars a breeze and prevents sticking.
Step 2: Add the Cereal to a Bowl
Pour the crispy rice cereal into a large mixing bowl and set aside.
Pro Tip: Use a large bowl so you have plenty of room to fold the cereal into the chocolate mixture.
Step 3: Melt the Chocolate Mixture
In a microwave-safe bowl, combine the chocolate chips, peanut butter, maple syrup, and coconut oil. Microwave in 30-second increments, stirring in between, until completely melted, glossy, and smooth.
Pro Tip: Stir between each 30-second interval to prevent the chocolate from seizing or burning.
Step 4: Combine
Pour the warm melted chocolate mixture over the crispy rice cereal. Gently fold with a spatula from the bottom up until all the cereal is evenly coated.
Pro Tip: Fold gently! You want to coat the cereal without crushing it.
Step 5: Set in the Pan
Transfer the mixture into the prepared baking dish. Press down firmly and evenly into an even layer using the back of your spatula.
Pro Tip: Press firmly! A compact layer holds together better when sliced.
Step 6: Chill
Refrigerate for at least 1 hour, or until the chocolate is completely firm to the touch.
Pro Tip: Don’t skip the chilling step! This is what sets the bars and makes them sliceable.
Step 7: Slice and Serve
Lift the block out using the parchment paper edges. Place on a cutting board and cut into neat squares or bars. Enjoy!
Pro Tip: For the cleanest cuts, dip your knife in hot water and wipe it dry between each slice.
How to Serve It Like a Pro
These Homemade Crunch Bars are delicious on their own, but a few simple touches make them even better:
-
With a sprinkle of flaky sea salt – For a sweet-salty contrast.
-
With a drizzle of extra chocolate – For chocolate lovers.
-
With a drizzle of caramel – For gooey sweetness.
-
With a scoop of vanilla ice cream – For a decadent dessert.
-
With a cup of coffee – The bitterness balances the sweetness.
-
With a glass of cold milk – Classic pairing.
-
On a dessert platter – Arrange with other treats for a beautiful spread.
-
At room temperature – The chocolate softens slightly, making them extra gooey.
-
Chilled – The bars stay firm and slice cleanly.
-
As a gift – Stack in a pretty tin with parchment between layers.
Variations & Swaps (Because Life Happens)
One of the best things about this recipe is how flexible it is. Here are some easy ways to make it your own:
Make It with Different Nut Butters
-
Almond butter – For a sophisticated twist.
-
Cashew butter – Creamy and mild.
-
Sunflower seed butter – For a nut-free version.
-
Tahini – For a Middle Eastern twist.
Make It with Different Chocolate
-
Dark chocolate – Less sweet, more intense.
-
Milk chocolate – Sweeter and creamier.
-
White chocolate – For a beautiful contrast.
-
Butterscotch chips – For a rich, caramel flavor.
Make It with Add-Ins
-
Chopped nuts – Pecans, walnuts, or almonds for crunch.
-
Dried fruit – Raisins or cranberries for chewiness.
-
Pretzels – Crushed for a sweet-salty crunch.
-
Toffee bits – For buttery, crunchy sweetness.
-
Coconut – Toasted and sprinkled on top.
-
Sea salt – A sprinkle for sweet-salty contrast.
Make It Spicier
-
Add cayenne – A pinch for heat.
-
Add cinnamon – A pinch for warmth.
-
Add chili powder – A pinch for a Mexican chocolate twist.
Make It Healthier
-
Use dark chocolate – For less sugar.
-
Use natural peanut butter – For no added sugar.
-
Use brown rice syrup – Instead of maple syrup.
Pro Tips for the Best Homemade Crunch Bars
-
Use fresh cereal. Stale cereal won’t have the same crunch.
-
Melt the chocolate gently. Short bursts in the microwave prevent seizing.
-
Stir between intervals. Ensures even melting.
-
Fold gently. Keep the cereal intact.
-
Press firmly. A compact layer holds together better.
-
Chill completely. This ensures clean, even slices.
-
Use a hot knife. Dip your knife in hot water and wipe dry between cuts.
-
Store in the fridge. Keeps them firm and fresh.
-
Make extra. They disappear fast!
-
Customize freely. Make them your own.
Frequently Asked Questions
Can I use a different type of cereal?
Yes. Any puffed rice cereal works beautifully. Avoid flaky cereal—it won’t hold together.
Can I use a different type of chocolate?
Yes. Dark, milk, or white chocolate all work beautifully.
Can I use a different nut butter?
Yes. Almond butter, cashew butter, or sunflower seed butter all work beautifully.
Can I use honey instead of maple syrup?
Yes. Honey works beautifully, but it’s not vegan.
Can I make these without coconut oil?
Yes. Use grass-fed butter or additional peanut butter.
Can I make these ahead of time?
Yes. These bars taste even better the next day. Store in the refrigerator for up to 2 weeks.
How long do leftovers last?
Store in an airtight container in the refrigerator for up to 2 weeks.
Can I freeze these bars?
Yes. Wrap individual bars tightly in plastic wrap and freeze for up to 3 months. Thaw in the refrigerator overnight.
Why are my bars falling apart?
The mixture may not have been pressed firmly enough, or the bars weren’t chilled long enough. Press firmly and chill for at least 1 hour.
Why is my chocolate grainy?
The chocolate seized, likely from overheating or getting water in it. Use short microwave bursts and dry utensils.
Can I add sea salt?
Absolutely! A sprinkle of flaky sea salt on top before the chocolate sets adds a delicious sweet-salty contrast.
Is this recipe gluten-free?
Yes, as written, this recipe is naturally gluten-free.
Storage & Reheating
Refrigerator
-
Store in an airtight container for up to 2 weeks.
-
Serve chilled or at room temperature.
Freezer
-
Wrap individual bars tightly in plastic wrap, then store in a freezer bag for up to 3 months.
-
Thaw in the refrigerator overnight before serving.
Make-Ahead Tips
-
Prep Ahead: Line the pan and measure the ingredients up to 24 hours in advance.
-
Make Ahead: Make the bars up to 2 weeks in advance and store in the refrigerator.
-
Freeze Ahead: Freeze baked bars for up to 3 months. Thaw and serve.
The Beauty of Simple, No-Bake Treats
There’s something deeply satisfying about a recipe that delivers big flavor with minimal effort. These Homemade Crunch Bars are the kind of treat that makes people happy—the kind that brings back childhood memories and creates new ones.
They’re not fancy. They’re not complicated. But they are reliable, crowd-pleasing, and absolutely delicious. And isn’t that what great no-bake treats are all about?
So keep crispy rice cereal, chocolate chips, peanut butter, maple syrup, and coconut oil in your kitchen. And when you need a simple, impressive treat that delivers big flavor with minimal fuss, you’ll know exactly what to make.
Final Verdict
Rating: 5 out of 5
Difficulty: Easy
Prep Time: 5 minutes
Chilling Time: 1 hour
Total Time: Approximately 1 hour 5 minutes
Yield: 16 bars
Cleanup: Minimal (one bowl + one pan)
Leftover potential: Excellent — store in the fridge or freezer
Best for: Holidays, potlucks, lunchbox treats, and anytime you need a no-bake crowd-pleaser