
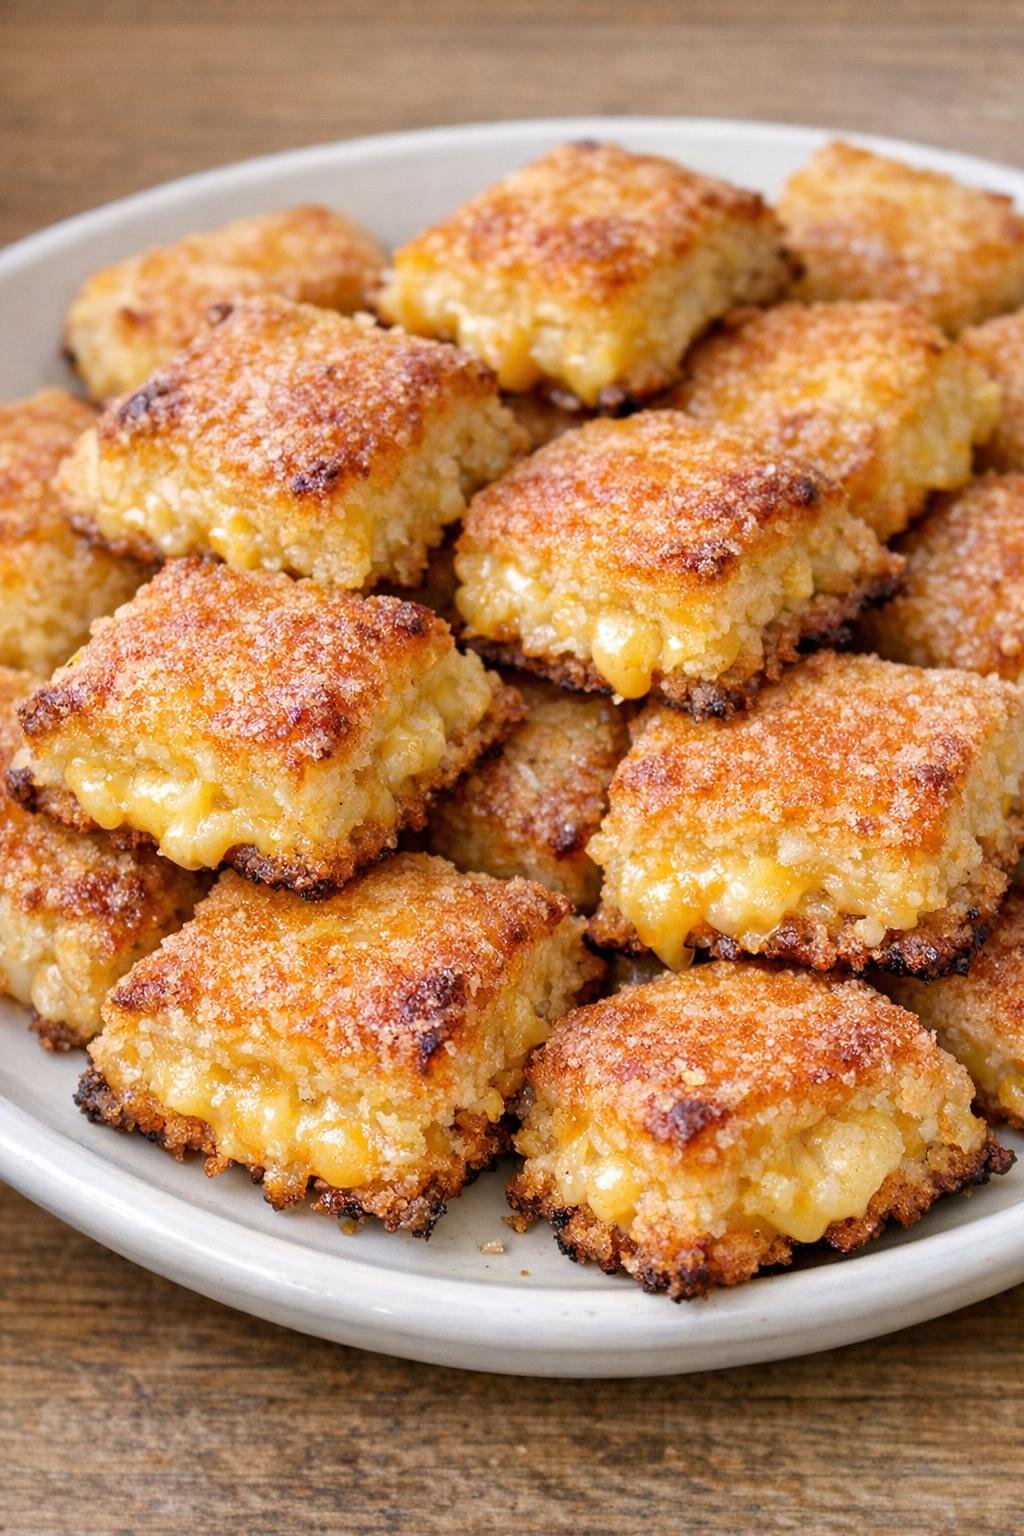
Why This Recipe Is an Absolute Keeper
Before we dive into the method, here’s why these toasted cheese bites will become a staple in your kitchen:
-
Just 3 ingredients. Cheddar cheese, mayonnaise, and cocktail rye bread. That’s it!
-
Quick and easy. Ready in about 15 minutes from start to finish.
-
Crispy and cheesy. The rye bread toasts beautifully, and the cheese melts perfectly.
-
Tangy and rich. The mayonnaise adds a creamy, tangy depth.
-
Crowd-pleasing. Everyone loves these—kids and adults alike.
-
Perfect for parties. Always the first thing to disappear.
-
Budget-friendly. Simple, affordable ingredients.
-
Minimal cleanup. One bowl, one baking sheet.
-
Make-ahead friendly. Assemble in advance and bake when ready.
-
Customizable. Add bacon, green onions, or spices.
The Ingredients
This recipe uses simple, affordable ingredients that come together beautifully.
-
2 cups shredded sharp cheddar cheese – Sharp cheddar gives the best flavor. Shred it fresh for the best melt.
-
1 cup mayonnaise – Use a good-quality mayonnaise like Duke’s or Hellmann’s. Don’t substitute Miracle Whip.
-
24 cocktail rye bread slices – These small, square slices of rye bread are the perfect base. Look for them in the deli or bakery section.
Step-by-Step Instructions
Step 1: Preheat and Prep
Preheat your oven to 350°F and line a baking sheet with parchment paper or lightly grease it for easy cleanup.
Pro Tip: Parchment paper makes cleanup a breeze and prevents the cheese from sticking to the pan.
Step 2: Mix the Cheese and Mayonnaise
In a medium bowl, stir together the shredded cheddar cheese and mayonnaise until the mixture is evenly combined and spreadable. The mixture should be thick but easy to spread.
Pro Tip: Make sure the cheese is finely shredded. Larger shreds can make the mixture difficult to spread evenly.
Step 3: Spread on the Rye Bread
Spread a generous spoonful of the cheese mixture onto each cocktail rye bread slice, covering most of the top. Don’t be shy—you want a nice, thick layer of that cheesy goodness.
Pro Tip: Use the back of a spoon to spread the mixture evenly, reaching the edges but leaving a tiny border to prevent overflow.
Step 4: Bake to Golden Perfection
Bake for 10 to 12 minutes, or until the tops are melted and the edges are golden brown and crisp. Your kitchen will smell absolutely incredible—cheesy, tangy, and warm.
Pro Tip: Watch them closely toward the end. The cheese can go from golden to burnt quickly.
Step 5: Cool and Serve
Let them cool for 2 to 3 minutes before serving warm. The cheese will be hot, so give them a moment to set before popping them in your mouth.
Pro Tip: Serve warm or at room temperature. They’re delicious either way!
How to Serve It Like a Pro
These toasted cheese bites are delicious on their own, but a few simple accompaniments make them even better:
-
With a bowl of tomato soup – For dipping.
-
With a fresh green salad – For a light lunch.
-
On a party platter – Arrange with other appetizers.
-
With a sprinkle of fresh chives – For a pop of color.
-
With a drizzle of hot honey – For sweet heat.
-
With a side of pickles – For a tangy contrast.
-
With a glass of sweet tea – The Southern way.
-
With a glass of white wine – Sauvignon Blanc or Chardonnay.
-
With a sprinkle of everything bagel seasoning – For a trendy twist.
-
With a dash of hot sauce – For heat lovers.
Variations & Swaps (Because Life Happens)
One of the best things about this recipe is how flexible it is. Here are some easy ways to make it your own:
Make It with Different Cheeses
-
Pepper Jack – For a spicy kick.
-
Monterey Jack – Mild and melty.
-
Swiss – Nutty and elegant.
-
Gruyère – Rich and sophisticated.
-
Parmesan – Sharp and nutty.
Make It with Different Breads
-
Cocktail pumpernickel – Dark and hearty.
-
Baguette slices – Classic and crusty.
-
English muffin halves – For a heartier bite.
-
Tortilla chips – For a crunchy twist.
-
Croissant halves – Buttery and flaky.
Make It with Add-Ins
-
Bacon – Crumbled cooked bacon stirred into the mixture.
-
Green onions – Thinly sliced for freshness.
-
Jalapeños – Minced for heat.
-
Pimentos – For a Southern pimento cheese vibe.
-
Garlic powder – A pinch for savory depth.
-
Onion powder – A pinch for warmth.
-
Worcestershire sauce – A teaspoon for umami.
-
Hot sauce – A few dashes for kick.
Make It with Different Cooking Methods
-
Broiler: Broil for 2-3 minutes, watching closely.
-
Air Fryer: Cook at 350°F for 5-7 minutes.
-
Toaster Oven: Bake at 350°F for 10-12 minutes.
Pro Tips for the Best Toasted Cheese Bites
-
Use sharp cheddar. It gives the best flavor and melts beautifully.
-
Use good mayonnaise. Duke’s or Hellmann’s are the gold standard.
-
Shred your own cheese. Freshly shredded melts better than pre-shredded.
-
Spread generously. A thick layer of cheese mixture is key.
-
Leave a small border. Prevents the cheese from overflowing.
-
Watch them closely. The cheese can go from golden to burnt quickly.
-
Serve warm. These are best fresh from the oven.
-
Make extra. They disappear fast!
-
Store properly. Keep in an airtight container to maintain crispiness.
-
Reheat gently. A few minutes in a low oven restores crispiness.
Frequently Asked Questions
Can I use a different type of cheese?
Yes. Pepper Jack, Monterey Jack, Swiss, Gruyère, or Parmesan all work beautifully.
Can I use a different type of bread?
Yes. Cocktail pumpernickel, baguette slices, English muffin halves, or croissant halves all work.
Can I use pre-shredded cheese?
Yes, but freshly grated melts better and has a better texture.
Can I make these ahead of time?
Yes. Assemble the bites on a baking sheet, cover, and refrigerate for up to 24 hours. Bake as directed, adding a few minutes if needed.
How long do leftovers last?
Store in an airtight container in the refrigerator for up to 3 days. Reheat in the oven or air fryer to restore crispiness.
Can I freeze these?
Freezing is not recommended, as the bread can become soggy upon thawing.
Why is my cheese mixture too thick?
You may need to add a little more mayonnaise. The mixture should be spreadable but not runny.
Why did my cheese burn?
The oven may be too hot, or you baked them too long. Keep the temperature at 350°F and check at the 10-minute mark.
Can I add meat?
Absolutely! Crumbled bacon, diced ham, or chopped turkey all work beautifully.
Can I make these vegetarian?
Yes. Omit any meat and use vegetarian cheese.
Can I double the recipe?
Yes. Use two baking sheets and rotate them halfway through baking.
Is this recipe gluten-free?
Use gluten-free bread for a gluten-free version.
Storage & Reheating
Refrigerator
-
Store cooled bites in an airtight container for up to 3 days.
-
Reheat in the oven at 350°F for 5-7 minutes to restore crispiness.
Freezer
-
Freezing is not recommended due to texture changes in the bread.
Reheating Tips
-
Oven: Best method. 350°F for 5-7 minutes.
-
Air Fryer: 350°F for 3-5 minutes.
-
Microwave: Works in a pinch but will soften the bread.
Make-Ahead Tips
-
Prep Ahead: Mix the cheese and mayonnaise up to 3 days in advance and store in the fridge.
-
Assemble Ahead: Spread the mixture on the bread, cover, and refrigerate for up to 24 hours. Bake as directed.
-
Bake Ahead: Bake completely, cool, and store in an airtight container. Reheat gently before serving.
The Beauty of Simple, Cheesy Southern Snacks
There’s something deeply satisfying about a recipe that delivers big flavor with minimal effort. These Southern Toasted Cheese Bites are the kind of treat that makes people happy—the kind that brings everyone to the table with a smile.
They’re not fancy. They’re not complicated. But they are reliable, crowd-pleasing, and absolutely delicious. And isn’t that what great Southern cooking is all about?
So keep sharp cheddar, mayonnaise, and cocktail rye bread in your kitchen. And when you need a simple, impressive snack that delivers big flavor with minimal fuss, you’ll know exactly what to make.
Final Verdict
Rating: 5 out of 5
Difficulty: Easy
Prep Time: 5 minutes
Cook Time: 10-12 minutes
Total Time: Approximately 15-20 minutes
Yield: 24 bites (8 servings)
Cleanup: Minimal (one bowl + one baking sheet)
Leftover potential: Good — reheat in oven or air fryer
Best for: Parties, potlucks, holiday gatherings, game days, and anytime you need a crowd-pleasing appetizer